EN 11
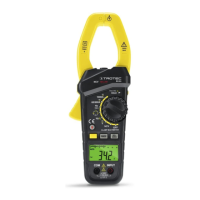
clamp meter BE44
Diode test
Warning of electrical voltage
Risk of electric shock and risk of injury when
testing diodes!
Make sure that the electric circuit to be tested is
switched off and de-energized.
• When holding onto the measuring cables, make sure not to
reach behind the protection against contact(12).
Please proceed as follows to test the forward voltage of a diode:
ü The electrical circuit is deactivated.
ü All capacitors are completely discharged.
1. Connect the black measuring cable(14) to the
COMconnection(7) and the red measuring cable(13) to
the Input connection(6).
2. Turn the rotary switch(3) to the diode test position(38).
3. Repeatedly press the function button(34) until the icon for
diode testing is displayed via the diode testing
indication(18).
4. Connect the test probe(11) of the red measuring
cable(13) to the diode's anode.
5. Connect the test probe(11) of the black measuring
cable(14) to the diode's cathode.
ð The diode's approximate forward voltage will be
displayed in the measurement value display(24).
ð If OL is indicated on the display, the test probes are not
positioned correctly.
Using the compare mode
The compare mode can be used for other measuring functions.
When compare mode is activated, the device saves the
currently measured result as reference value for subsequent
measurements.
Proceed as follows to activate compare mode:
1. Carry out a measurement.
2. Press the compare button(32).
ð The compare mode icon will be indicated in the
respective section of the display(17).
ð The current measurement result will be saved as
reference value.
3. Carry out another measurement.
ð The difference between the current measurement and
the reference value is now indicated on the
measurement value display(24).
4. Press the compare button(32) to exit compare mode.
Freezing the displayed measured value
The hold function allows you to freeze the currently measured
result in the measurement value display(24). To do so, please
proceed as follows:
1. Carry out a measurement.
2. Press the hold button(2).
ð An acoustic signal is emitted.
ð The current measured value is frozen in the
measurement value display(24).
ð The hold icon is displayed in the hold function
indication(29).
3. Press the hold button again to deactivate the hold function.
Switch-off
The device switches off automatically after 15minutes of
non-use.
1. Turn the rotary switch(3) to the switch position OFF(31).
ð The device switches off.
Maintenance and repair
Battery change
A battery change is required when a battery indication(25)
lights up on the display(5) or the device can no longer be
switched on. See chapter Operation.
Info
In case of a low battery the displayed values may be
inaccurate or incorrect! If so, stop using the measuring
device and exchange the batteries immediately.
Cleaning
Clean the device with a soft, damp and lint-free cloth. Make
sure that no moisture enters the housing. Do not use any
sprays, solvents, alcohol-based cleaning agents or abrasive
cleaners, but only clean water to moisten the cloth.
Repair
Do not modify the device or install any spare parts. For repairs
or device testing, contact the manufacturer.