EN 9
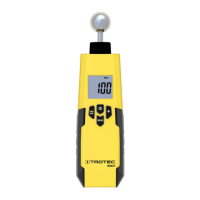
pyrometer BP21
Further setting options
You can use the MODEbutton(5) to set advanced functions on
the device. Each time you press the MODEbutton, the device
switches to the next function. The functions are arranged as
follows:
Position Function
1 Setting the emissivity
2 Setting the temperature unit
3 Activating/deactivating maximum/minimum value
4 Activating/deactivating continuous measurements
5 Activating/deactivating the upper alarm threshold
6 Setting upper alarm value
7 Activating/deactivating the lower alarm threshold
8 Setting lower alarm value
Examples:
• If you have just set the temperature unit and now would
like to change the upper alarm value, press
theMODEbutton(5) four times.
• If you have just activated the lower alarm value and now
would like to set the emissivity, press the MODEbutton(5)
twice.
Setting the emissivity
1. Press the MODEbutton(5) repeatedly until you reach the
desired function.
ð
The Emissivity indication(13) appears on the display.
2. Set the emissivity by increasing or decreasing the value
using the Laser/Up(6) and Light/Down(7)buttons.
ð The value range is between1.00 and0.10.
3. Press the Measurementbutton(3) to confirm the selected
settings and return to the measuring mode.
Setting the temperature unit
1. Press the MODEbutton(5) repeatedly until you reach the
desired function.
2. Set the temperature unit using the Laser/Up(6) and
Light/Down(7) buttons.
ð The measured value can be displayed in °C or °F.
ð The selected unit appears on the display in the
Temperature unit indication(10).
3. Press the Measurementbutton(3) to confirm the selected
settings and return to the measuring mode.
Activating/deactivating maximum/minimum value
1. Press the MODEbutton(5) repeatedly until you reach the
desired function.
2. Use the Laser/Up(6) and Light/Down(7) buttons to select
whether the MAX or MIN temperature value is to be
displayed.
ð If the MAX temperature value is selected, MAX(15)
appears on the display and the highest temperature
value measured is indicated in the MAX/MIN
temperature indication(14).
ð If the MIN temperature value is selected, MIN(12)
appears on the display and the lowest temperature
value measured is indicated in the MAX/MIN
temperature indication(14).
3. Press the Measurementbutton(3) to confirm the selected
settings and return to the measuring mode.
Activating continuous measurement
Notice
Once the continuous measurement function is
activated, the measurement will continue until the
function is terminated again. The settings for the
display illumination and laser cannot be changed
during this period. Therefore, select the corresponding
settings before activating continuous measurement.
1. Press the MODEbutton(5) repeatedly until you reach the
desired function.
ð The continuous measurement indication appears on the
display(20). It is deactivated by default (OFF).
2. Use the Laser/Up(6) and Light/Down(7) buttons to select
the ON mode and press the Measurementbutton(3) to
start the continuous measurement.
ð The current measured value is indicated on the
measurement value display(16).
ð During continuous measurement, you can adjust the
emissivity to changing grounds. Set the emissivity by
increasing or decreasing the value using the
Laser/Up(6) and Light/Down(7)buttons.
3. Briefly press the Measurementbutton(3) to terminate the
continuous measurement.