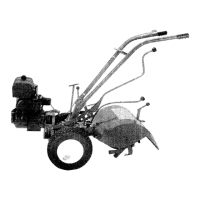
I
32
HANDLEBARS-4
in
Photo
2/1,
the
handle-
bars on
your
Troy-Bilt
Horse Model
Tiller
are
used
to
guide
your
machine
through
the gar-
den, to
turn
the
tiller
at the end
of
each row,
and also
to
lift
the tines
out
of
the
ground
when
you
want
to
stop
chopping
or
tilling.
Also,
when
you
adjust
the depth regulator, you
may
need
to
lift
up
gently
on the handlebars.
You
will
find
that the handlebar
height
adjust-
ment is
quite
flexible and easy to obtain
with
the single lever
control
knob. (See 5 in Photo
2/1). See Section
1,
page 22, on
how
to
adjust
handlebars
for
a
perfect
height, ideally suited
to
your
requirements.
Normally, the handlebars should be
approxi-
mately
waist-high
when the
tiller
is
digging
deeply.
The
adjustment,
of
course, will vary
with
individuals. Also, you may
find
that
you
will
want
to
set the handlebars at a
lower
level
whenever you are using
the
Dozer/,Snow Blade.
It's easier to
control
the
weight
and
lift
the
snow blade
off
the
ground
with
the
handlebars
in the
lower
position.
"T"
BAR ADJUSTMENT
-6
in
Photo
2/1, allows
the
operator
to move the entire
handlebar
base
over
to
the left
or
right
side
of
the tiller,
for
operation from
either
side. For various rea-
sons, this
may
be
more
convenient
for
some
in-
dividuals
who
wish to walk alongside
their
til-
lerwjthout
scratching
their
hands
or
arms when
shallow cultivating
right
up close to raspber-
ries,
fruit
trees, roses
or
other
thorny
bushes-
see Photo2/1
O.
(Photo ,2/1
0)
To
save
your
hands from
being
scratched
by
thorny
bushes while
tilling
close
to them,
just
move the handlebars to one side.
It certainly is
not
necessary
to
move
the
han-
dlebars
to
operate
your
Troy-Bilt
Tiller
in the
garden
without
leaving
footprints
because,
with rare exceptions, all
you
need is one hand
on a single handlebar to operate
your
tiller, so
you can walk on
either
side
of
the
tiller
as
you
move along.
When you use the handlebars
to
tilt
the
tiller
over on its
"nose"
for
inspection
or
mainte-
nance, watch to make sure
that
you
let
it
down
gently.
Don't
let the
front
of
the
tiller
down
suddenly on a hard surface. You
could
dent
in
the engine cover so
much
that
it'
hits
the
re-
volving flywheel.
This
will cause severe damage
to
the engine.
NOTE: The
'T"
bar
clamp
for
the handlebars
also covers the gear
oil-fill
hole
of
the
tiller
transmission.
PRACTICE BEFORE YOU
START-Before
you take
your
tiller
out
in
the
garden
for
the
first time, it's a
good
idea
to
learn
which
lever
does what and learn the sequence
of
operation
step-by-step. Practice
engaging
the
levers sev-
eral times before you start.
First,
put
the Wheel Speed
Shift
Lever in
high Gear, then Free Wheeling and then,
Low
Gear. Next,
put
the Forward/Reverse Lever in
Forward, then Neutral, then Reverse
position.
Notice
how
you
have to
hold
the lever in Re-
verse, and
how
it
springs
back a very
short
dis-
tance when
you
let
go
of
the lever. (The Reverse
spring
automatically
returns
the
lever
to
Neu-
tral when
you
let
go.-See
Photo
2/11).
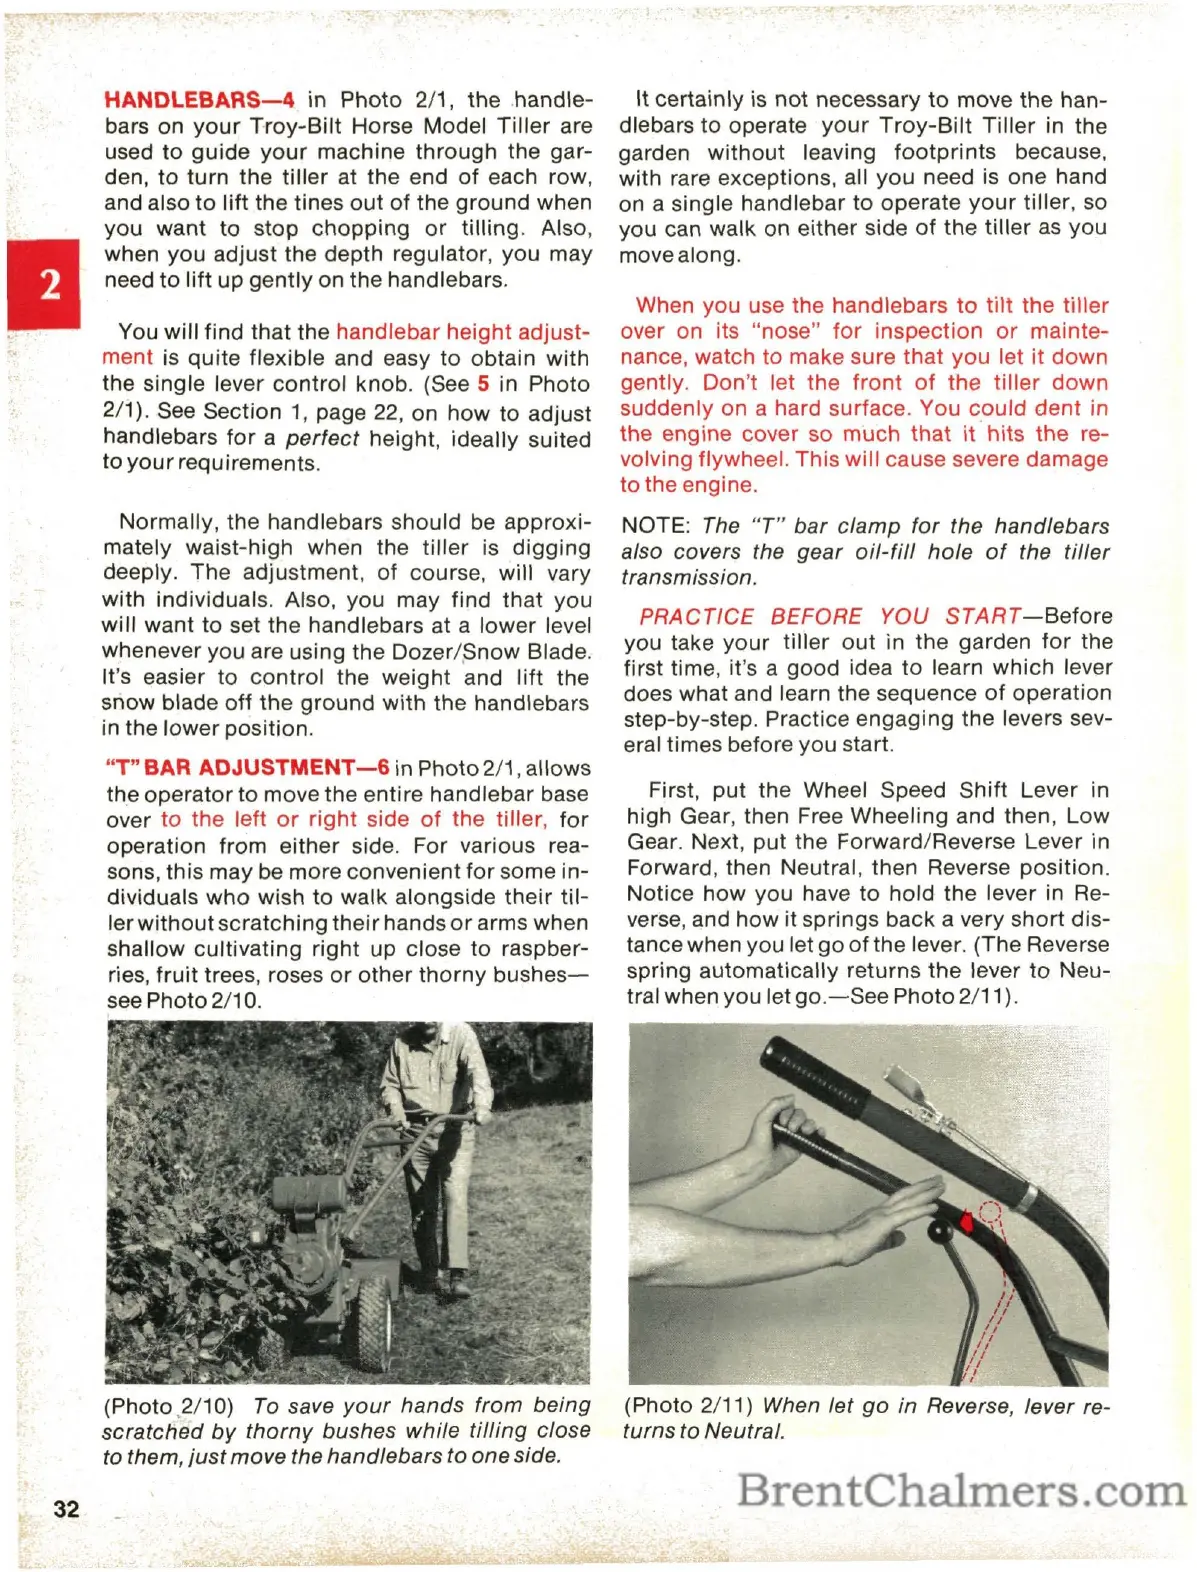
(Photo 2/11) When let
go
in Reverse, lever re-
turns to Neutral.
 Loading...