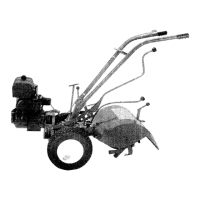
A
third
method
of
shifting
wheel speeds on
your
tiller
is
to
keep the wheels
stationary
(see
Photo 2/16) while you
apply
pressure on the
lever towards the gear you select, and
simul-
taneously
tilt
the
tiller
forward
by
lifting
up
on
the handlebars. As you rotate
the
tiller
on its
axle in
this
method, the
tiller
will
"fall"
into
the
gear you choose. It works a very
high
percent-
age
of
the time and
of
course is an extremely
useful method
to
use when
you
are stopped,
deep in garden soil. Naturally,
don't
shift
with
this
method
while the tines are revolving.
DEPTH
REGULATOR-The
depth
regulator
has
a
spring-loaded
plunger
that
will
allow
you
to
adjust the depth
of
the drag bar
to
any
of
eight
positions even
while
tilling.
You will note
when you begin,
that
the depth
adjustment
bar
should be all the way
down
in the
top
notch
and
that
the tines
do
not
reach the
ground
in
this position.
This
is most convenient
for
mov-
ing the
tiller
back and
forth
either
in the garage
or
barn,
or
to
and
from
the garden.
When you start
tilling
in
unplowed
soil (see
Photo 2/17),
you
normally
begin on the
second
notch
of
the Depth Regulator.
After
your
ground
is well tilled, you can increase the depth
of
your
tilling
by
raising the
depth
regulator
to
the third,
fourth
and
ultimately
fifth
through
eighth notches.
(Photo 2/17)
Start
shallow
in
new
ground.
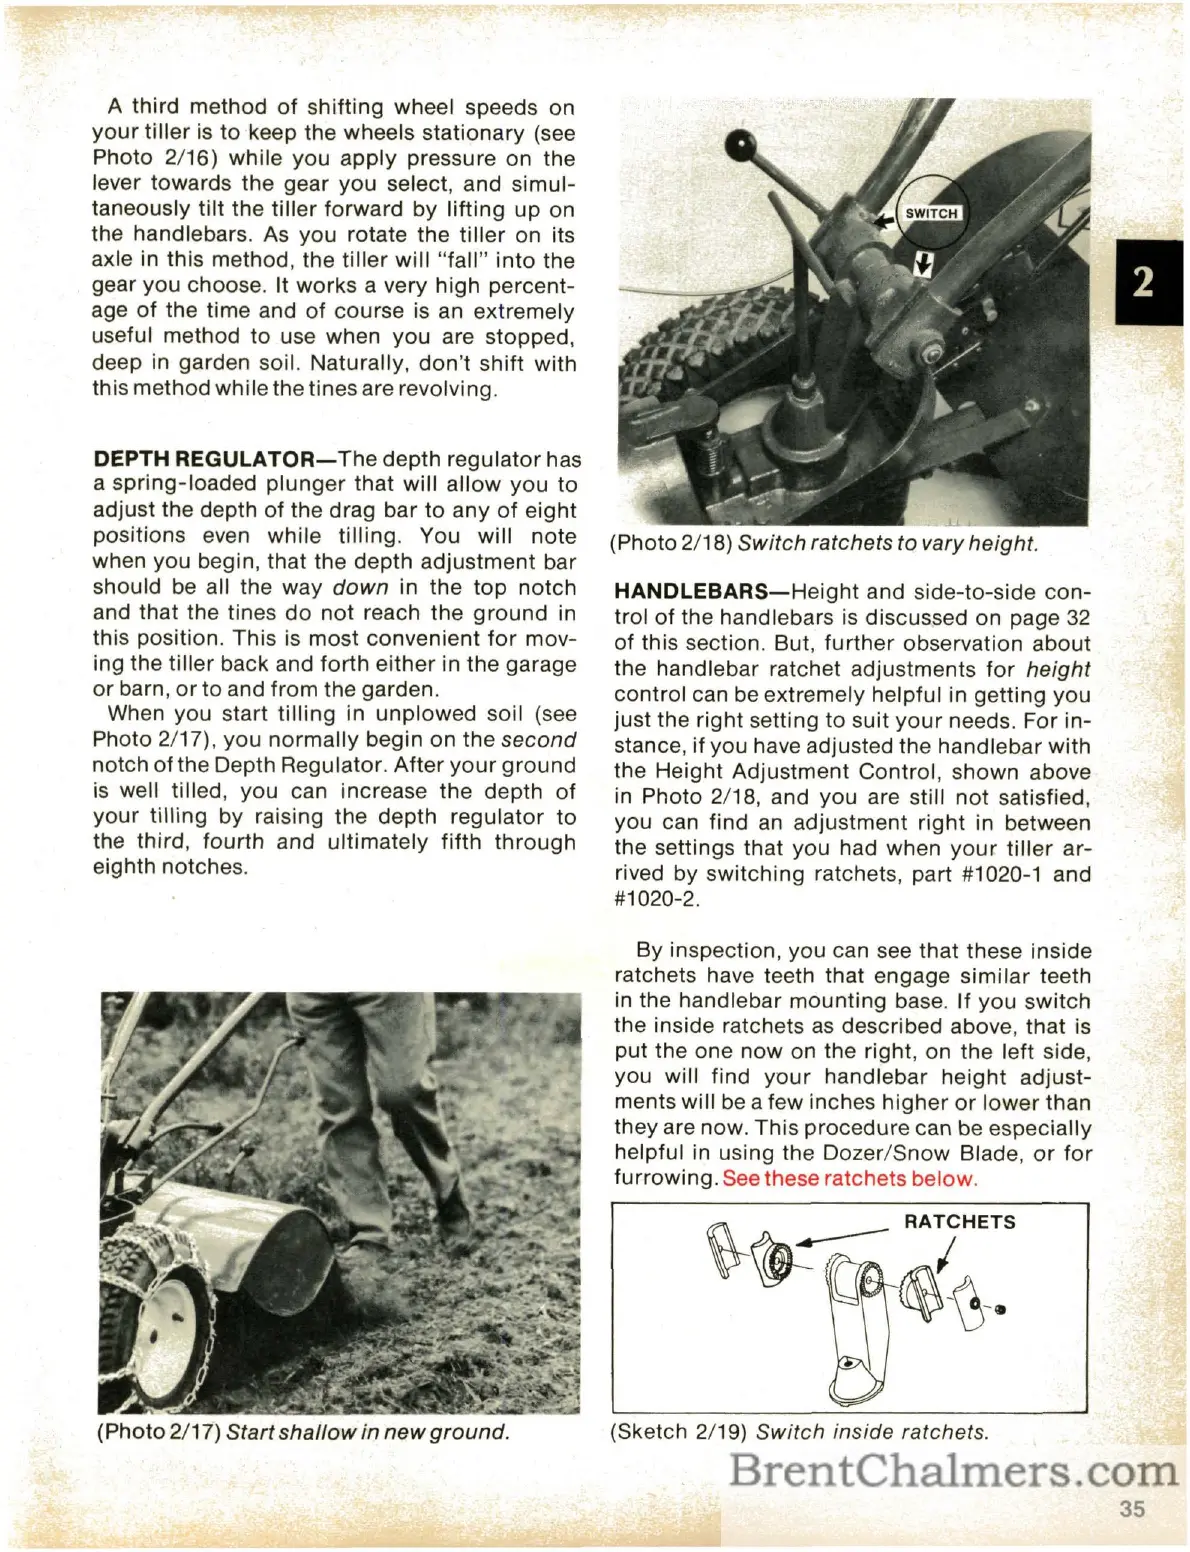
(Photo 2/18)
Switch
ratchets to vary height.
HANDLEBARS-Height
and side-to-side
con-
trol
of
the handlebars is discussed on page
32
of
this section. But,
further
observation
about
the handlebar ratchet adjustments
for
height
control
can be extremely helpful in
getting
you
just the right setting
to
suit
your
needs. For
in-
stance,
if
you have adjusted the
handlebar
with
the Height
Adjustment
Control,
shown
above
in Photo 2/18, and you are still
not
satisfied,
you can find
an
adjustment
right
in between
the settings
that
you had when
your
tiller
ar-
rived
by
switching
ratchets, part #1020-1 and
#1020-2.
By inspection, you can see
that
these inside
ratchets have teeth
that
engage
similar
teeth
in the handlebar
mounting
base.
If
you
switch
the inside ratchets
as
described above,
that
is
put
the one
now
on the right, on the left side,
you will find
your
handlebar
height
adjust-
ments will be a few inches
higher
or
lower
than
they are now.
This
procedure can be especially
helpful in using the
Dozer/Snow
Blade,
or
for
furrowing. See these ratchets below.
(Sketch 2/19)
Switch
inside ratchets.
35
 Loading...