EasyManua.ls Logo

Troy-Bilt OEM-290-253 User Manual

Troy-Bilt OEM-290-253
20 pages
To Next Page IconTo Next Page
Page #1 background imageLoading...
Page #1 background image
Wrenches (two 9/16 inch)
Screwdriver (medium-sized)
Soft Rubber Mallet
Penetrating Oil
Metal File (needed only if
tine holders are also
removed)
How To Reach Us
If you have any questions about removing or installing tines, please
refer to the “Customer Assistance” information on the back cover.
These instructions apply only
to owners of the following
tillers:
HORSE
TM
Model
ECONO HORSE
TM
Model
PONY
®
Model
First, read the general
information given for all model
tillers on Pages 1 through 4. You
will then be directed to install-
ation instructions for your
particular model tiller. Carefully
look at the adjacent figures while
following the step-by-step
instructions. Finally, see the
Bolo Tines Maintenance Section
on Page 16.
Attention!
HORSE Model Owners
Horse Model tillers have two
different style tine holders as
shown in figures to the right:
Welded steel
Note: Welded steel holders may
be secured to tine shaft either
with two bolts and nuts or with
single mounting bolt (illustrated
in these instructions).
Cast iron
Owners of HORSE Model
tillers with
cast iron tine holders
should keep the cardboard box in
which this kit was shipped to use
with the template (pattern) on the
inside back cover of these
instructions. You will use both
the template and the box when
assembling tines.
Owners of all other models can
ignore the template and discard
the box.
;;;;;
;;;;;
;;;;;
;;;;;;;;;;
;;;;;;;;;;
;;;;;;;;;;
;;;;;;;;;;
;;;;;;;;;;
;;;;;;
;;;;;;
;;;;;;
;;;;;;
;;
;;
;;;
;;;
;;;;
;;;;
;;
;;
;;
;;
;;
;;
;;
;;
;;
;;
;;
;;
;;
;;
;;
;;
;;
;;;
;;;
;;;
;;;
;;;
;;;;;;;;;
;;;;;;;;;
;;;;;;;;;
;;;;;;;;;
;;;;;;;;;
Welded Steel Tine Holder
Cast Iron Tine Holder
How To Use These
Instructions
Tools Needed
Thanks for buying new bolo tines. These tines were designed for your model tiller
and will handle all of your tilling needs including sod busting, seedbed preparation,
cultivating, and turning under crop residue.
THANK
YOU!
Bolo Tine Kit
OEM-290-253 / 290-253-081
for HORSE
TM
, ECONO HORSE
TM
,and PONY
®
Tillers
Installation Instructions
Question and Answer IconNeed help?

Do you have a question about the Troy-Bilt OEM-290-253 and is the answer not in the manual?

Troy-Bilt OEM-290-253 Specifications

General IconGeneral
BrandTroy-Bilt
ModelOEM-290-253
CategoryTiller
LanguageEnglish

Summary

Installation Instructions

How To Use These Instructions

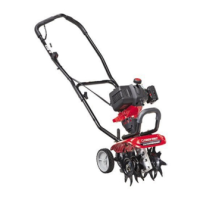
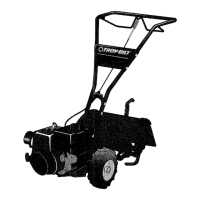
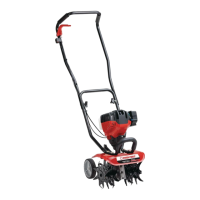
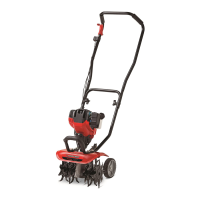
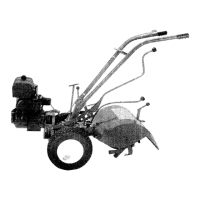
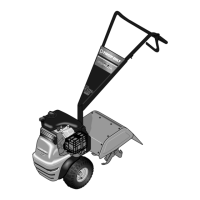
Explains how to follow the provided installation steps for specific tiller models.

How To Reach Us

Provides contact information for customer assistance with questions.

PRE-INSTALLATION STEPS

Check Your Parts

Verify all parts received against the listed components for your tiller model.

Tine Removal

Instructions on how to safely remove existing tines from the tiller.

Tine Identification

Learn how to distinguish between left-curved and right-curved tines.

Bolt Installation

Guidance on inserting bolts for tine holders, noting exceptions.

HORSE MODEL TINE INSTALLATION (WELDED STEEL HOLDERS)

Find Your Tiller Model

Directs users to the correct installation procedure based on their tiller model.

Position Holders Before Starting Tine Installation

Describes how to prepare the tine holders by positioning them correctly.

Install Tines on Left Inner Holder

Step-by-step guide for installing tines on the left inner tine holder.

Install Tines on Right Inner Holder

Step-by-step guide for installing tines on the right inner tine holder.

Check the Installation (Inner Holders)

Procedures to verify the correct installation of tines on the inner holders.

Install Tines on Left Outer Holder

Step-by-step guide for installing tines on the left outer tine holder.

Install Tines on Right Outer Holder

Step-by-step guide for installing tines on the right outer tine holder.

Check the Installation (Outer Holders)

Final verification of tine installation for HORSE models with welded steel holders.

HORSE MODEL TINE ASSEMBLY AND INSTALLATION (CAST IRON HOLDERS)

Assemble Tines Into Gangs

Instructions for assembling tines into gangs using a template.

Assemble Three "A" Gangs

Detailed steps to assemble three identical "A" type tine gangs.

Assemble One "B" Gang

Detailed steps to assemble one "B" type tine gang with a different pattern.

Install Gangs on Holders

Guide on how to attach the assembled tine gangs to the cast iron holders.

Check the Installation

Final check to ensure correct tine installation on cast iron holders.

PONY MODEL BOLO TINE INSTALLATION

Install Tines on Left Inner Holder

Step-by-step instructions for installing tines on the Pony tiller's left inner holder.

Install Tines on Right Inner Holder

Step-by-step instructions for installing tines on the Pony tiller's right inner holder.

Install Tines on Left Outer Holder

Steps to install tines on the left outer holder for the Pony tiller.

Install Tines on Right Outer Holder

Steps to install tines on the right outer holder for the Pony tiller.

Check the Installation

Final verification of the tine installation for the Pony tiller.

ECONO HORSE MODEL BOLO TINE INSTALLATION

Install Tines on Left Outer Holder

Instructions for installing tines on the left outer holder for the Econo Horse tiller.

Install Tines on Right Outer Holder

Instructions for installing tines on the right outer holder for the Econo Horse tiller.

Check the Installation

Final check of the tine installation for the Econo Horse tiller.

BOLO TINES MAINTENANCE

Check Bolts and Nuts

Procedure for checking the tightness of tine attachment bolts and nuts.

Inspect Tines for Wear

Guidance on inspecting tines for wear and determining when replacement is needed.

Horse Model Tine Rotation (Welded Steel Holders)

Specific instructions for rotating tines on Horse models with welded steel holders.

Horse Model Tine Rotation (Cast Iron Holders)

Step 1: Move the entire tine gang labelled "1"

Detailed steps for rotating tine gangs on cast iron holders (Step 1).

Step 2: Move the entire tine gang labelled "2"

Detailed steps for rotating tine gangs on cast iron holders (Step 2).

Econo Horse Model Tine Rotation

Step 1: Move the tines labelled "A"

Specific instructions for rotating tines on Econo Horse outer holders.

Related product manuals