12
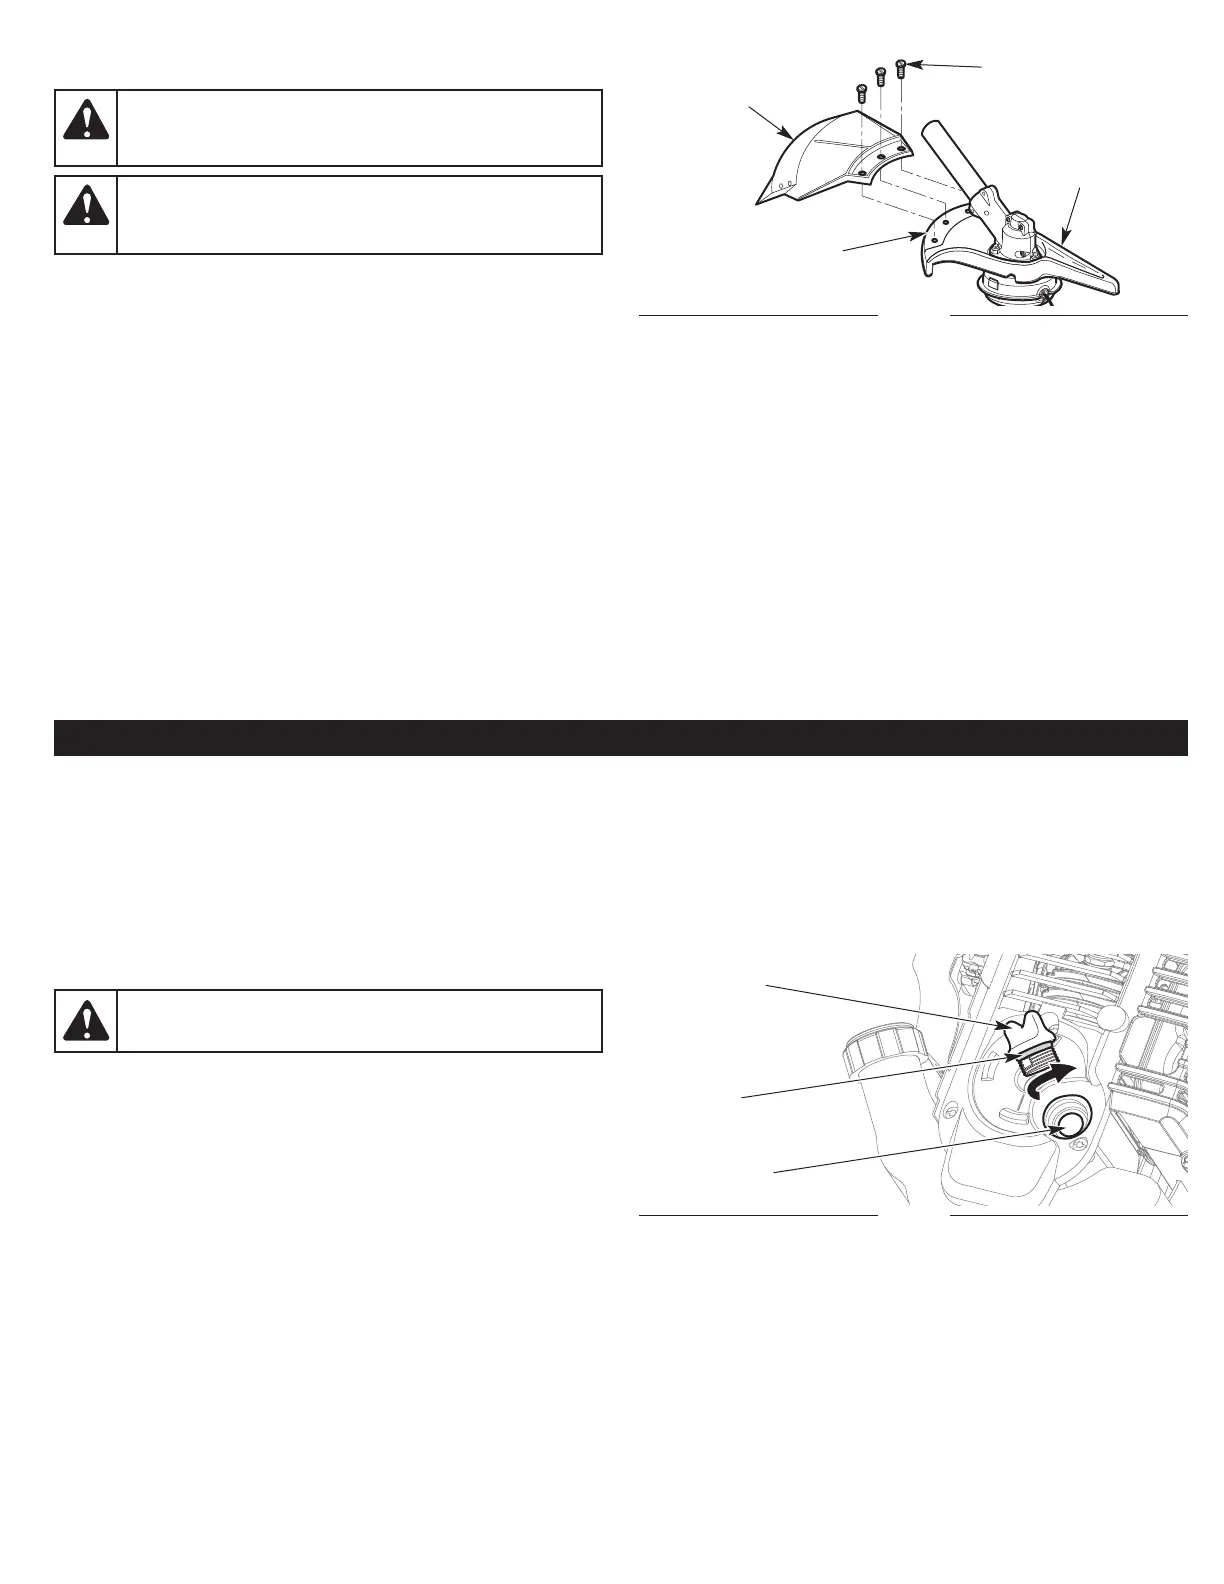
INSTALLING AND REMOVING THE CUTTING HEAD SHIELD
Installing the Cutting Head Shield
1. Place the cutting head shield over the shield mount surface on
the blade shield (Fig. 17).
2. Insert the screws (x3) through the screw holes on the cutting
head shield (Fig. 17).
3. Tighten the screws with a Phillips screwdriver.
Removing the Cutting Head Shield
1. Unscrew the screws (x3) on the cutting head shield with a
Phillips screwdriver (Fig. 17).
2. Store the parts for future use.
WARNING: DO NOT install the cutting head shield when
operating the unit as a brushcutter. Remove the cutting
head shield before removing or installing the blade.
Fig. 17
Blade Shield
Cutting Head
Shield
Screws (x3)
Shield Mount
WARNING:
To prevent serious personal injury, when
using the unit as a trimmer, never operate the unit without
the cutting head shield in place.
OIL AND FUEL
USING THE RIGHT OIL
Use a high-quality SAE 30 weight oil. DO NOT use dirty oil. Failure
to use clean oil of the correct type can cause premature engine
wear and failure.
Fig. 18
Oil Fill Plug
Oil Fill Hole
O-Ring
ADDING OIL: INITIAL USE
NOTE: This unit was shipped without oil in the crankcase. Oil must
be added before starting the unit.
NOTE: Never add oil to the fuel tank. This unit has a four-cycle
engine. DO NOT mix oil with gasoline.
1. Set the unit on a flat, level surface.
2. Unscrew the oil fill plug (Fig. 18).
3. Pour 3.04 fluid oz. (90 ml) of oil into the oil fill hole (Fig. 18).
NOTE: This unit comes with a 3.04 fluid oz. (90 ml) container of oil.
NOTE: DO NOT overfill. Refer to Checking the Oil Level.
4. Wipe up any oil that may have spilled.
5. Make sure the O-ring is in place on the oil fill plug (Fig. 18).
6. Reinstall the oil fill plug.
WARNING:
OVERFILLING THE CRANKCASE MAY
CAUSE SERIOUS PERSONAL INJURY.
 Loading...