18
TRUE
tcgr
www
.truemfg.com
FOR ADDITIONAL MAINTENANCE INSTRUCTION,
PLEASE VISIT THE MEDIA CENTER AT
WWW.TRUEMFG.COM
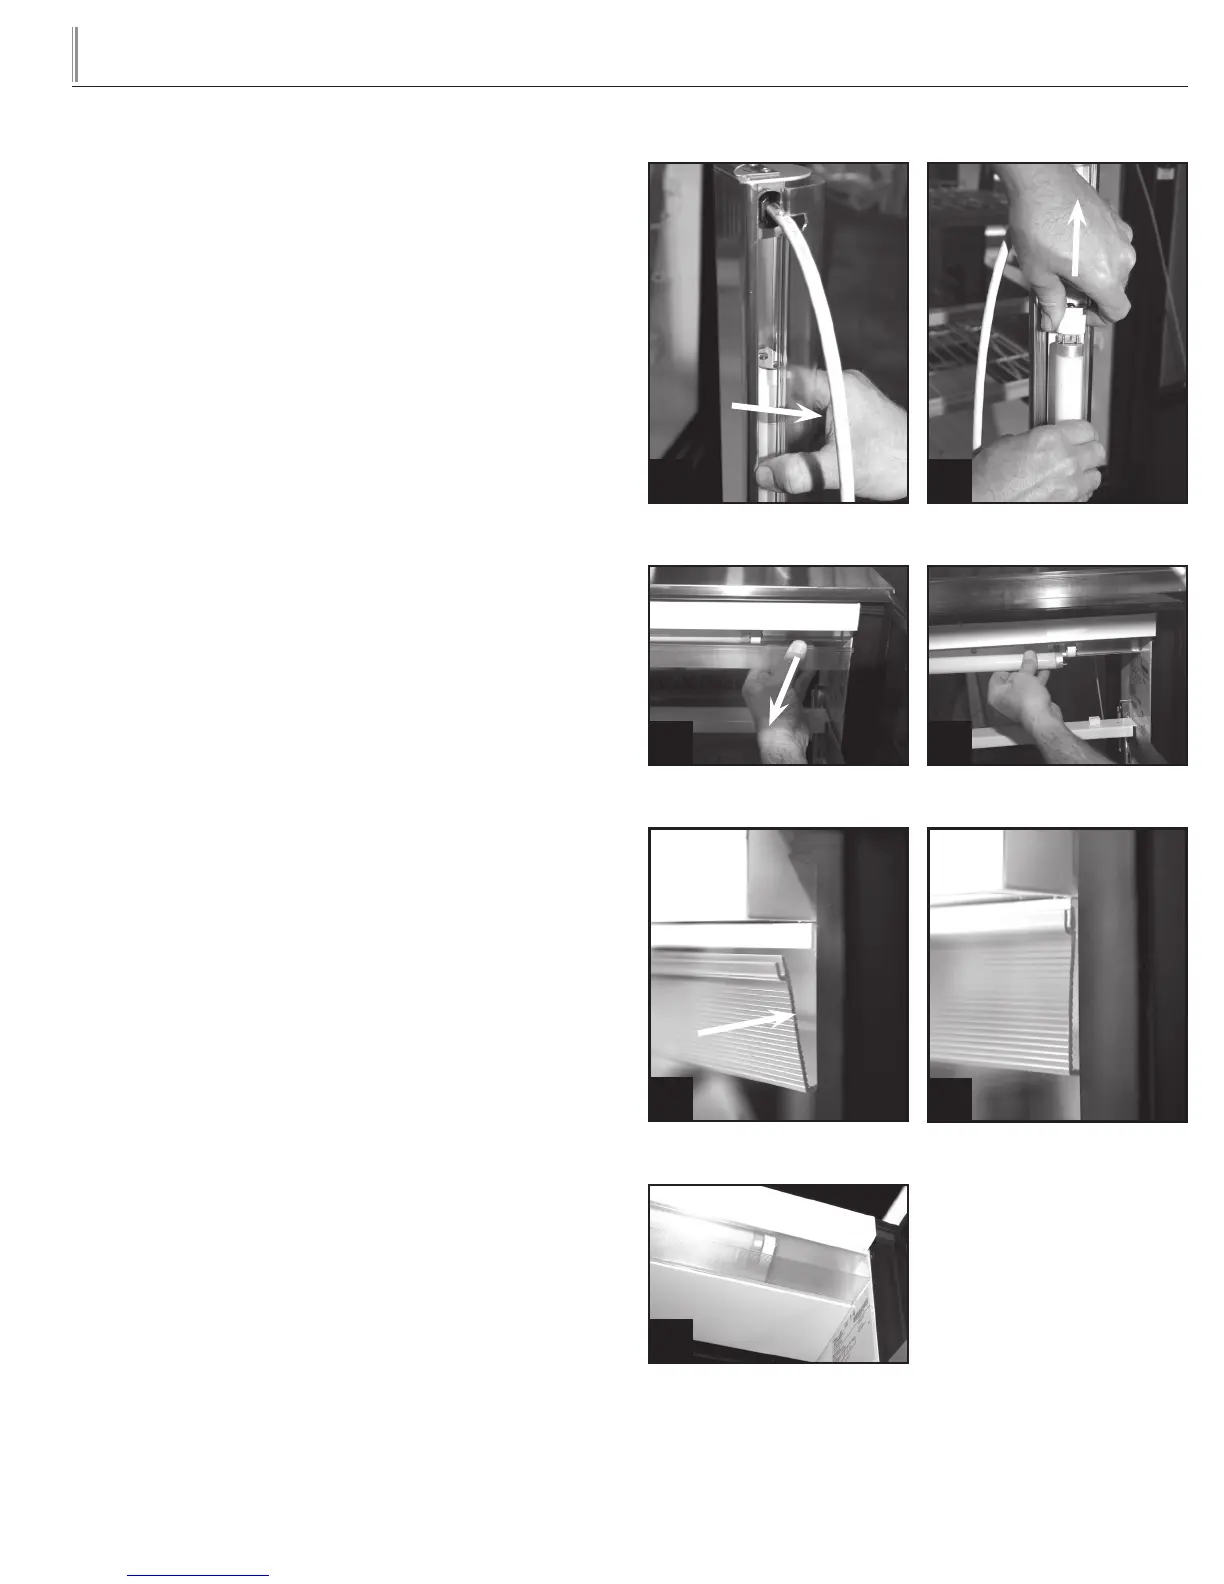
GENERAL MAINTENANCE
SHELF MOUNTED BULB REPLACEMENT:
WARNING: When replacing a light bulb make sure power to the
unit is either turned off or unplugged.
A. Unplug the light assembly from the receptacle on the interior
side wall. Remove shelf and light assembly from cabinet.
B. Remove the lampshield by gently squeezing the sides together
and rotating out (Image 1).
C. Remove bulb from the corded end of assembly by holding the
bulb and gently pulling up on spring loaded lampholder
which
will allow enough clearance to remove bulb (Image 2).
D. Install new bulb using spring loaded lampholder.
E. Reinstall light assembly and shelf. Plug cord into side wall
receptacle.
NOTE: All spring loaded lampholders are located on the left side of
the cabinet as you face the front.
NOTE: Please be aware of your local ordinances for disposal of
old florescent bulbs. These bulbs should be disposed of in a safe and
proper manner.
INTERIOR TOP BULB REPLACEMENT:
WARNING: When replacing a light bulb make sure power to the
unit is either turned off or unplugged.
A. Remove the lampshield by gently squeezing the sides together
and rotating out (Image 3).
B. Remove bulb by gently pushing bulb back into spring loaded
lampholder which will allow enough clearance to remove bulb
(Image 4).
C. I nstall new bulb using spring loaded lampholder.
D. Reinstall light lampshield by sliding rear "U" channel of
lampshield over metal bracket and gently squeezing lampshield
to fit front "U" channel over front metal bracket (Images 5-6).
E. Image 7 shows assembly properly installed.
Squeeze lampshield and rotate out.
1
Remove bulb by gently pulling up on
spring loaded lampholder.
2
Squeeze lampshield and rotate out.
3
Remove bulb by gently pushing bulb
into spring loaded lampholder.
4
Squeeze lampshield "U" channel into
position over metal bracket.
5
lampshield "U" channel in position
over metal bracket.
6
Interior top light assembly
properly installed.
7