7
TRUE
tcgr
www
.truemfg.com
STANDARD ACCESSORIES
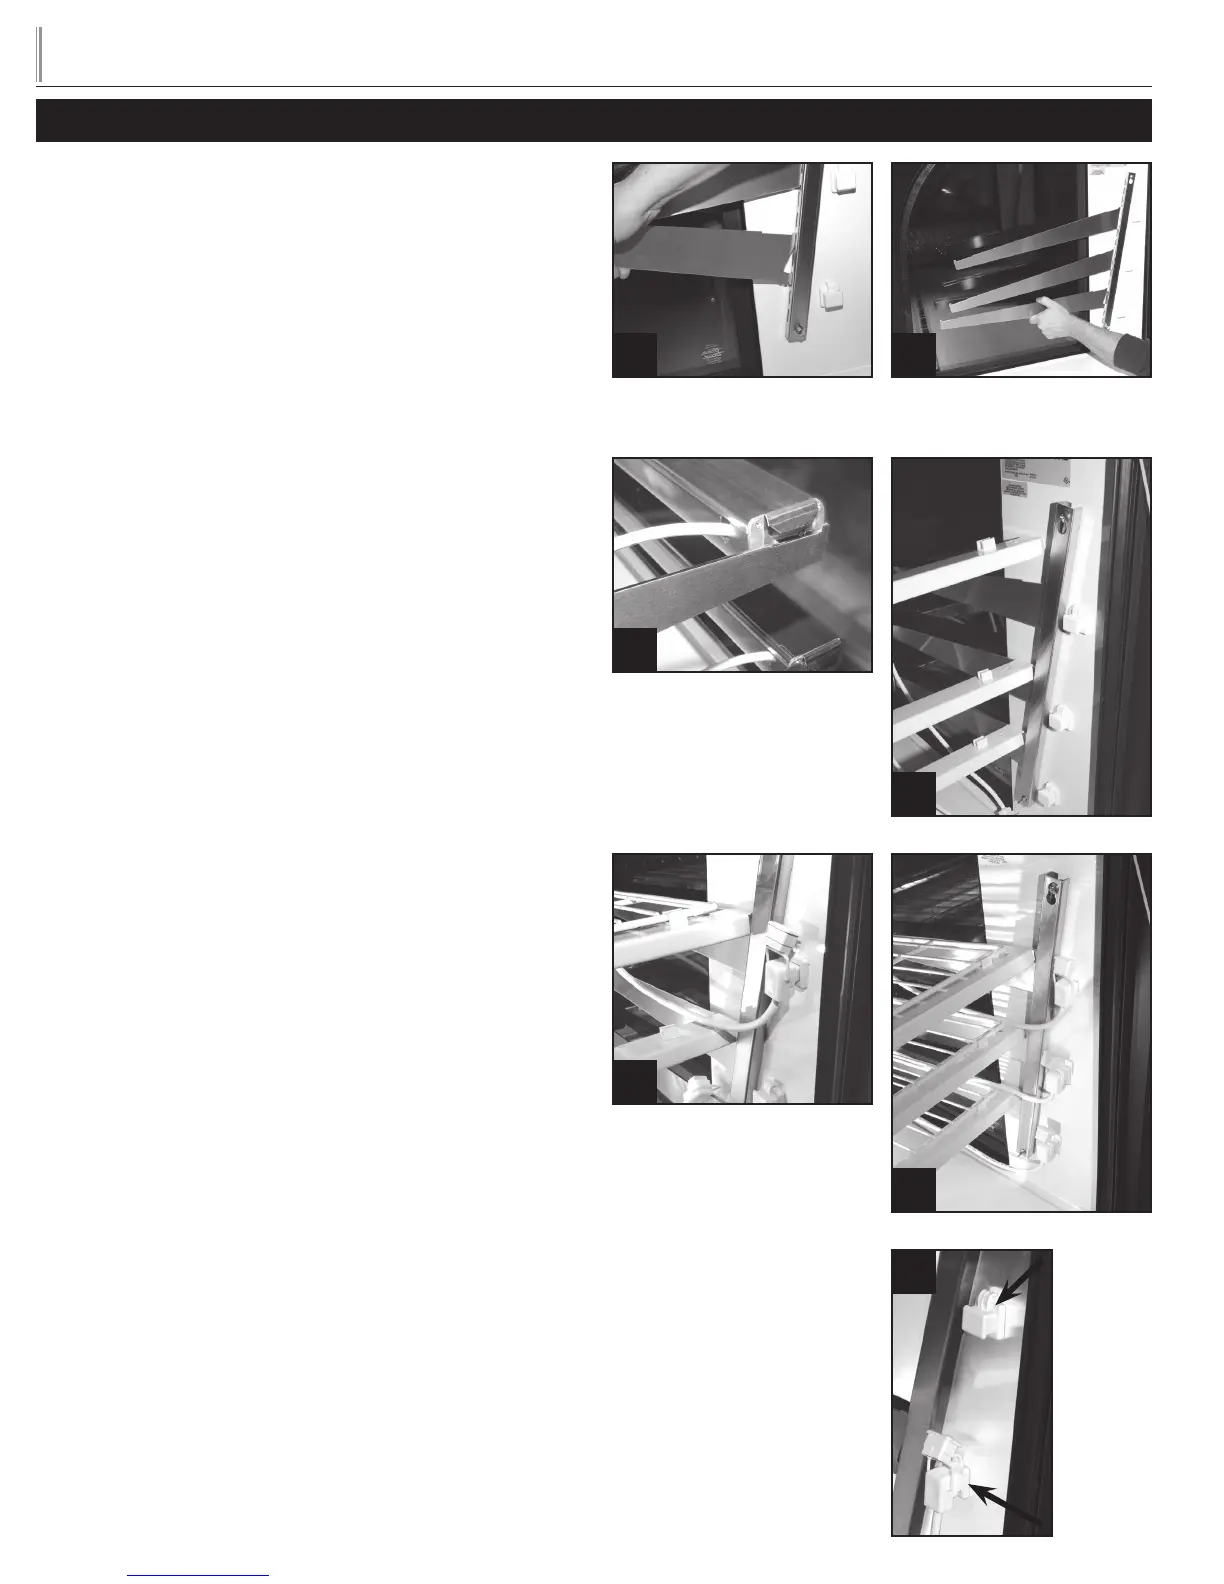
SHELF INSTALLATION (REFRIGERATED BAKERY &
DRY BAKERY):
A. Lift each door up and out of track (do not disconnect elastic
tubing). Stretch elastic surgical tubing and set doors on each
side of unit.
B. Locate brackets, lights, shelves, etc. from cabinet interior.
C. Locate shelf supports wrapped in micro foam and install teeth
end into stainless pilasters located on interior walls. Adjust to
desired height matching right and left pairs. (Images 1 & 2).
D. Locate three horizontal lights wrapped in micro foam and
install (light side down). Electrical cords should be on the right
to plug into side receptacles.
Hang end hooks of light assembly on two shelf supports (left
and right) slide assembly forward until it seats in front notch of
shelf support. (Image 3).
E. Install rear brackets by sliding end hooks over rear notch of
shelf support. (Image 4).
F. Locate shelves, install top shelf first. With the front lip (tray
stop) up and towards cabinet front, place on top of front light
assembly and snap shelf into (2) clips on top of rear bracket
(Image 5).
G. Plug top light assembly into top receptacle of cabinet interior
side wall (Image 5).
H. Repeat procedures for remaining two shelves
(Image 6).
I. Replace doors in track.
WARNING: SHELF MOUNTED LIGHTING REQUIRES
A CLOSED CIRCUIT. ALL PLUGS MUST BE
PLUGGED INTO SIDE WALL RECEPTACLES FOR
LIGHTS TO WORK. IF LESS THAN THREE SHELVES
ARE INSTALLED BE SURE ATTACHED CAPS ARE
PLUGGED INTO RECEPTACLE(S) (IMAGE 7).
Shelf plug.
Receptacle
cap.
7
Completed assembly.
6
Snap shelf into position.
5
Install rear brackets.
4
Hang end hooks of light assembly
on front notch of shelf supports.
3
Install shelf supports. teeth end into
stainless pilasters.
1
Adjust to desired height matching
right and left pairs.
2
SETUP