4
3. BASIC SETTINGS AND FUNCTIONS
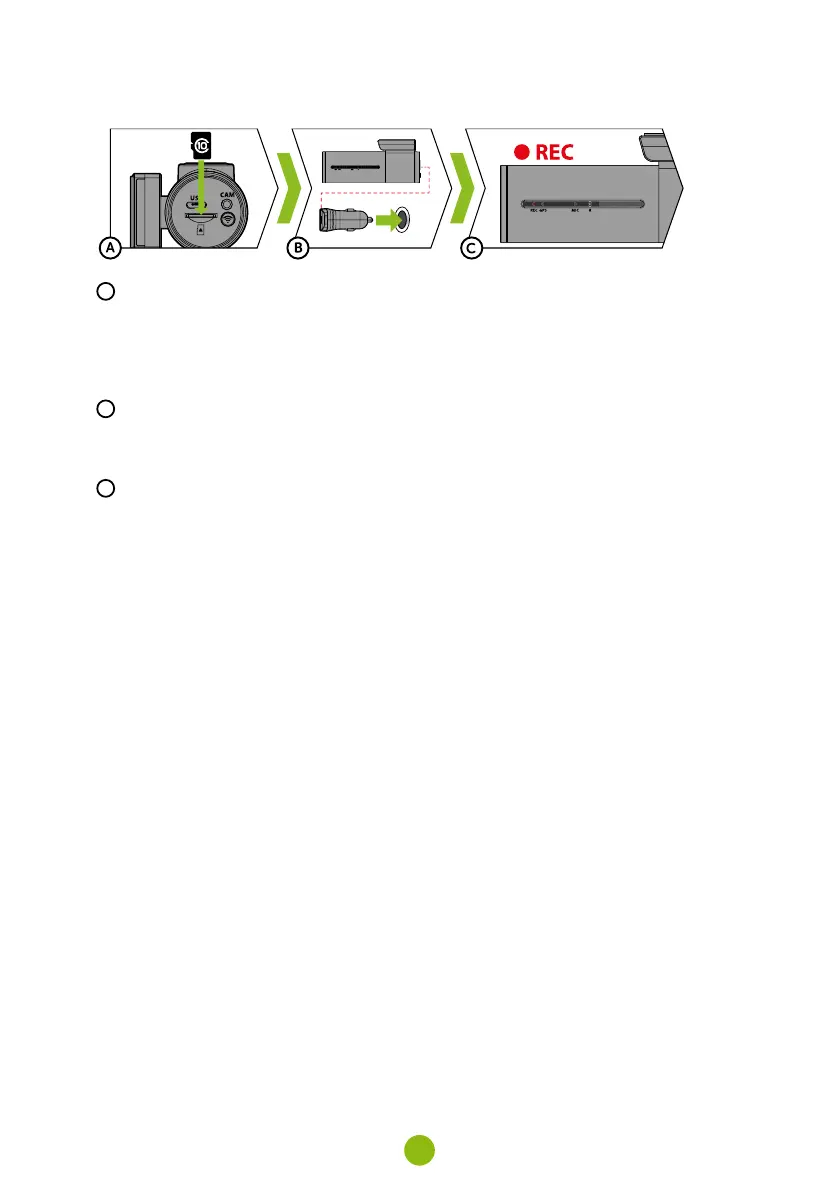
A
Insert the microSD card as shown into the camera
›
Use Class 10 and higher branded cards up to 128 GB.
›
Only remove the card, when the camera is turned off.
›
Format the card when using it for the first time directly in the camera by holding down the WiFi
button (10s) or using the mobile app. Repeat the formatting at least once a month to ensure the
camera works properly.
B
Insert the adapter into the car cigarette lighter and connect it to the camera using the USB cable
›
The camera is designed to operate only when connected to a power supply.
›
Instead of a battery, the camera contains a supercapacitor that provides power which has several
times the lifespan of a conventional battery.
C
Camera turns on automatically and begins recording.
›
For some vehicles, the ignition key must be turned first.
4. BASIC FUNCTIONS
LOOP RECORDING
›
Camera automatically splits the video into shorter files and overwrites the oldest unprotected files
when the SD card is full.
›
This means you don't have to worry about free space on the card.
FILE PROTECTION
›
To protect the file from being overwritten, press Wi-Fi while recording.
G-SENSOR
›
If the G-Sensor detects an impact, it automatically protects the video currently being captured
against being overwritten.
›
Attention, when the settings are set to high sensitivity and you are driving over uneven surfaces this
can cause files to be automatically protected and the filling up of the MicroSD card.
TIMELAPSE
›
Allows you to create video using 0.2s, 0.5s, and 1s frames.
›
With a permanent power supply, it enables long-term monitoring of events around a parked car.