5
6. basic Features
looP recordinG
›
Camera automatically splits the video into shorter files and overwrites the oldest unprotected files
when the SD card is full
›
This means you don‘t have to worry about free space on the card
File Protection
›
To protect the file from being overwritten, press MENU / MODE while recording or select Protect
from the playback mode menu
G-sensor
›
If the G-Sensor detects an impact, it automatically protects the video currently being captured
against being overwritten
›
Attention, when the settings are set to high sensitivity and you are driving over uneven surfaces this
can cause files to be automatically protected and the filling up of the SD card
motion detection
›
The camera automatically starts recording when it detects movement in the lens field of view and
stops recording after about 10 seconds.
›
If you stop recording manually or turn off the camera, motion detection is disabled
›
The function is for monitoring a parked vehicle, do not use whilst driving
›
To use the motion detection function, the camera must be turned on and connected to the power
supply
ParkinG mode
›
The camera will start recording automatically when it detects a jolt to the vehicle and if it does not
happen again, after about 30 seconds it stops recording and turns off
›
To use the parking mode function, the camera should be turned off and connected to the power
supply
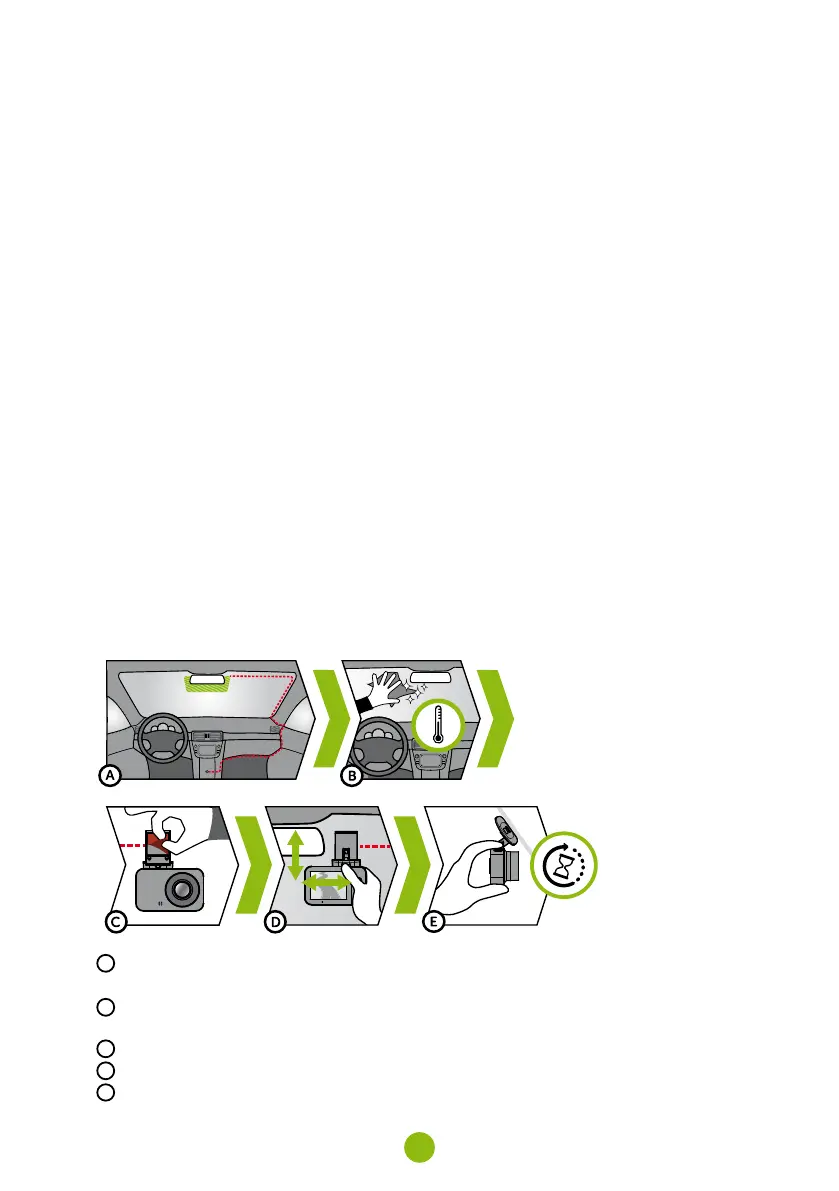
7. Placement on Glass
A
The ideal place to mount your camera is the space between the windscreen and the rear-view mirror
so as not to obstruct the driver‘s view
B
Make sure that the glass is clean and dry at the attachment point
›
The ideal bonding temperature is 20°C - 40°C
C
Remove the film from 3M adhesive pad on the camera holder
D
Before attaching it to the glass, point the camera to capture best view
E
Press the 3M adhesive pad onto the glass and hold it for a while
 Loading...