Do you have a question about the Tsurumi Pump 3PN and is the answer not in the manual?
Test motor insulation resistance with a megger. Record readings after 20 seconds to identify potential shorts.
Drain and inspect oil from the pump casing for water or debris to detect mechanical seal leaks.
Remove pump casing to inspect for wear, damage, or debris on the casing, impeller, and discharge flange.
Use a #2 Phillips bit on an impact driver to remove the screw that secures the impeller.
Inspect oil casing, O-ring, oil lifter, and mechanical seal for wear, damage, or debris. Clean as required.
Compare Tsurumi dual inside seals with competitor tandem seals, detailing differences in durability and performance.
Lift the press-fit oil lifter from the oil casing to allow access for removing the stationary mechanical seal.
Carefully pry the lower stationary seal from the oil casing using a flat blade screwdriver to avoid damage.
Use two flat blade screwdrivers to pry and remove the lower rotary mechanical seal and spring from the shaft.
Remove the upper rotary seal and spring from the shaft, prying from the top side only.
Remove motor head cover to inspect the capacitor for bulging or electrolyte leaks, indicating overheating.
Test capacitor capacitance with a multimeter. Replace if readings deviate more than 5% from the specified value.
Remove the four screws holding the motor bracket. Tap the shaft end with a rubber hammer to aid removal.
Inspect rotor, stator, and bearings for signs of burning, moisture, or damage. Dry stator if wet.
Replace bearings if they wobble or spin roughly. Heat new bearings to 230°F before pressing onto the shaft.
Details Tsurumi's Miniature Thermal Protector (MTP) and Current Thermal Protector (CTP) features for motor protection.
Arrange mechanical seal components (stationary, rotary, spring) on the shaft in the correct order for installation.
Coat seal components with oil and press stationary seals into motor frame and oil casing, ensuring proper seating.
Assemble motor by setting bearing housing and placing motor housing atop, aligning marks from disassembly.
Re-install capacitor and connect leads. Replace head cover gasket and secure with bolts, ensuring correct wire routing.
Coat shaft with oil and press upper/lower rotary seals and spring onto shaft, ensuring correct orientation.
Run rotary seals on shaft, replace O-ring, and fasten oil casing to motor frame. Verify smooth shaft rotation.
Secure the impeller with its screw and washer, ensuring impeller vanes face away from the motor.
Test oil casing with vacuum to confirm mechanical seal seating and leak-free operation.
Fill the oil casing with the specified amount of VG32 turbine oil or 20W non-detergent motor oil.
Mount motor assembly onto pump casing and secure with 4 hex bolts, aligning tab over air purge valve.
Connect cable assembly leads to motor housing. Fasten gland to head cover, ensuring proper location.
Test pump operation by connecting to 120V power, checking for air movement and steady humming.
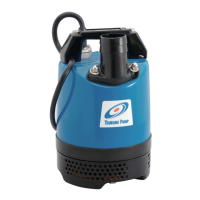
| Brand | Tsurumi Pump |
|---|---|
| Model | 3PN |
| Category | Water Pump |
| Language | English |