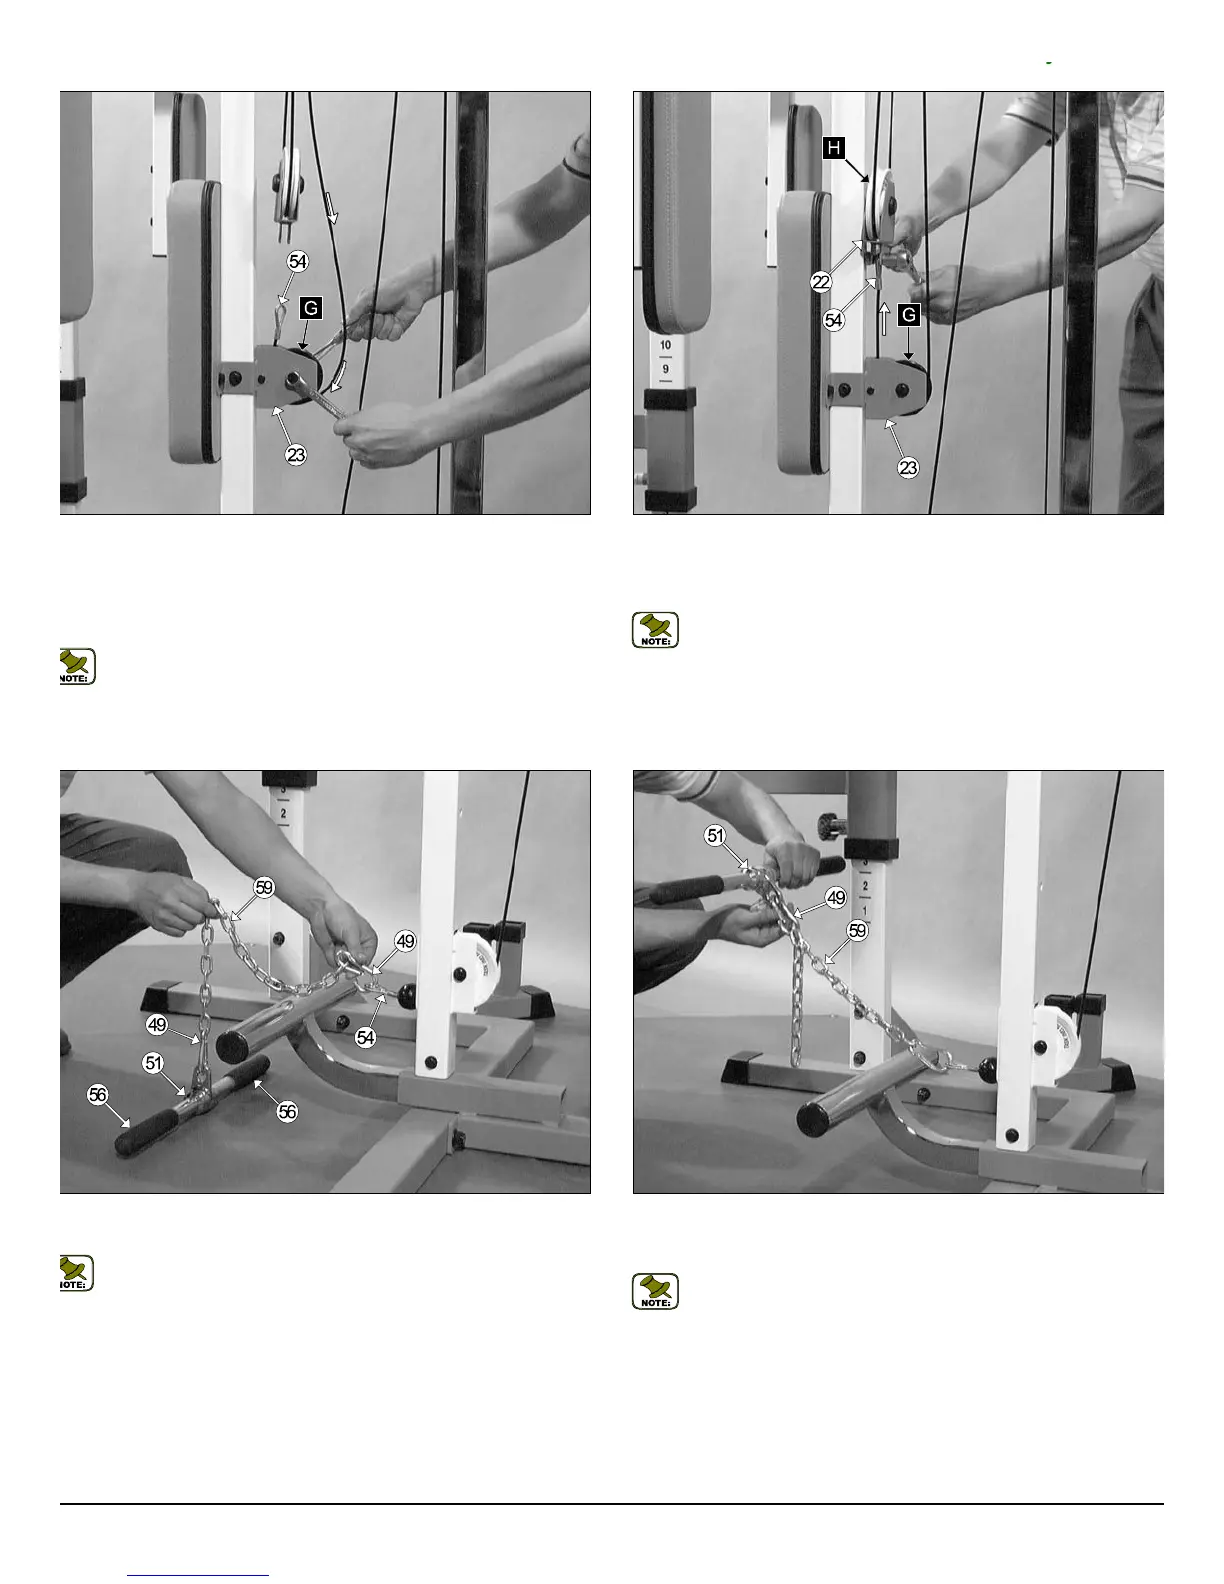
Fig. 38 Affix the Low Row Cable (#54) to the Pec Dec Floating Pulle
Bracket (#22) using one Hex Head Cap Screw 3/8-16 X 1 (#47), and on
Nylon Insert Jam Lock Nut 3/8-16 (#46). Refer to Fig. C on page 18 f
further illustration of this assembly.
Note: Refer to the Cable Mapping Diagram on page 18 for furth
detailed illustration of the Low Row Cable (#54) routing.
ig. 37 Next, insert the Low Row Cable (#54) and the Nylon Pulley 3 1/2”
d. (#24-Labeled G) into the Back Pad Pulley Bracket (#23) and secure
em into place using one Hex Head Cap Screw 3/8-16 X 1 3/4 (#30), two
lat Washers SAE 3/8” (#45), and one Nylon Insert Jam Lock Nut 3/8-16
46). Be sure the Low Row Cable (#54) is routed properly into the pulley’s
roove.
Note: Refer to the Cable Mapping Diagram on page 18 for further
detailed illustration of the Low Row Cable (#54) routing.
g. 39 Insert two Hard Grips 1 X 6 (#56) onto each of the tube-ends of
e Low Row Bar (#51).
Note: Use Windex or household glass cleaner for easy insertion of
the Hard Grips 1 X 6 (#56).
ext, connect the Low Row Bar (#51) to the Low Row Cable (#54) using
e Coil Chain 3/16” X 21 (#59), and two Snap Links (#49), as shown above.
Fig. 40 Multiple starting exercise positions can be achieved by connecti
the Low Row Bar to the Coil Chain Links with out loosing traveling range
the Weight Carriage.
Note: Optional Cable Attachments can be utilized within the sa
manner, for example: D Handle, Ankle Strap, etc.
TDH 345 Half Cage Ensemble
12
y