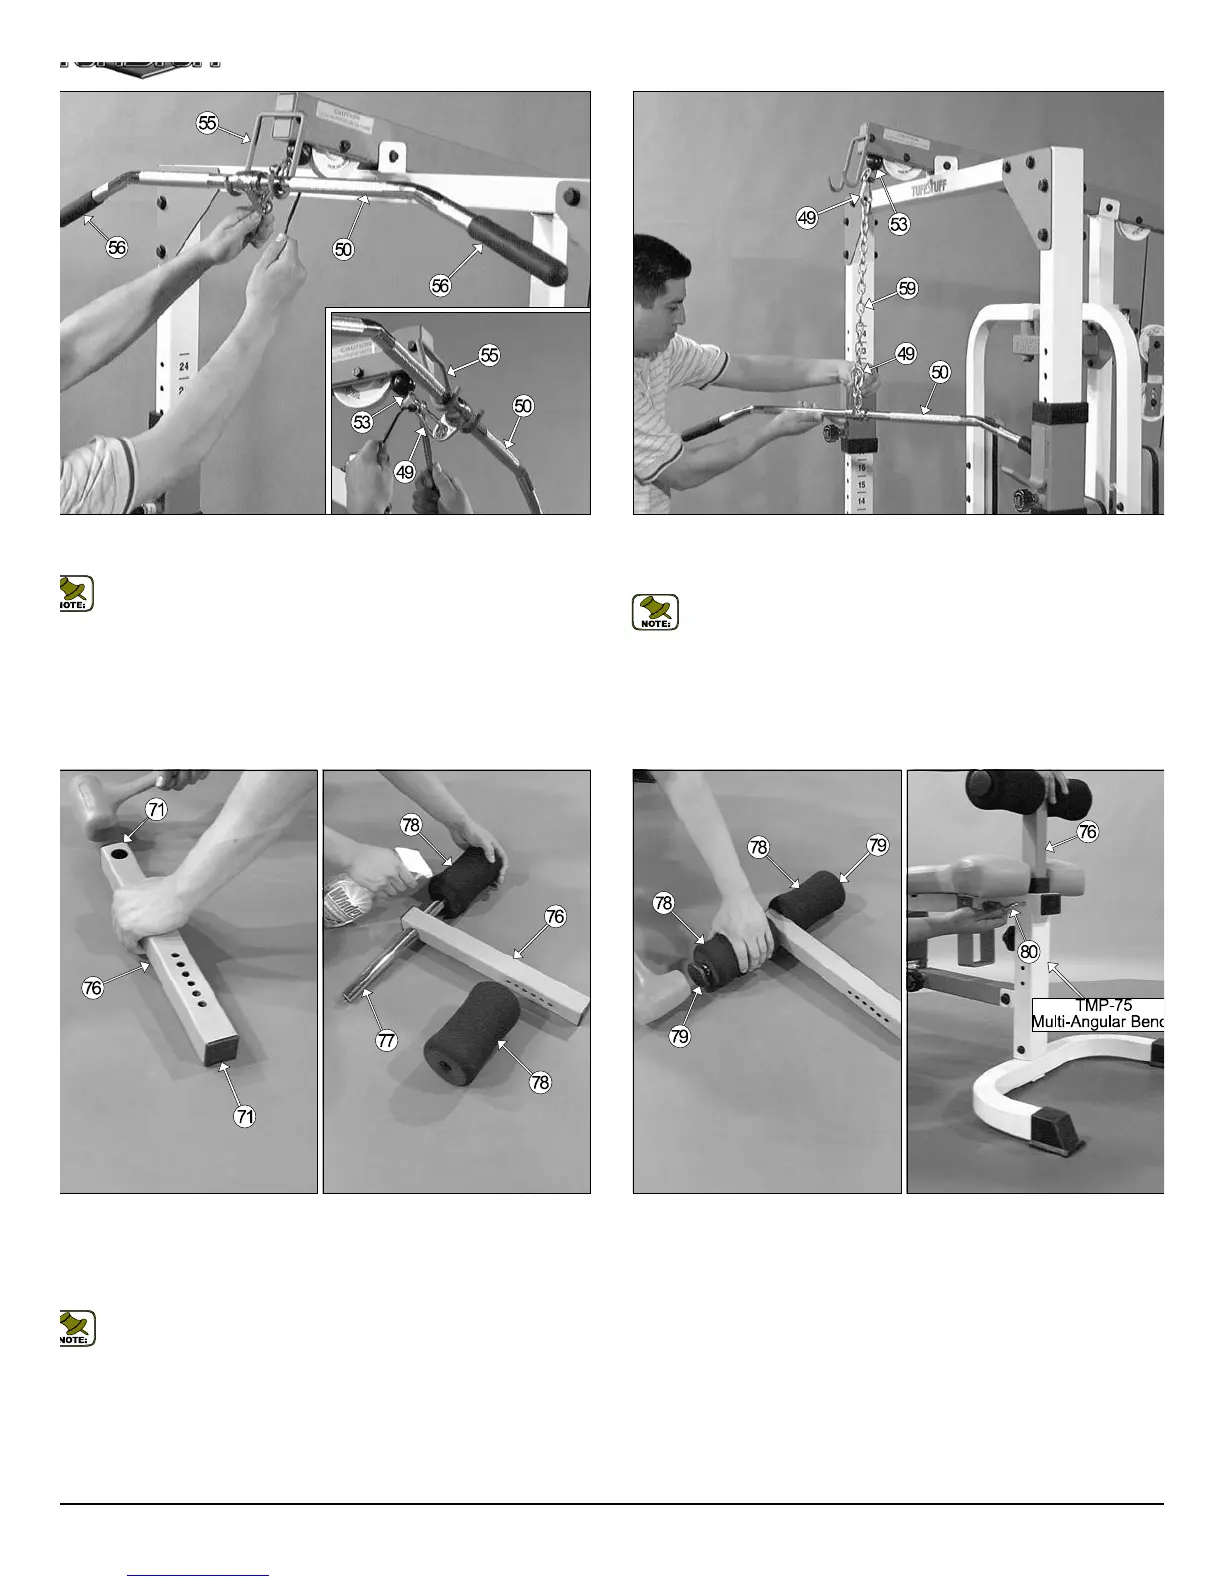
Fig. 42 Multiple starting exercise positions can be achieved by using th
Coil Chain as an extension to connect the Lat Bar to the Lat Cable with o
loosing traveling range on the Weight Carriage.
Note: Optional Cable Attachments can be utilized within the sa
manner, for example: Tricep Bar, D Handle, etc.
g. 41 Insert two Hard Grips 1 X 6 (#56) onto each of the tube-ends of
e Lat Bar (#50).
Note: Use Windex or household glass cleaner for easy insertion of
the Hard Grips 1 X 6 (#56).
ext, mount the Lat Bar (#50) onto the Lat Bar Holder (#55) and affix it to
e Lat Cable (#53), in the position as shown above, using one Snap Link
22), one Shoulder Bolt 3/8 X 3/4 (#63), and one Nylon Insert Lock Nut
16-18 (#66). Use the supplied Hex Key 3/16” (#81) and a 1/2” combina-
n wrench to fasten this assembly properly. Refer to Fig. A on page 18 for
rther illustration of this assembly.
Fig. 44 Using a rubber mallet, insert two Foot Roll Plastic End Ca
1” (#79) into each of the tube-ends of the Foot Roll Tube (#77).
Next, insert the Leg Hold Down Assembly into the receptacle of the *TM
75 (Multi-Angular Bench). Use the L-Locking Pin (#80) to Adjust the L
Hold Down Assembly to the desired height.
*Assembly Instructions for the TMP-75 (Multi-Angular Bench) come in i
own box.
ig. 43 Locate the Leg Hold-Down Tube (#76) and, using a rubber mal-
t, insert two Plastic Insert Caps 1 3/4” Sq. (#71) into each of the tube-
nds.
ext, insert the Foot Roll Tube (#77) into the receptacle of the Leg Hold-
own Tube (#76), then insert two Foam Foot Rolls 7 X 4 X 1 (#78) over
ch of the tube-ends of the Foot Roll Tube (#77), as shown above.
Note: Use Windex or household glass cleaner for easy insertion of
the Foam Foot Rolls 7 X 4 X 1 (#78).
13
TDH 345 Half Cage Ensembl