The T909 User's Manual describes a weighing indicator, likely for industrial or commercial scales, with a range of features for accurate and versatile weighing operations.
Function Description
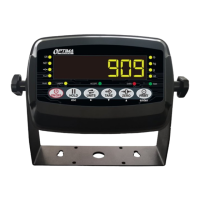
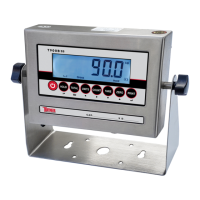
The T909 indicator serves as the control and display unit for a weighing scale. It processes signals from load cells, converts them into weight readings, and displays them on an LED screen. It supports various weighing units and offers functions such as gross/tare/preset tare/zero, multiple hold options, and overload/underload indication. The device can connect to external peripherals like printers, remote displays, and PCs, making it suitable for integrated weighing systems. It also includes calibration procedures and parameter settings for customization and accuracy.
Important Technical Specifications
- Accuracy Class: 5000 e
- Zero Stability Error: TKO < 0.1 µV/K
- Span Stability Error: TKspn < ± 6 ppm/K
- Sensitivity (Internal): 0.3 µV / d
- Input Voltage: -30 to +30mV DC
- Excitation Circuit: 5 VDC, 4 or 6 wire connection, supporting up to 8 load cells of 350 ohm max.
- AC Power: 100-250V (uses the included 9V adapter).
- Operation Temperature: 14-104°F (-10°C ~ +40°C)
- Operation Humidity: < 90%RH
- Storage Temperature: -40-158°F (-40°C ~ +70°C)
- Load Cell Connection: Supports 4 or 6 wire connections.
- RS-232 Port: Serial interface for printer, second display, PC, etc.
- DC Power Port: For DC 9V adapter.
- Serial Output Format: 8 data bits, 1 stop bit, no parity, no handshaking.
Usage Features
The T909 indicator is designed for ease of use with a splash-proof keyboard and display.
Main Features:
- LED Display: Provides clear weight readings.
- Weighing Units: Supports lb/kg or lb/kg/g/oz/lb-oz (on upgraded models).
- Gross/Tare/Pre-Set Tare/Zero: Allows for precise weighing by accounting for container weight.
- Multiple Hold Functions:
- Peak Hold: Captures and displays the highest weight recorded (useful for materials testing).
- Manual Hold: Holds the current weight on the screen until released.
- Average Hold: Calculates and displays the average weight over 3 seconds (ideal for weighing animals).
- Overload / Underload Indication: Alerts users to weight limits.
- Configurable with Multiple Printers: Supports various printer types for ticket or label printing.
- Connects to a Remote Display/Scoreboard: Enhances visibility in different environments.
- Power Saving Mode: Extends battery life.
- Gravity Compensation: Ability to modify gravity settings based on geographical location for improved accuracy.
- RS232 Output: For data communication with other devices.
- Optional Dual Load Cell Ports: For increased flexibility in scale design.
Keypad Functions:
- ON/OFF: Powers the unit on or off (press and hold for 2 seconds).
- HOLD: Activates weight hold functions.
- UNITS: Switches between weighing units.
- TARE: Resets the scale to zero for container weight or clears tare weight.
- ZERO: Zeros the scale when empty.
- PRINT: Prints the current weight when connected to a printer.
- ESC: Saves and exits settings.
- Arrow Keys (▼▲): Navigate menus and adjust values.
- ENTER: Confirms selections and moves to the next menu.
Operating Instructions:
- Power On: Press the power button for 2 seconds. The unit performs a self-check before entering weighing mode. Any load on the scale during power-on is automatically tared out.
- Zero: Used when the scale is empty. Pressing the ZERO key resets the scale to 0. Manual zero range can be configured.
- Unit Selection: Press the UNITS key to switch between available measuring units.
- Tare Function: Used to exclude container weight. Press TARE to zero the display after placing a container. Press TARE again to exit tare mode.
Maintenance Features
Safety Precautions:
- Ensure the indicator is on a stable surface.
- DO NOT disassemble or modify the unit.
- DO NOT exceed the rated load limit.
- DO NOT use if damaged.
- DO NOT use for purposes other than weighing.
- Keep other electronic equipment away.
- Electrical Safety: Connect to a GFCI outlet. Disconnect power before servicing. All operators must discharge themselves. DO NOT use if the power cord is worn or damaged; replace with original parts by certified technicians.
Preparation & Set Up:
- Plug the DC adapter directly into the "DC" pin at the bottom of the indicator.
- Use a wall outlet to avoid interference.
- Turn on the indicator with no load.
- Calibrate the scale upon initial installation or relocation.
Battery Maintenance (if applicable):
- Fully charge the internal battery before first use.
- Use only the provided AC adapter.
- Fully discharge the battery monthly by leaving the indicator on until it powers off, then recharge fully.
- Remove the battery if not used for a long time to prevent leakage.
Calibration Procedure:
The manual provides detailed steps for both Single Point and Linear Calibration methods.
- Accessing Calibration Menu: Turn on the scale by holding ON/OFF for 2 seconds, then press HOLD and PRINT together.
- Parameter Settings: The indicator has a comprehensive parameter settings menu (C01 to C49) to configure various aspects of its operation, including:
- Weighing Unit (C01)
- Decimal Setting (C02)
- Graduation Setting (C03)
- Maximum Capacity (C04)
- Zero Calibration (C05)
- Calibration Method (C06)
- Restore Default Settings (C07)
- Warning Tone (C08)
- Automatic Power Off (C09)
- Power Saving Mode (C10)
- Hold Function (C11)
- Unit Conversion (C12)
- Upper/Lower Limit Alarms (C13, C14)
- Inner Code Display (C15)
- Set Date/Time (C16, C17)
- Communication Setting (C18)
- Baud Rate (C19)
- Manual Zero Range (C20)
- Initial Zero Range (C21)
- Zero Tracking (C22) and Time (C23)
- Overload Range (C24)
- Negative Display (C25)
- Standstill Time (C26) and Range (C27)
- Digital Filter (C28) for stability
- Noise Filter (C29)
- Print Time and Date (C30)
- Analog Output Setting (C31) and Calibrate Current (C32)
- Relay Output Setting (C33)
- Zero Setting (C34)
- Gravity of Calibration Location/Destination (C36, C37)
- Weight Reversed Setting (C39)
- Print Mode (C41) and Print Carriage Return/Space Print (C42, C43)
- Date/Time Print (C44, C45)
- LED Display Brightness (C49)
- Seal Switch: Access to calibration settings (C01 and up) requires the seal switch on the PCB to be OFF. Breaking the official seal may necessitate recertification.
Troubleshooting:
The manual includes a detailed troubleshooting guide for common issues:
- Scale not turning on: Loose power cord, defective outlet.
- Reading goes negative: Incorrect Sig+ and Sig- wire connections.
- "000000" error: Overload, improper cable connection, defective load cell.
- "Err1" (No weight used/weight above max capacity): Use correct weight within defined range.
- "Err2" (Weight below min required): Use calibration weight at least 10% of max capacity (60-80% recommended).
- "Err3" (Input signal negative): Check wire connections, load cell for damages, recalibrate, or replace PCB.
- "Err4" (Signal unstable): Start calibration after platform is stable.
- "Err5" (EEPROM Error): Replace PCB.
- "Err6" (Exceed Zero Range): Check cables, scale for damages, perform full calibration procedure.