Remove remaining calliper bolts and lift calliper clear of rotor by raising trolley using foot
pedal. Manoeuvre Service Trolley until calliper is clear of the vehicle. Loosen knob on
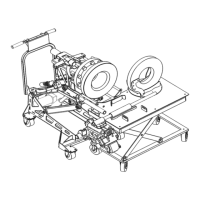
linear shaft and retract linear shaft until calliper is against Service Trolley. Tighten knob
again to secure.
Fig.4 Linear Shaft inserted into Calliper Clamp
At this stage the ServiceTrolley can be moved away from the immediate work space and
either transfer the calliper to a workbench if a service is needed, or lower table and park
it ready for the rotor change over process. (Service trolley should be at lowest height
prior to manoeuvring around workshop)
c. HUB/ROTOR REMOVAL
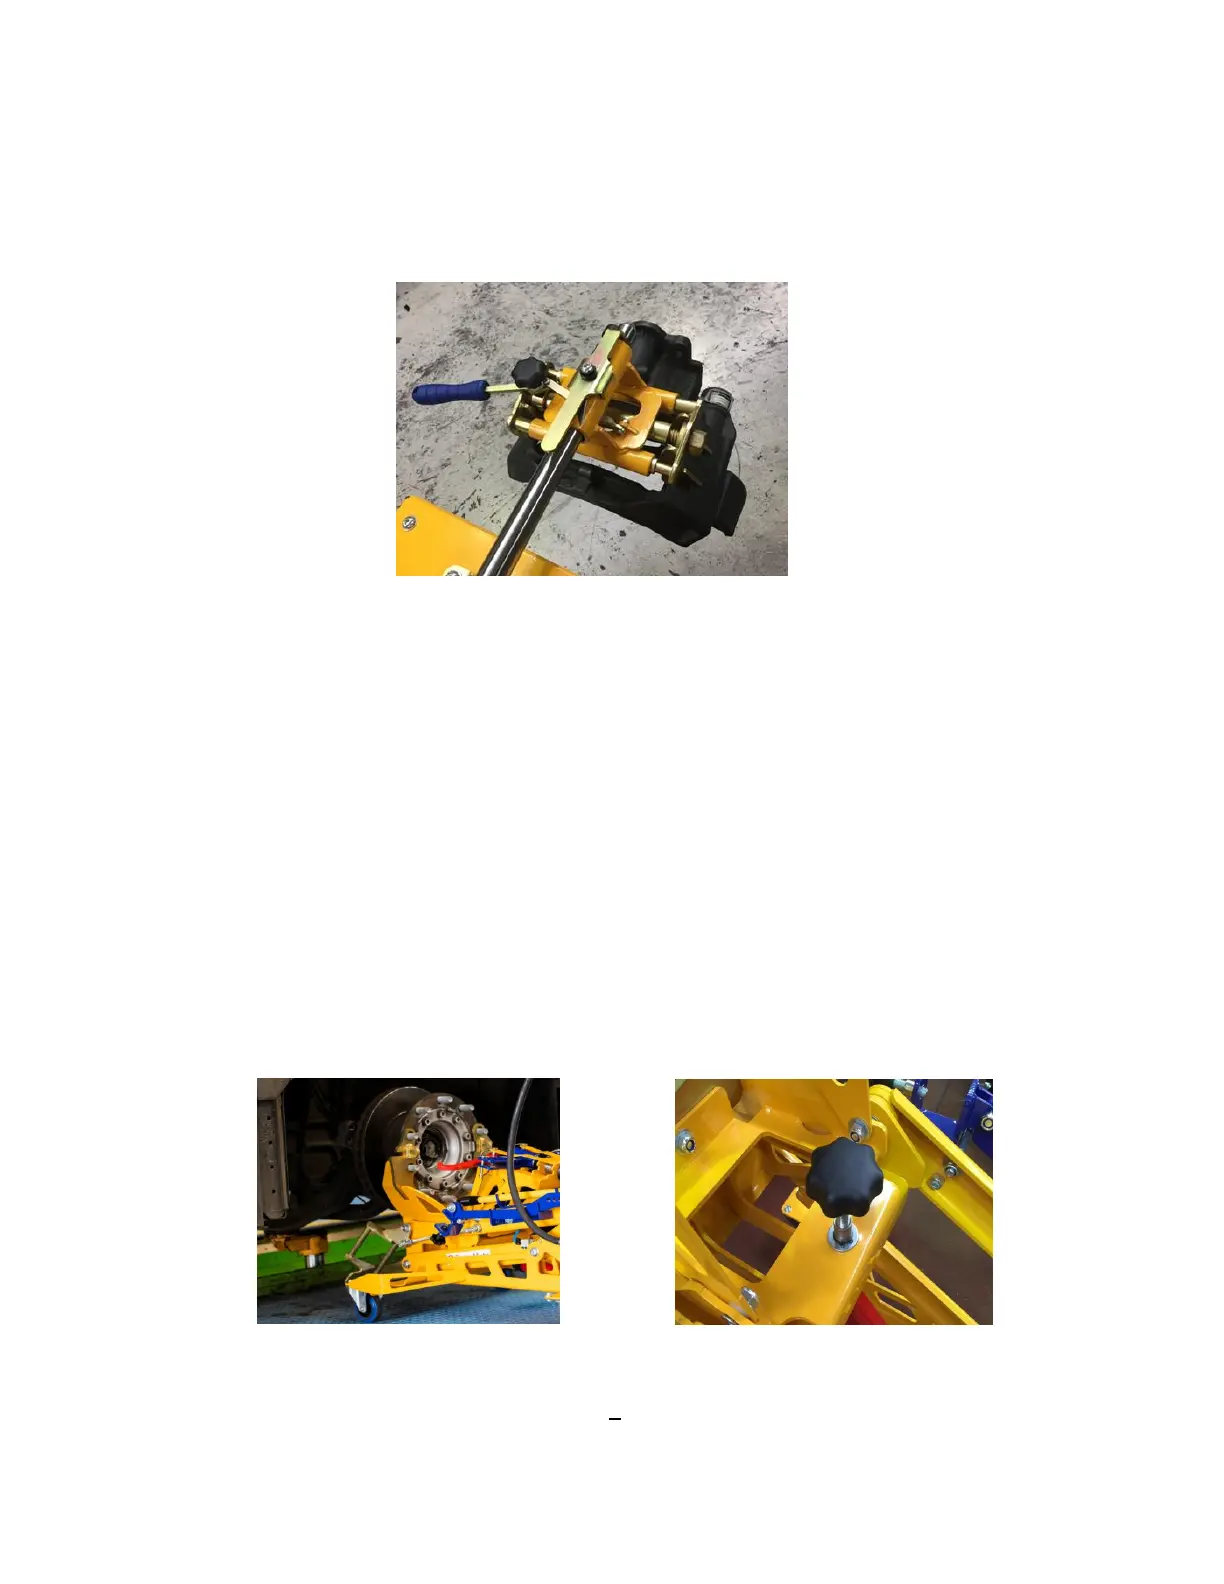
Check that Face Plate is correct for stud pattern of vehicle. Manoeuvre Hub/Rotor Trolley
so that Face Plate aligns with wheel studs. (Fig. 5). Use ↑(up) ↓(down) control buttons
to adjust height. The black safety buttonmust held down whenever operating the
up/down functions.Use Pitch Adjustment Knob (Fig.6)to square Face Plate to hub. This
ensures correct realignment of hub when returning to vehicle. Firmly secure face plate to
studs using two wheel nuts.
Fig. 5 Face Plate aligned with hub Fig.6 Pitch Adjustment Screw
7