This document is an owner's manual for the Tunturi E504/E550 Recumbent Cycle, providing comprehensive information on its assembly, operation, and maintenance.
Function Description
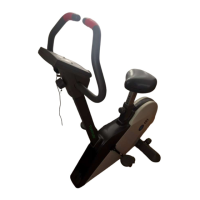
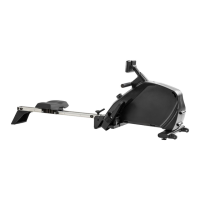
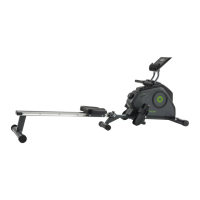
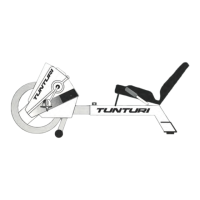
The Tunturi Recumbent Cycle is an exercise machine designed for aerobic workouts. It allows users to control the intensity of their exercise by adjusting resistance, determining cycling speed, and monitoring pulse, time, and distance for each session. The recumbent design is intended for safe operation, distributing the user's weight more evenly over the buttocks and lower back compared to an upright cycle. This design also positions the legs closer to the heart level, promoting a comfortable and efficient workout.
The cycle features an electronics module with an LCD window that displays various exercise metrics. This module includes keys for ON/OFF, START/STOP, SET, PULSE, MODE, and RESET functions. The ON/OFF key powers the module on or off, with a tone and all symbols lighting up for three seconds upon activation. The START/STOP key initiates tracking of speed, time, and distance during a workout, and pausing it displays the selected mode value while retaining other mode values in memory. The SET key allows users to preset exercise time or an upper pulse rate limit. The PULSE key turns the pulse function on or off, displaying a heart-shaped symbol that flashes in rhythm with the user's pulse and sounding a tone if the heart rate exceeds a preset limit. The MODE key cycles through different display modes (Speed, Time, Distance, Pulse) when the unit is stopped, and in start mode, it steps through Speed, Time, Distance, and Pulse modes. Holding the MODE key for two seconds activates a scan function, displaying speed, time, distance, and pulse modes at five-second intervals. The RESET key sets one or all mode values to zero and switches the electronics module to STOP.
The electronics module tracks several modes:
- Speed Mode: Calculates miles per hour (mile/h) from 0 to 99.99 and displays a speed bar graph showing revolutions per minute (RPM x 100) from 0 to 700 RPMs.
- Time Mode: Tracks elapsed exercise time from 0 to 99 minutes. If a workout time is preset, the module counts down, displaying the remaining time.
- Distance Mode: Tracks distance traveled during each session from 0 to 99.99 miles.
- Pulse Mode: Tracks heart rate during an exercise session, with the heart-shaped symbol flashing in rhythm with the pulse.
- Pulse Set Mode: Tracks heart rate and compares it to a preset upper limit, sounding a tone if the pulse exceeds the limit.
Usage Features
Before beginning any exercise program, users are advised to consult a physician for a complete physical examination. The manual emphasizes several safety precautions: never operate or repair the cycle near children or pets, wear proper clothing and shoes, perform gentle stretching for the lower body and back, and stop exercising immediately if experiencing dizziness, nausea, chest pains, or other abnormal symptoms. Users should warm up gradually at the beginning of a workout and cool down afterward, allowing their pulse rate to return to normal. It is crucial not to get on or off the cycle while the flywheel is moving unless it's an emergency. Maintenance or adjustments not described in the manual should be handled by an authorized service representative. The cycle should only be operated with all access covers in place, by one person at a time, and on a solid, level surface.
A typical exercise session involves several steps:
- Adjusting Seat Length: The seat rail length should be adjusted so that the knee is slightly bent when the leg is extended during pedaling. This is done by loosening the spring-loaded adjustment pin, lifting it, choosing one of the 10 adjustment holes in the seat rail, and then tightening the locking pin. Users should not sit on the cycle while adjusting the seat rail.
- Adjusting Pedal Straps: Place one foot in each pedal and adjust the straps for desired tightness. The straps should allow feet to slip in and out easily. To tighten, fit the strap over the securing tab and pull down firmly. To release, pull up and out on the strap.
- Selecting Functions on the Electronics Module:
- Turn on the electronics module using the ON/OFF key.
- Press the MODE key until the arrow points to the time mode.
- Use the SET key to set the desired exercise time (0 to 99 minutes), advancing by one minute with each press. Holding the SET key advances the time quickly. A bell symbol indicates the countdown timer is set.
- Press the MODE key to select pulse set mode.
- Use the SET key to advance the desired upper limit pulse rate (50 to 200 bpm), advancing by one beat per minute with each press. Holding the SET key advances the rate quickly.
- Plug the pulse monitor into the side of the electronics module, rub the earlobe, and clip the sensor to it. Secure the cable to clothing with the cable clip.
- Press the PULSE key to activate heart rate tracking. A tone will sound if the heart rate exceeds the preset pulse.
- Press the START/STOP key to begin tracking speed, time, and distance. A tone will sound when the preset time reaches zero.
- Hold the MODE key for two seconds to activate the scan function, displaying speed, time, distance, and pulse in sequence.
- Adjusting Resistance: Begin pedaling and adjust the tension control knob on the front frame. Turning it clockwise increases resistance, and counterclockwise decreases it.
- Cool Down: Slow down cycling at the end of the session to bring the heart rate back to normal.
For storage, the cycle should be kept in a cool, dry, dust-free location to prevent damage, especially rust on the flywheel. For transportation, the cycle can be moved by lifting the back of the seat until its entire weight rests on the front wheels, then rolling it to the desired location.
Maintenance Features
The Tunturi Recumbent Cycle requires minimal maintenance. After each workout, it should be cleaned with a damp cloth or towel. For any problems encountered during maintenance, users should consult an authorized service representative.
Key maintenance procedures include:
- Replacing the Brake Cable: This may be necessary after extended use.
- Remove the left pedal by turning the bolt at its base clockwise with a 15mm open-end wrench, then gently pulling the pedal off the crank.
- Remove the left cover from the front frame by unscrewing four Phillips head screws with a Phillips screwdriver and lifting the cover.
- Release the brake belt from the cam clip and unlock it from the spring.
- Replace the brake belt: Ensure the tension control knob on the front frame is turned counterclockwise to its lowest setting. Hook the brake belt onto the spring, wrap it around the flywheel, and attach it snugly to the cam clip.
- Replace the left cover and pedal.
- Lubricating the Chains: The chain should be oiled once a year to ensure correct operation.
- Remove the right pedal by turning the bolt at its base counterclockwise with a 15mm open-end wrench, then gently pulling the pedal off the crank.
- Remove the right cover from the front frame by unscrewing four Phillips head screws with a Phillips screwdriver and lifting the cover.
- Lubricate the chain with a few drops of household lubricant or aerosol spray, wiping off any excess oil.
- Turn the pedal to advance the chain, and once the entire chain is lubricated, reassemble the right cover.
- Changing the Batteries: Batteries need replacement if there is no display in the LCD window of the electronics module.
- Lift the electronics module from the front frame.
- Insert two size AA 1.5 volt batteries into the battery holder, ensuring correct orientation as indicated inside the holder.
- Replace the electronics module on the front frame.
E504/E550 Tension Adjustment Procedure
The tension system is factory preset for the average user, but can be adjusted if it's too loose or too tight.
- Turn the tension knob to the loosest setting (counter-clockwise).
- Remove the computer (2 screws) and computer mounting bracket (2 screws).
- Remove the left pedal (left-hand threads).
- Remove the left side cover (4 screws).
- Loosen the belt clip (part #61 on page 11 of the owner's manual) by pulling down on its front part.
- If the tension is too loose, pull the strap up 1/4" and reset the belt clip. If it's too tight, pull the strap down 1/4" and reset the belt clip.
- Temporarily re-install the left pedal to test the tension. If it's still not adequate, continue adjusting the belt 1/4" at a time until it's right.
- Remove the pedal again and re-install the side cover (4 screws).
- Re-install the pedal.
- Re-install the computer mounting bracket and computer.
For further assistance, users can contact Tunturi Customer Support.