33
Cutter Configuration:
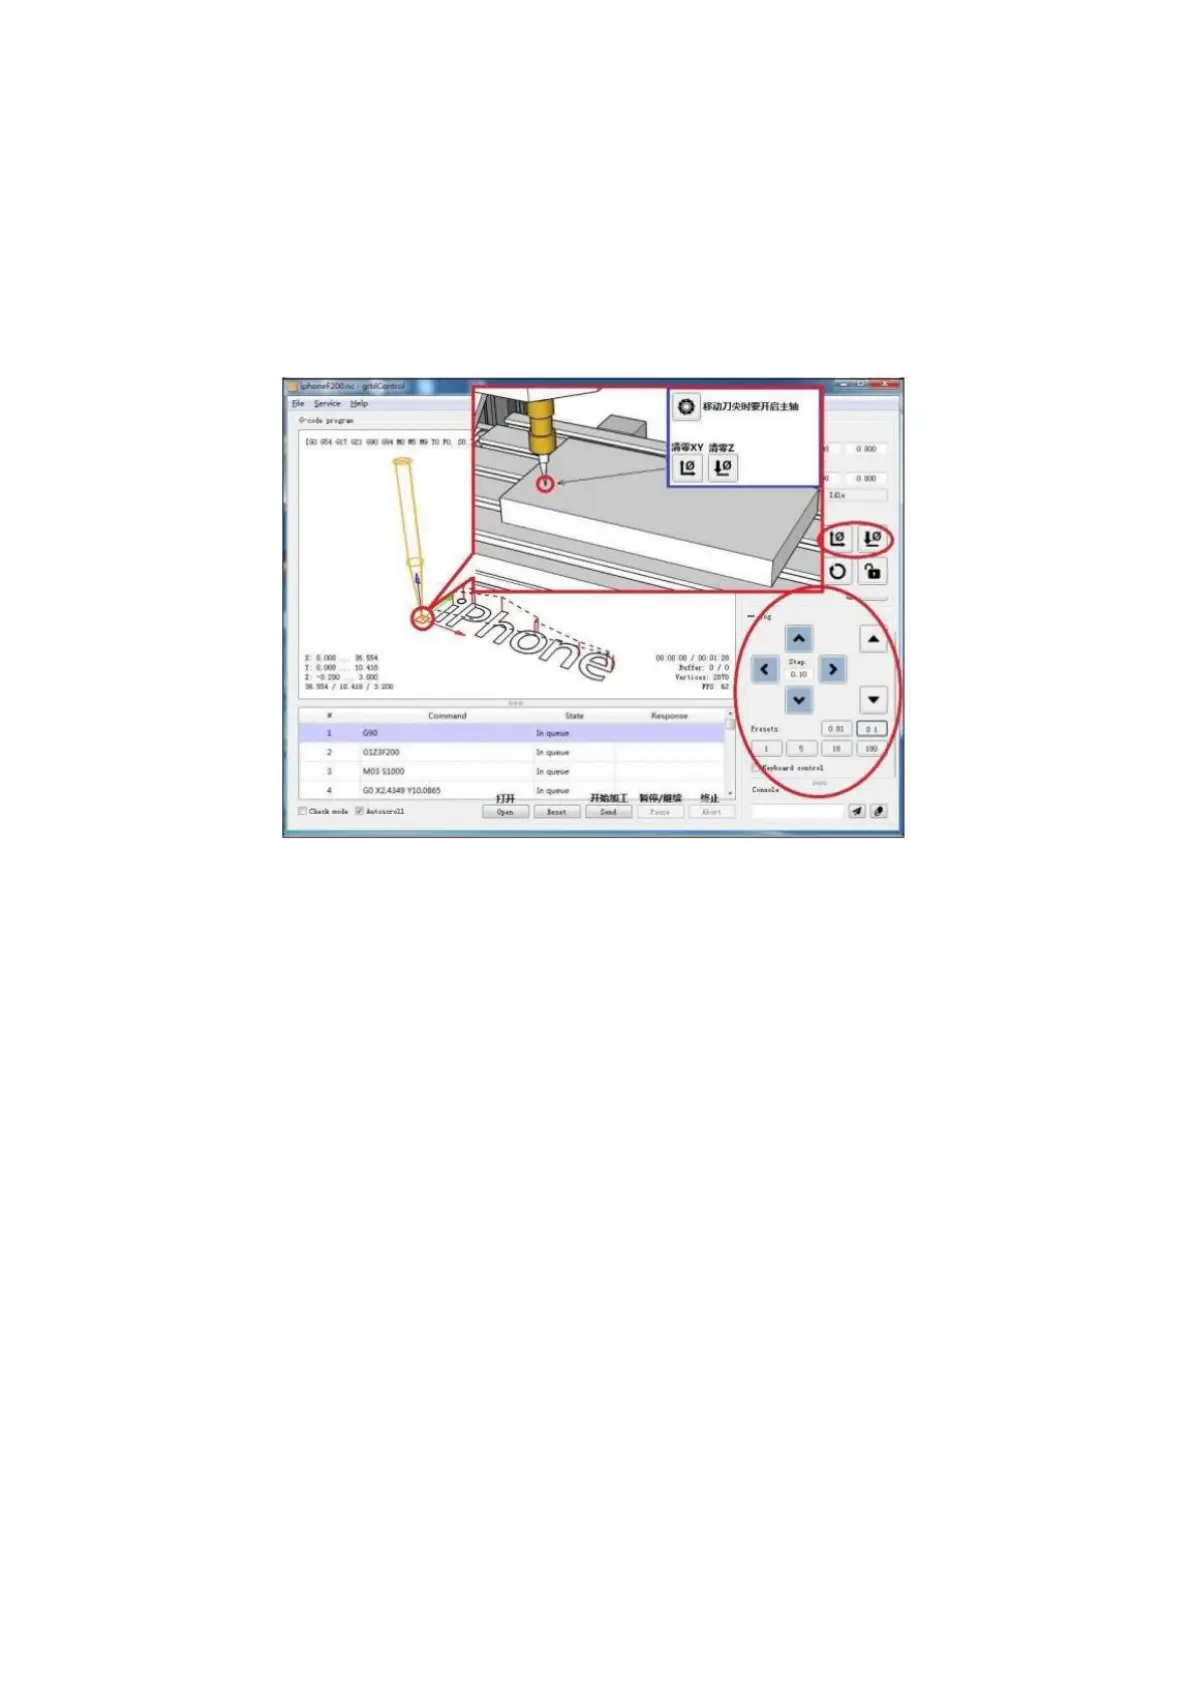
Cutter Configuration: Establish the starting position for the task. Position the cutter at
the desired location, proceed to click on XY and Z axis coordinate zero clearing. This
action will initiate the engraving process from the designated point. While performing
the final step, ensure that the spindle is in operation, as the cutter might come into
contact with the object intended for engraving.
Once you've successfully conducted your initial tests, you'll find yourself ready to delve
into crafting your very own Gcode for engraving purposes. Gcode serves as the set of
commands responsible for orchestrating the machine's movements to create intricate
designs. These commands are encapsulated within a .nc file format. To get you started,
take a look within the provided folder – you'll discover a collection of .nc files that can
serve as references.
For generating these .nc files, a software that you can consider is ARTCAM. Although the
linked version is an older one, it can still provide the foundation you need. If you're
interested in acquiring the latest iteration of ARTCAM, a quick online search should point
you in the right direction. This software holds a ubiquitous presence and is renowned
for its capabilities. (https://www.dropbox.com/s/n1pi86z2lu5zd8q/ArtCAM.rar?dl=0)
Should you wish to deepen your familiarity with the process of generating .nc files using
ARTCAM, there's an abundance of learning resources available on YouTube.
(https://www.youtube.com/user/delcamartcam/videos) By navigating to the channel
"delcamartcam," you'll encounter a wealth of tutorial videos that comprehensively guide
you through the process. This visual aid can empower you with the insights needed to
harness ARTCAM's potential and craft Gcode that brings your creative visions to life.