TFP1326
Page 6 of 22
Heat tracing of the DV-5a Valve or its
associated trim is not permitted. Heat
tracing can result in the formation of
hardened mineral deposits that are
capable of preventing proper operation.
Always open the system control valves
slowly to avoid a sudden rush of water
entering the system.
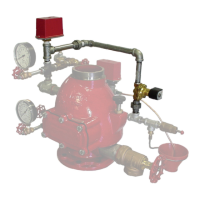
The DV-5a Valve is to be installed in
accordance with the following criteria:
Step 1. All nipples, fittings, and devices
must be clean and free of scale and
burrs before installation. Use pipe
thread sealant sparingly on male pipe
threads only.
Step 2. The DV-5a Valve must be
trimmed in accordance with Figure 6.
Note: If the addition of an Alarm Control
Valve is desired or required by the local
AHJ, the Alarm Control Valve noted as
Item H in Figure 9 is to be a separately
ordered electronically supervised nor-
mally open valve.
Step 3. Care must be taken to ensure
that check valves, strainers, globe
valves, etc. are installed with the flow
arrows in the proper direction.
Step 4. Drain tubing to the Drip Funnel
must be installed with smooth bends
that will not restrict flow.
Step 5. The Main Drain and Drip Funnel
Drain may be interconnected pro-
vided a check valve is located at least
12 in. (300 mm) below the Drip Funnel.
Installation
The TYCO DV-5a Valve is to be installed
in accordance with this section.
NOTICE
DV-5A Automatic Water Control Valves
are designed to be used in freshwa-
ter systems. When the supply is from
an alternative source such as brackish
water, saltwater, or contains additives
such as foam, the limited warranty is
reduced to one year from the time of
installation. An increase in frequency of
inspections is required when the valve
is exposed to such supplies and other
corrosive conditions or chemicals that
could impact valve materials or the
operation of the assembly. The system
and all components must be designed
accordingly for the increased demand.
It is required to thoroughly flush the
valve and trim assembly with freshwa-
ter and reset to the set condition after
each operation.
Proper operation of the DV-5a Valves
depends upon their trim being installed
in accordance with the instructions
given in this technical data sheet.
Failure to follow the appropriate trim
diagram may prevent the DV-5a Valve
from functioning properly, as well as
void approvals and the manufacturer’s
warranties.
The DV-5a Valve must be installed in a
readily visible and accessible location.
The DV-5a Valve and associated trim
must be maintained at a minimum tem-
perature of 40°F (4°C).
Step 6. Suitable provision must be
made for disposal of drain water. Drain-
age water must be directed such that
it will not cause accidental damage to
property or danger to persons.
Step 7. Connect the Diaphragm Supply
Valve to the inlet side of the System
Main Control Valve in order to facili-
tate setting of the DV-5a Valve. Refer
to Figure 9.
NOTICE
The connection to the Diaphragm
Supply Valve should be as short as
practical and from the same water
supply as the system.
Step 8. Unused Pressure Alarm Switch
connection must be plugged.
Step 9. Conduit and electrical connec-
tions are to be made in accordance
with the applicable standards of the
approval agency.
Step 10. Before a system hydrostatic
test is performed, the DV-5a Diaphragm
Chamber is to be depressurized, the
Automatic Drain Valve is to be tem-
porarily replaced with a plug, and the
Diaphragm Cover Bolts must be uni-
formly and securely tightened using a
cross-draw sequence. After tighten-
ing, double-check to make certain that
all of the Diaphragm Cover Bolts are
securely tightened. Refer to Table C in
the Care and Maintenance section for
torque specifications.
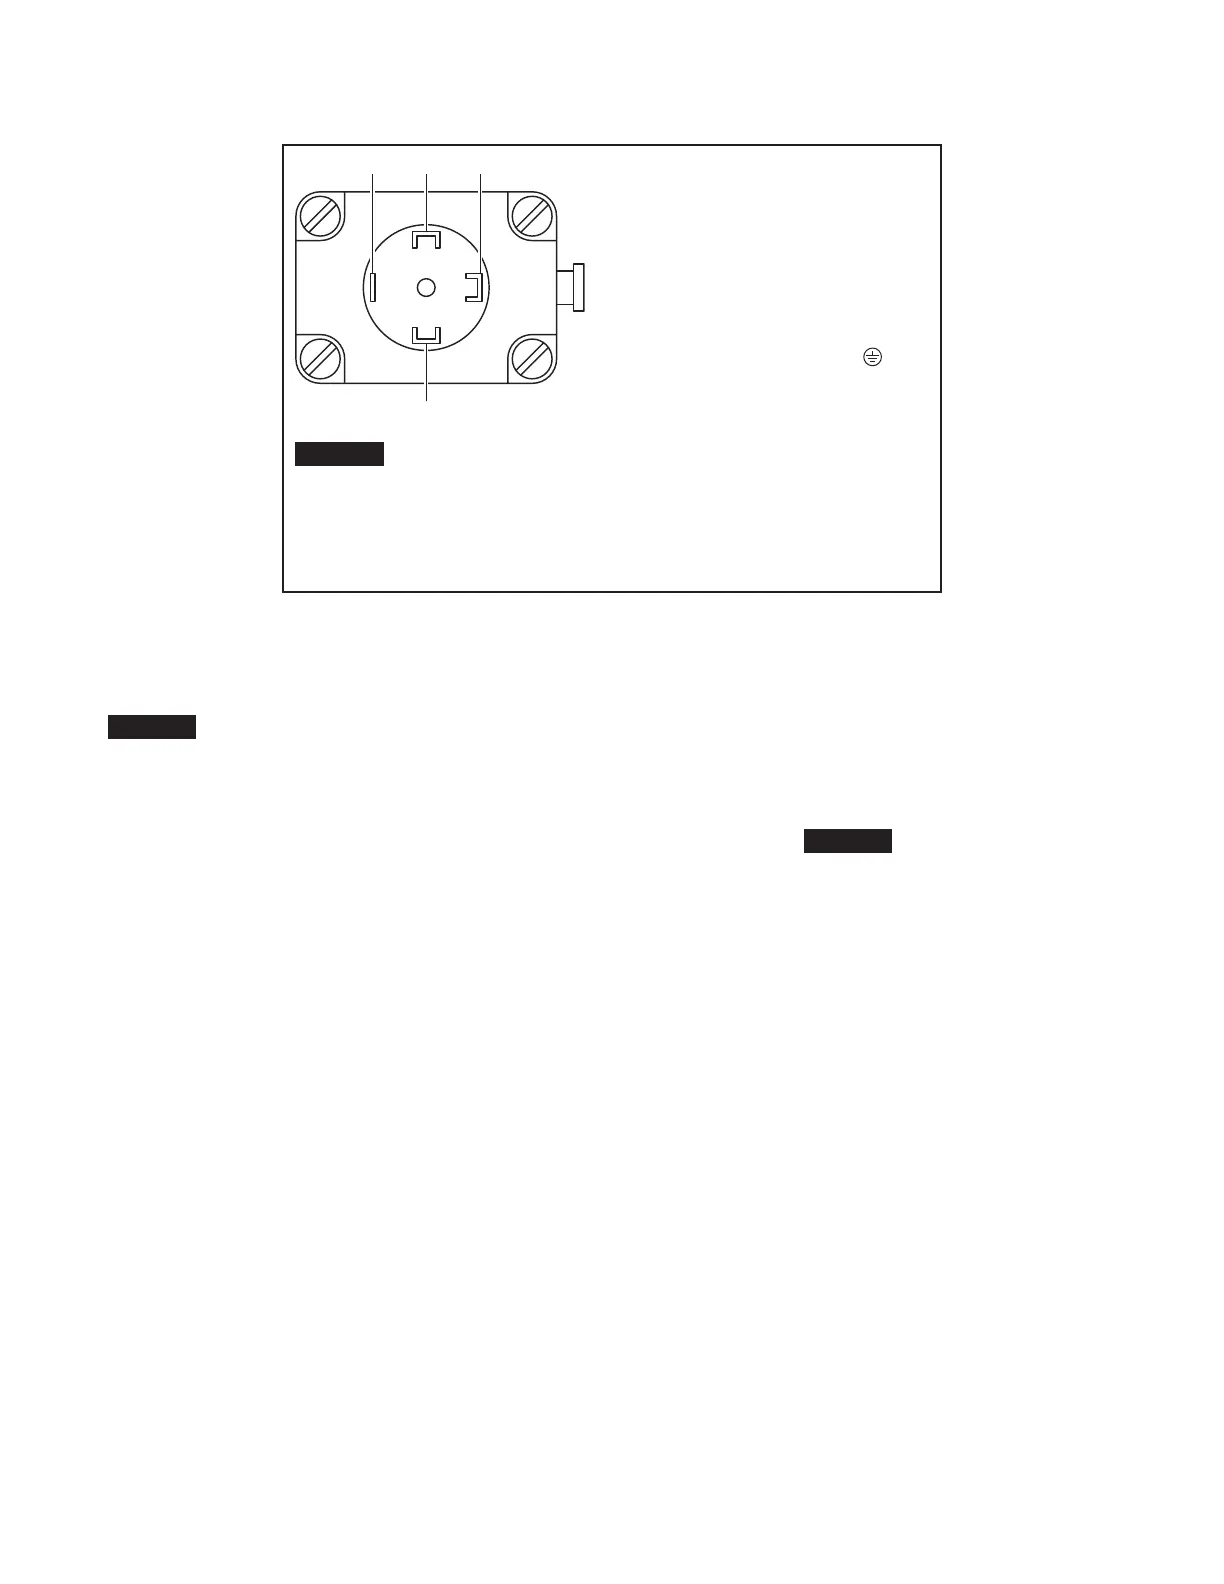
DC CONNECTIONS:
TERMINAL 1 = CLOSED +
TERMINAL 2 = OPEN +
TERMINAL 3 = GND -
TERMINAL 4 = PROTECTIVE
CONDUCTOR CONNECTION
NOTICE
Note the voltage and current type as specified on the rating plate. The con-
nection terminals in the device socket are identified with the numbers 1 to 3
according to the terminals on the valve.
FIGURE 5
BÜRKERT SOLENOID VALVE
CIRCUIT DIAGRAM
 Loading...