Do you have a question about the Tyger TG-BP6J85368 and is the answer not in the manual?
Read instructions carefully, verify all parts are present, and report any damage before installation.
Provides torque specifications for various fastener sizes based on class 8.8 and class 10.9.
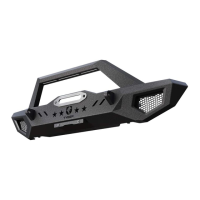
Lists all included components and hardware required for the front bumper installation.
Remove two T-55 Torx bolts from the bottom of the bumper and frame. Penetrating lubricant is recommended.
Remove four bolts from the top of the bumper attaching it to the frame. Remove tow hooks and plastic cover if applicable.
Slide bumper over frame, align mounting holes, and install spacers and support plates loosely.
Slide bumper over frame, align top mounting holes, and attach with bolts, washers, and lock washers.
Attach light brackets to bumper hoop using specified bolts and washers. Attach lights to brackets and adjust alignment.
Mount the winch to the top of the mounting plate behind the bumper and connect to the electrical system.
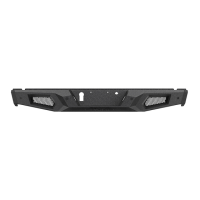
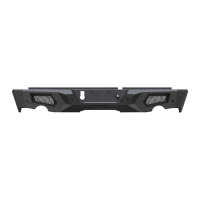
Remove screens, attach lights to mounting tabs at bumper ends, and wire to the vehicle's electrical system.
Secure the license plate bracket to the bumper bottom using specified bolts, washers, and nuts.
Ensure the bumper is centered and level, then fully tighten all previously installed hardware.
Perform regular inspections to confirm all installation hardware remains secure and tight.
| Model | TG-BP6J85368 |
|---|---|
| Material | Steel |
| Color | Black |
| Installation | Bolt-On |
| Brand | Tyger Auto |