2/5
Start installation under the front bumper. Carefully remove the
plastic lower air dam attached to the bottom of the bumper. Do
not remove the electronic “active air dam” behind the bumper if
equipped. Pay close attention to the type and location of all facto-
ry hardware for reinstallation.
STEP 1
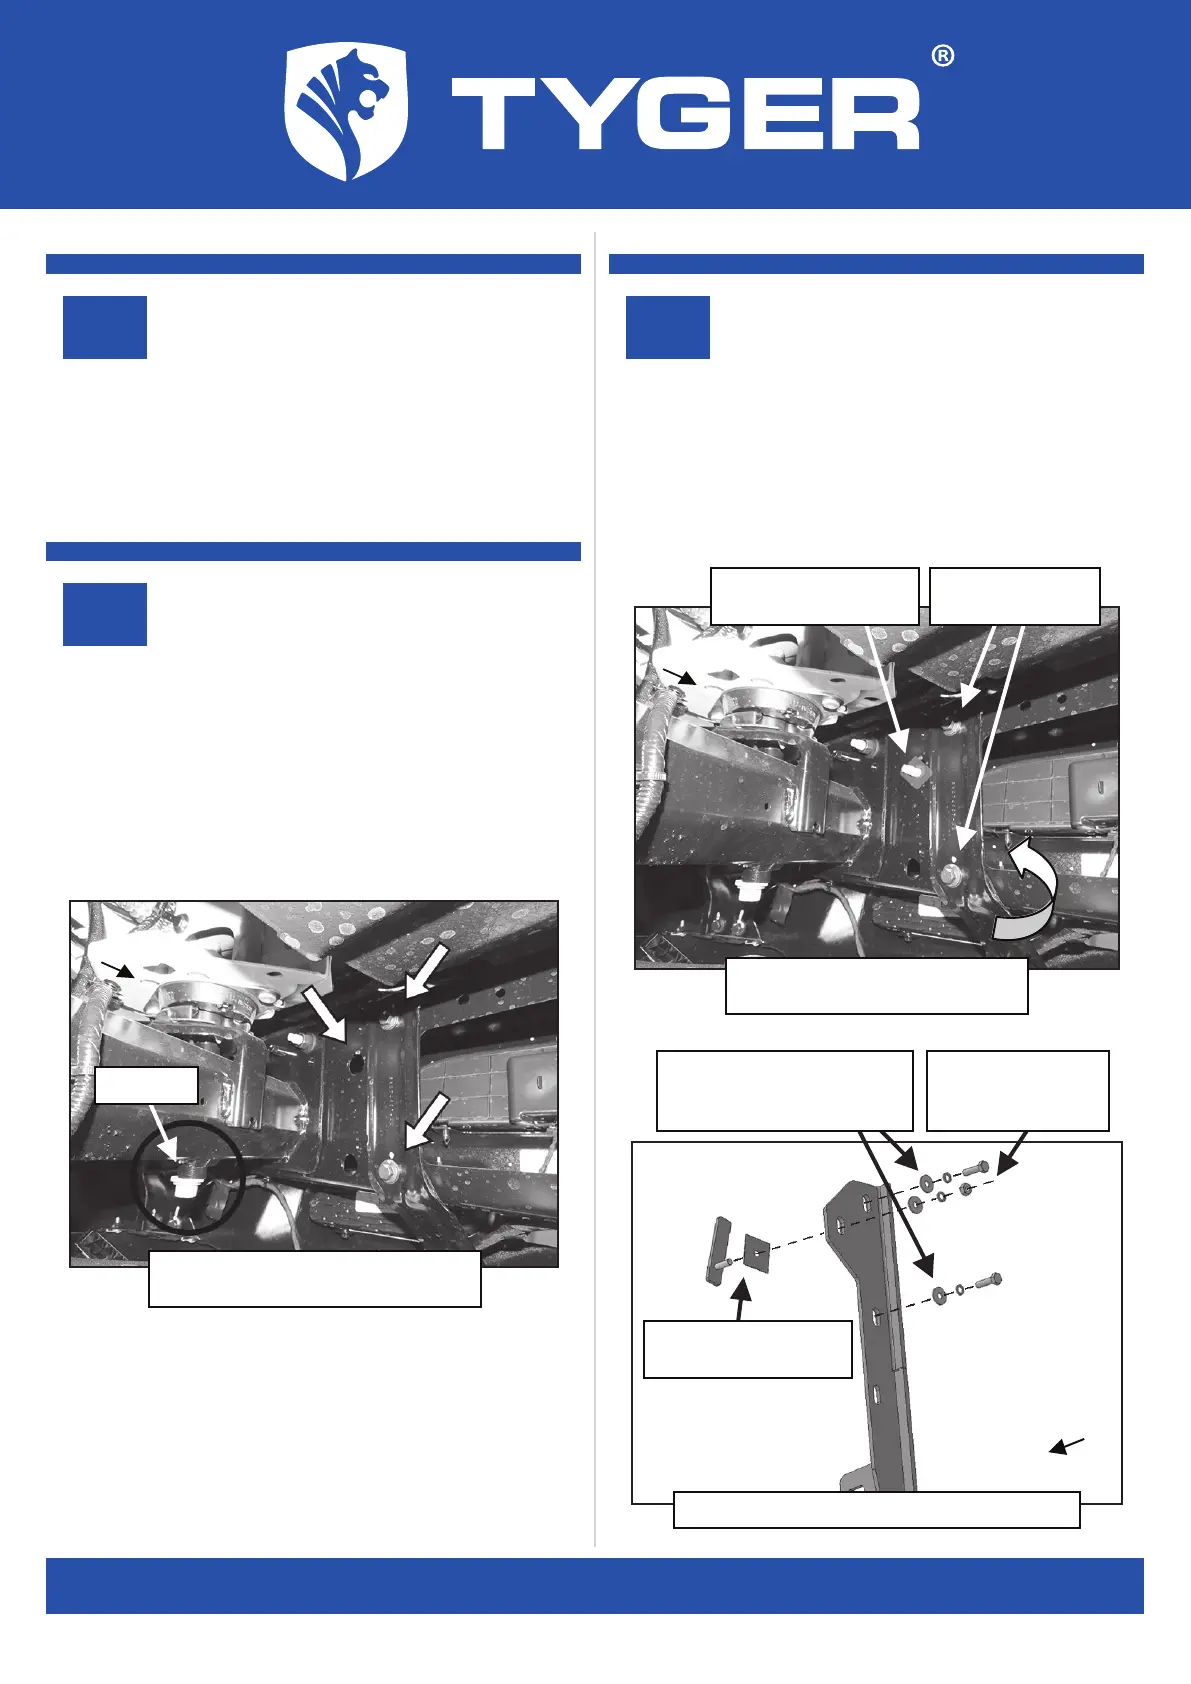
Move to the back of the driver/left side of the bumper, (Fig 1).
Select (1) 8mm Bolt Plate and (1) 8mm Plastic Retainer. Insert the
Bolt Plate into the space between the outer bumper cover and
bumper bracket, (Fig 2). Insert the threaded part of the Bolt Plate
back through the hole in the bumper bracket. Thread the Plastic
Retainer onto the Bolt Plate to hold it in place position.
NOTE: The Plastic retainer is used to help hold the Bolt Plate in
place but use is not mandatory for Bracket installation.
STEP 2
Front
Body bolt
(Fig 1) Driver/left mounting location
pictured from behind bumper
Front
8mm Bolt Plate
8mm Plastic Retainer
Remove the (2)
factory hex bolts
(Fig 2) Insert Bolt Plate back
through bumper bracket (arrow)
8mm Bolt Plate
8mm Plastic Retainer
(2) 8mm x 35mm Hex Bolts
(2) 8mm Lock Washers
(2) 8mm Flat Washers
8mm Flat Washer
8mm Lock Washer
8mm Hex Nut
Front
(Fig 3) Driver/left side Frame Bracket layout
Next, Remove the (2) factory hex bolts attaching the bumper to
the bumper bracket, (Fig 2). Select the driver/left Frame Mounting
Bracket. Attach the Bracket to the back of the bumper with the
included longer (2) 8mm x 35mm Hex Bolts, (2) 8mm Lock Wash-
ers and (2) 8mm Flat Washers, (Fig 3). Attach the Bracket to the
8mm Bolt Plate with (1) 8mm Flat Washer, (1) 8mm Lock Washer
and (1) 8mm Hex Nut. Do not fully tighten hardware at this time.
STEP 3
Customer Support: www.TygerAuto.com/Contact


 To Next Page