EasyManua.ls Logo

U-Line H-2272 - User Manual

U-Line H-2272
9 pages
Print Icon
To Next Page IconTo Next Page
Loading...
PAGE 1 OF 9 0721 IH-2272
1-800-295-5510
uline.com
H-2272
8" HANDS-FREE
TOWEL DISPENSER
USING THE PUSH BUTTON LOCK FEATURE
1. Open dispenser and raise end of lock spring just
enough to pop out the gray decorative hole plug.
(See Figure 1)
NOTE: Do not overstress the lock spring.
2. Remove push button from back of dispenser.
(See Figure 2)
3. Slide push button under lock spring at the top of the
dispenser and insert button through hole in door.
(See Figure 3)
4. Release lock spring and close dispenser. (See Figure 4)
OPTIONAL PUSH BUTTON LOCK INSTALLATION
PARTS
Dispenser x 1 Wall Anchor x 4 Screw x 4Dispenser Key x 1
Figure 3
Figure 4
Figure 2
Push Buttons
Figure 1
Push Button
Lock Spring
Decorative
Hole Plug
Para Español, vea páginas 4-6.
Pour le français, consulter les pages 7-9.
TOOLS NEEDED
Level
Tape Measure1/4" Drill BitElectric Drill Phillips Screwdriver
Question and Answer IconNeed help?

Do you have a question about the U-Line H-2272 and is the answer not in the manual?

U-Line H-2272 Specifications

General IconGeneral
CategoryDispenser
Storage Capacity25 lbs
Water FiltrationYes
Voltage115V
RefrigerantR134a
FinishStainless Steel

Summary

Tools Needed

Parts List

Optional Push Button Lock Installation

Step 1: Open Dispenser and Raise Lock Spring

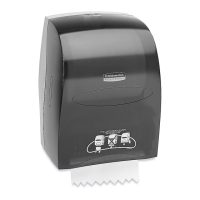
Open the dispenser and raise the lock spring to pop out the decorative hole plug.

Step 2: Remove Push Button

Remove the push button from the back of the dispenser unit.

Step 3: Slide Push Button Under Lock Spring

Insert the push button through the dispenser door and under the lock spring.

Step 4: Release Lock Spring and Close Dispenser

Release the lock spring and close the dispenser door to secure the button.

Decorator Strip Installation

Step 1: Open Cover to Expose Window

Open the dispenser cover to access the decorator strip window.

Step 2: Slide Decorator Strip into Place

Insert the decorator strip into the plastic guides within the window.

Step 3: Close Cover Firmly and Lock

Close the dispenser cover securely to lock the decorator strip in position.

Mounting Instructions

Step 1: Open Dispenser Cover

Use the key or push button to open the dispenser cover for mounting access.

Step 2: Position and Level Mounting Template

Tape the mounting template to the wall at the desired height and ensure it is level.

Step 3: Prepare Mounting Holes

Pre-drill mounting holes based on the template and insert wall anchors if needed.

Step 4: Mount Dispenser to Wall

Align dispenser over holes, insert screws, and tighten securely to the wall.

Loading Paper Rolls

Step 1: Place New Roll on Holder Arms

Open the dispenser, pull the holder arm, and place the new roll with paper feeding from beneath.

Step 2: Thread Sheet into Dispenser

Thread the paper tail under the stationary roll holder shaft and rotate the feed knob.

Step 3: Close Dispenser Door

Once threaded, close the dispenser door firmly to begin dispensing.

Stub Roll Loading

Step 1: Open Front Cover

Open the dispenser cover using the push button or key to access the stub roll feature.

Step 2: Place Stub Roll in Tray

Remove the stub roll from the hubs and place it in the designated tray at the back.

Step 3: Load New Roll onto Hubs

Load a new roll onto the holder hubs, ensuring the paper feeds from beneath.

Step 4: Secure New Roll Tail and Close

Place the new roll's tail under the top clips, then close the cover to dispense.

Related product manuals