EasyManua.ls Logo

U-Line PURELL ES6 User Manual

U-Line PURELL ES6
9 pages
To Next Page IconTo Next Page
Page #1 background imageLoading...
Page #1 background image
PAGE 1 OF 9 0623 IH-10632
H-10632, H-10633
PURELL
®
ES6 AUTO
DISPENSER
1-800-295-5510
uline.com
1. Open dispenser by pressing release buttons on
side of dispenser and slide front cover down.
(See Figure 1)
NOTE: Install dispenser with at least 7" of free
space above counter top to allow for routine
service.
SAFETY
PARTS
TOOLS NEEDED
Drill Phillips Screwdriver
Wall Anchor x 4 #10 x 1" Screw x 4
Figure 1
INSTALLATION
NOTE: Please read all instructions carefully
before installing and using the dispenser.
WARNING! Use dispenser only as directed.
WARNING! Do not use in areas where dispenser
may be exposed to wet environments such as
showers or outdoors.
WARNING! Do not install or use in extreme hot
or cold locations.
WARNING! Dispensed product intended for
external use only. Refer to refill for actions in
case of ingestion.
Para Español, vea páginas 4-6.
Pour le français, consulter les pages 7-9.
Question and Answer IconNeed help?

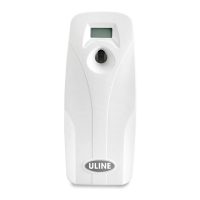
Do you have a question about the U-Line PURELL ES6 and is the answer not in the manual?

U-Line PURELL ES6 Specifications

General IconGeneral
BrandU-Line
ModelPURELL ES6
CategoryDispenser
LanguageEnglish

Summary

Safety Guidelines

General Safety Warnings

Important safety precautions and warnings for using the dispenser, including usage restrictions.

Installation and Setup

Opening the Dispenser

Instructions on how to open the dispenser cover for initial setup and access.

Mounting with Wall Anchors

Steps for securely mounting the dispenser using wall anchors and screws.

Mounting with Adhesive Tape

Steps for mounting the dispenser using the provided adhesive tape for a secure fit.

Final Assembly and Activation

Installing protective elements and activating the dispenser via battery tab.

Refill and Dispenser Preparation

Instructions on checking labels, matching refills, and inserting new refills into the dispenser.

Dispenser Operation Check

Steps for closing the dispenser, confirming readiness via status light, and testing dispensing.

Related product manuals