PAGE 2 OF 9 0623 IH-10632
INSTALLATION CONTINUED
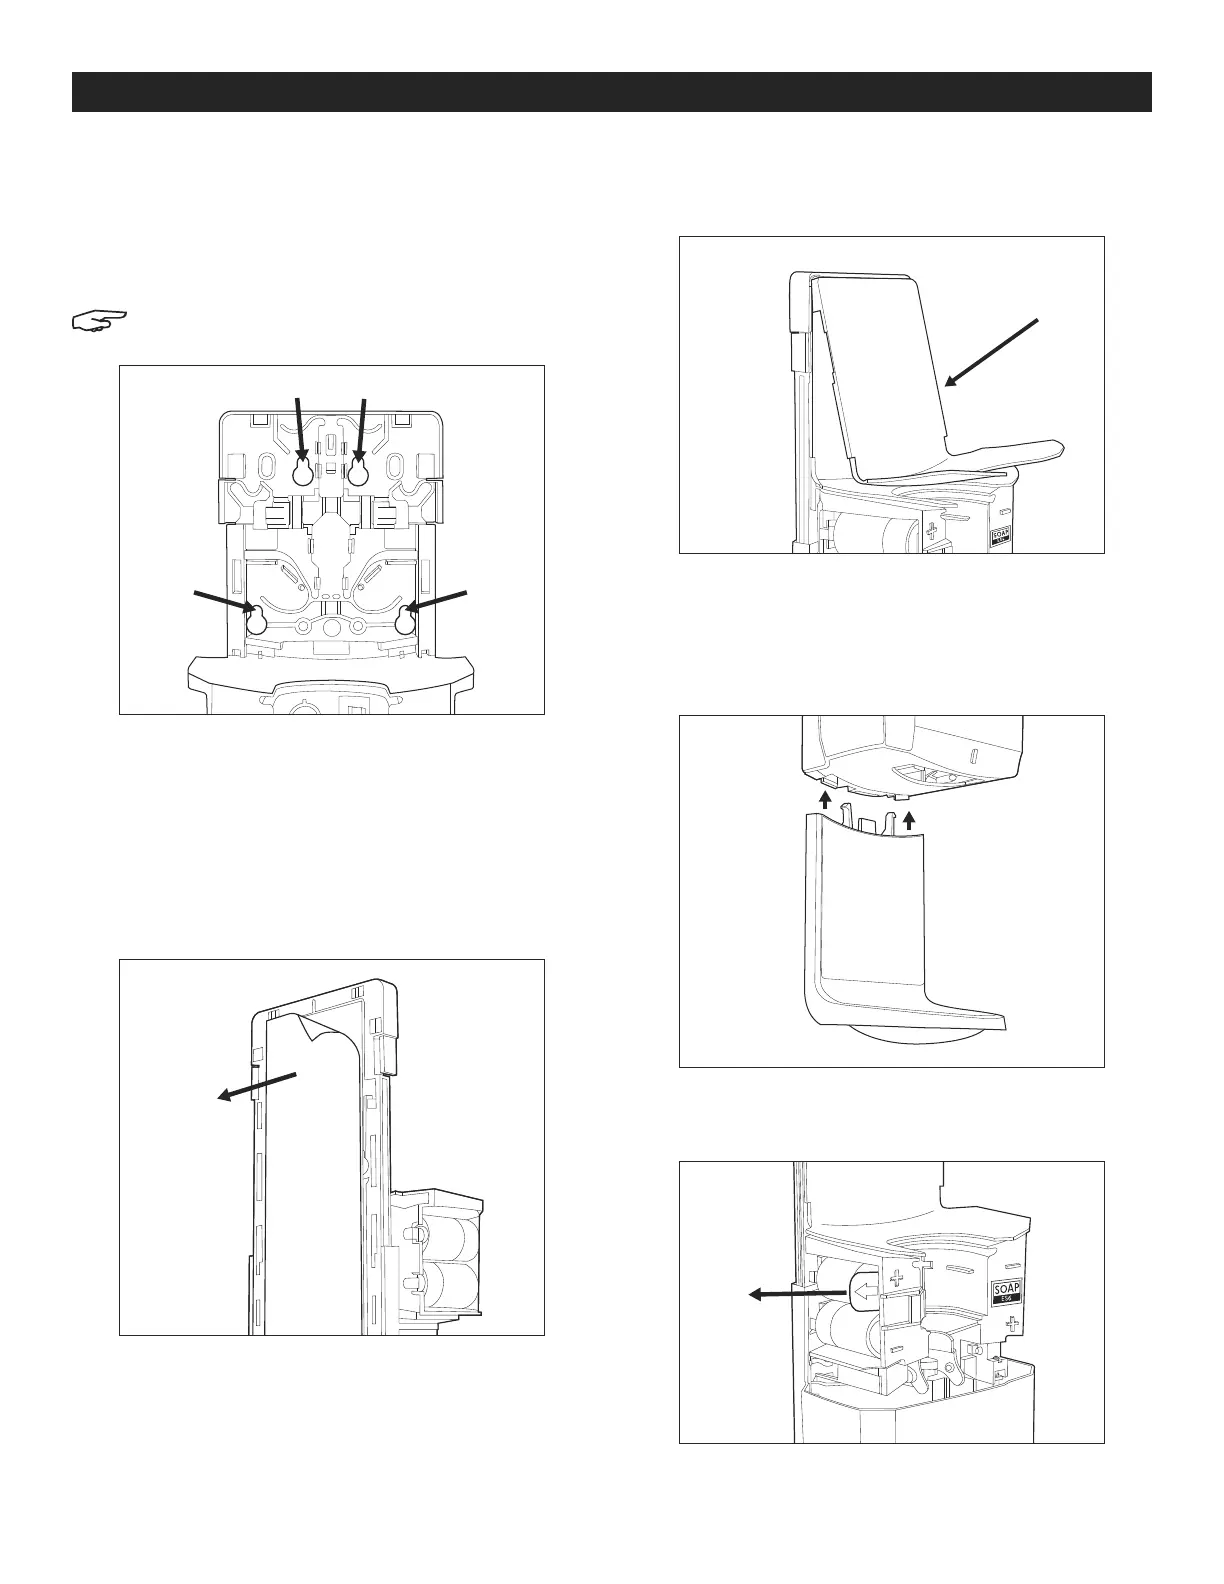
INSTALLING WITH WALL ANCHORS
Use the dispenser as a template. Pierce the tape on the
back plate to mark and drill four holes using 1/4" drill bit.
Use the supplied wall anchors and #10 x 1" screws to
secure the dispenser in place. (See Figure 2)
NOTE: Do not overtighten screws. If using two
screws, the top two holes should be used.
Figure 2
INSTALLING WITH TAPE
1. Clean installation surface with alcohol pad. Allow
surface to dry for 60 seconds. Peel paper off
installation tape and press firmly on back plate
for 10 seconds. For maximum adhesion, wait 24
hours before loading refill or using dispenser.
(See Figure 3)
2. Attach the back plate by pressing on the top two
corners and the bottom middle section. Audible
clicks will confirm proper installation. (See Figure 4)
3. Install the floor and wall protector into the bottom
of the dispenser by aligning plastic tabs with slots
on the dispenser and sliding up until the tabs snap
into place. If installing with wall anchors, use the
dispenser as a template. (See Figure 5)
4. Remove battery tab to activate the dispenser.
(See Figure 6)
Figure 3
Figure 4
Figure 5
Figure 6

 Loading...