Maintenance
14 221.100.002-00 03/2021
www.uni-geraete.com
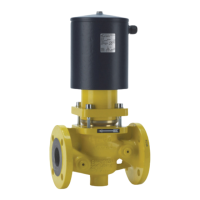
Install the spare parts kit for flange version 4/10-EVSA...; 16-EVSA 30N(H)..: Fig. 1
Disassembling the valve
1. Loosen the hexagon head screws (900/1).
2. Remove the housing flange (108).
3. Remove the Upper part of housing (106) completely.
4. Remove the spring bolt (210/1) and the pressure spring (503/1).
5. Remove the bolt (902/1) with the SL-retainer (949) or split pin (912).
6. Remove the solenoid core (207).
7. Remove the balance piston (220/1) with the piston guide (221/1) from the valve chamber (100).
8. Pull the balance piston (220/1) out of the piston guide (221/1).
Replacing wearing parts
1. Replace the O-rings (403/1, 403/2).
2. Replace the lip-rings (404/1, 404/3).
3. Replace the guide rings (206).
Installing the valve
1. Push the balance piston (220/1) into the piston guide (221/1).
2. Slide the balance piston (220/1) with the piston guide (221/1) into the valve chamber (100).
3. Secure the solenoid core (207) with the bolt (902/1) and the SL-retainer (949) or split pin (912).
4. Insert the pressure spring (503/1) and the spring bolt (210/1).
5. Fit the Upper part of housing (106).
6. Mount the housing flange (108).
7. Tighten the hexagon head screws (900/1) (See “Tightening torques” on page 10).
Install the spare parts kit for flange version 16/25-EVSA: Fig. 2
Disassembling the valve
1. Loosen the setscrew (941/1).
2. Completely unscrew the Upper part of housing (106).
3. Remove the spring bolts (210/1) and the pressure springs (503/1).
4. Remove the bolt (902/1) with the SL-retainer (949) or split pin (912).
5. Remove the solenoid core (207).
6. Loosen the hexagon head screws (900/1).
7. Disassemble the housing flange (108) with housing cylinder (109).
8. Remove the balance piston (220/1) with the piston guide (221/1) from the valve chamber (100).
9. Pull the balance piston (220/1) out of the piston guide (221/1).
Replacing wearing parts
1. Replace the O-rings (403/1, 403/2, 403/3).
2. Replace the lip-rings (404/1, 404/3).
3. Replace the guide rings (206).
Installing the valve
1. Push the balance piston (220/1) into the piston guide (221/1).
2. Slide the balance piston (220/1) with the piston guide (221/1) into the valve chamber (100).
3. Install the housing flange (108) with housing cylinder (109).
4. Tighten the hexagon head screws (900/1) (See “Tightening torques” on page 10).
5. Secure the solenoid core (207) with the bolt (902/1) and the SL-retainer (949) or split pin (912).
6. Insert the pressure springs (503/1) and spring bolts (210/1).
7. Screw on the Upper part of housing (106).
8. Tighten the setscrew (941/1).
Install the spare parts kit for threaded version 4/10-EVSA 10 – 20 (1” – 2”): Fig. 6
Disassembling the valve
1. Completely unscrew the Upper part of housing (106).
2. Remove the spring bolt (210) and the pressure spring (503).
3. Remove the bolt (902) with the SL-retainer (949) or split pin (912).
4. Remove the solenoid core (207).
5. Unscrew the balance piston (220/1) with the piston guide (221/1) from the valve chamber (100).
6. Pull the balance piston (220/1) out of the piston guide (221/1).