INSTALLATION
Section 2-3
• Raster to Vector Conversion Software (user supplied)
Adobe Streamline or CorelTRACE
• CAD Software (user supplied)
AutoCAD or AutoCAD LT for Windows
• FONTS (user supplied)
Use True Type fonts ONLY. Do not use PostScript or bitmapped fonts.
System Assembly
1
2
2
3
4
4
5
6
7
9
9
3
3
3
5
6
7
8
9
9
9
9
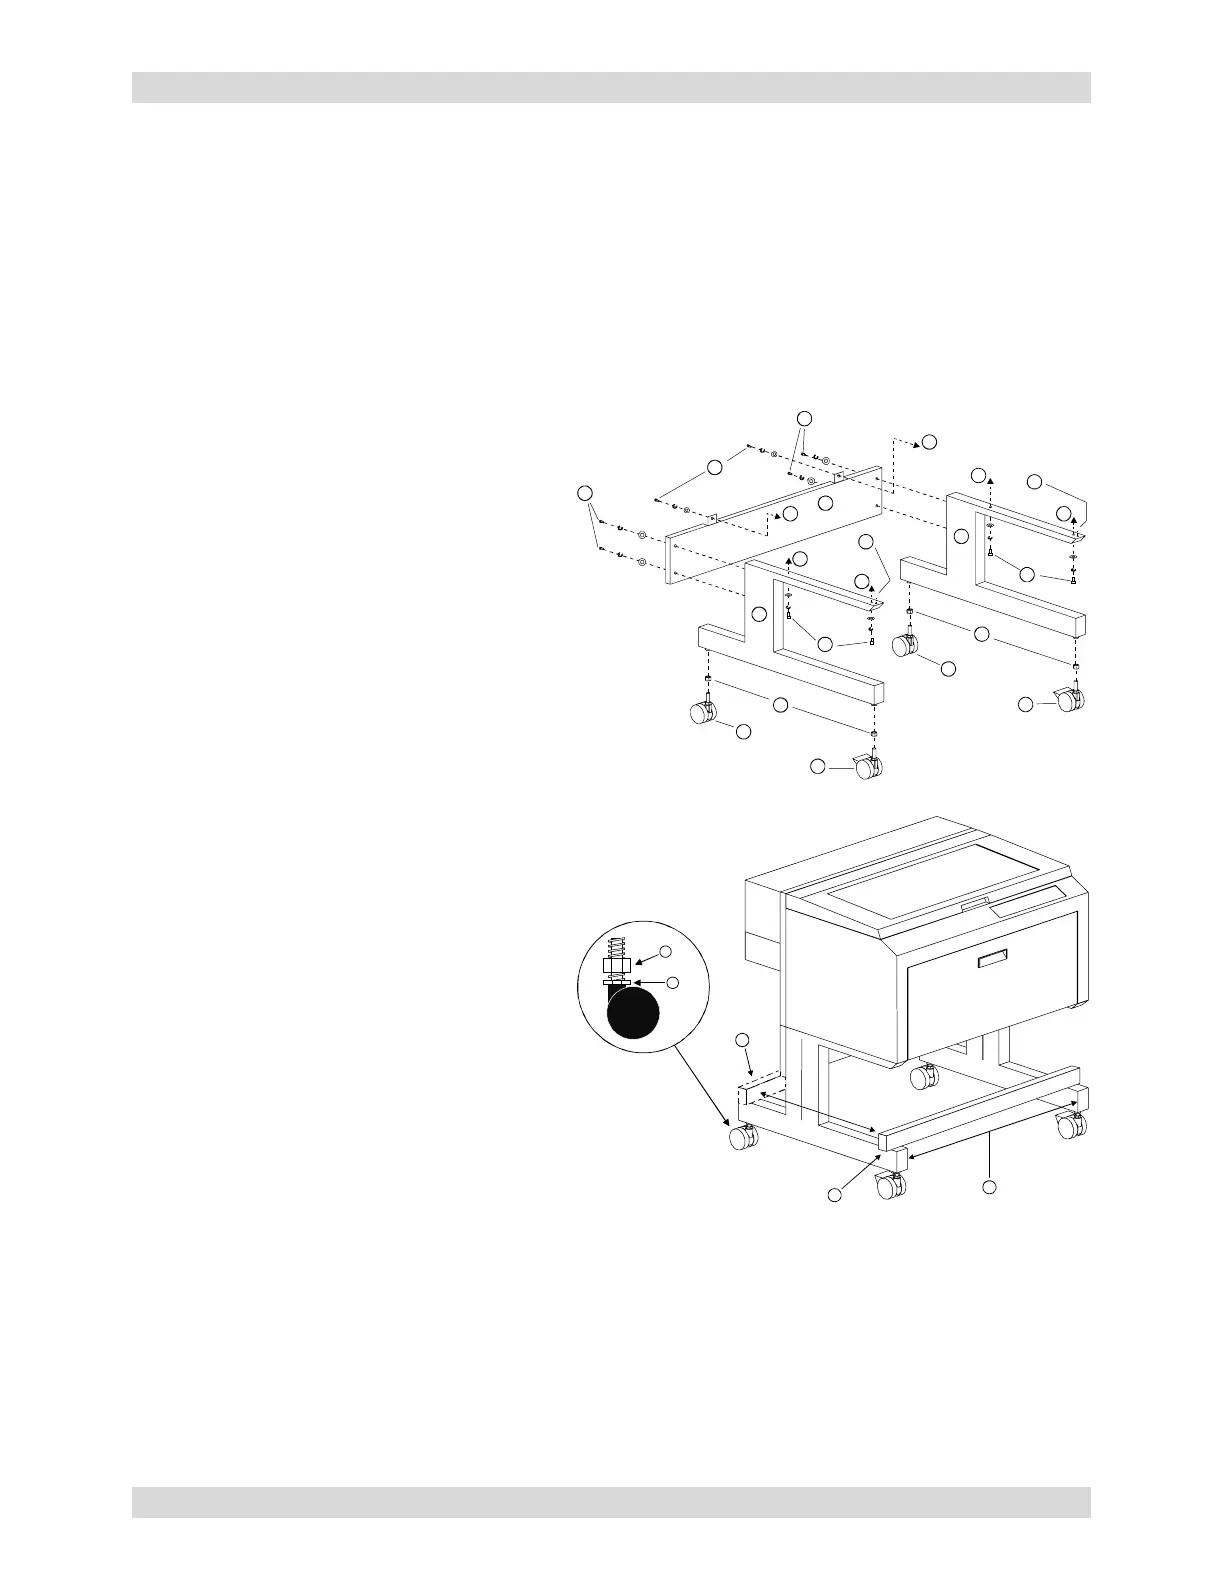
Cart
(1) Back panel
(2) Legs (both are identical)
(3) 1/4-20 x ½, socket head screws with lock
and flat washers
(4) Nuts (4)
(5) Non-locking casters
(6) Locking casters
(7) 10-32 x 1/4 socket head screws (serve as
guides for the main enclosure)
(8) 10-32 x 3/8 socket head screws with lock
and flat washers
(9) Connect to main enclosure
• Assemble the cart as it appears in the
diagram but leave all of the screws slightly
loose except for the casters, which should
be tightened as far as it can go into the
cart leg.
1
2
3
4
5
• With the assistance of one or two other
people, place the system on top of cart
and secure with the screws provided.
• Open front door all the way to ensure that
it does not come in contact with the cart
legs. If it does, gently spread the legs
apart. Securely tighten all the screws and
re-check.
• Attach your exhaust system’s flexible
rubber hose to the exhaust port at the rear
of the laser system and secure with a
hose clamp.
• Locate the laser system in its final resting
location.
• Place a bubble level across the front (2) and rear legs (3). Adjust the caster height using the
adjustment screw (4) until both the rear part and the front part of the legs are level with respect to
each other. Once the system is level, secure all casters by tightening the nut (5) up against the cart
leg.
• Open the top door and remove the rubber band that is holding the arm in place.
• Remove any remaining packing materials, accessories or any other items that may be located inside
the cabinet or on top of the engraving table.