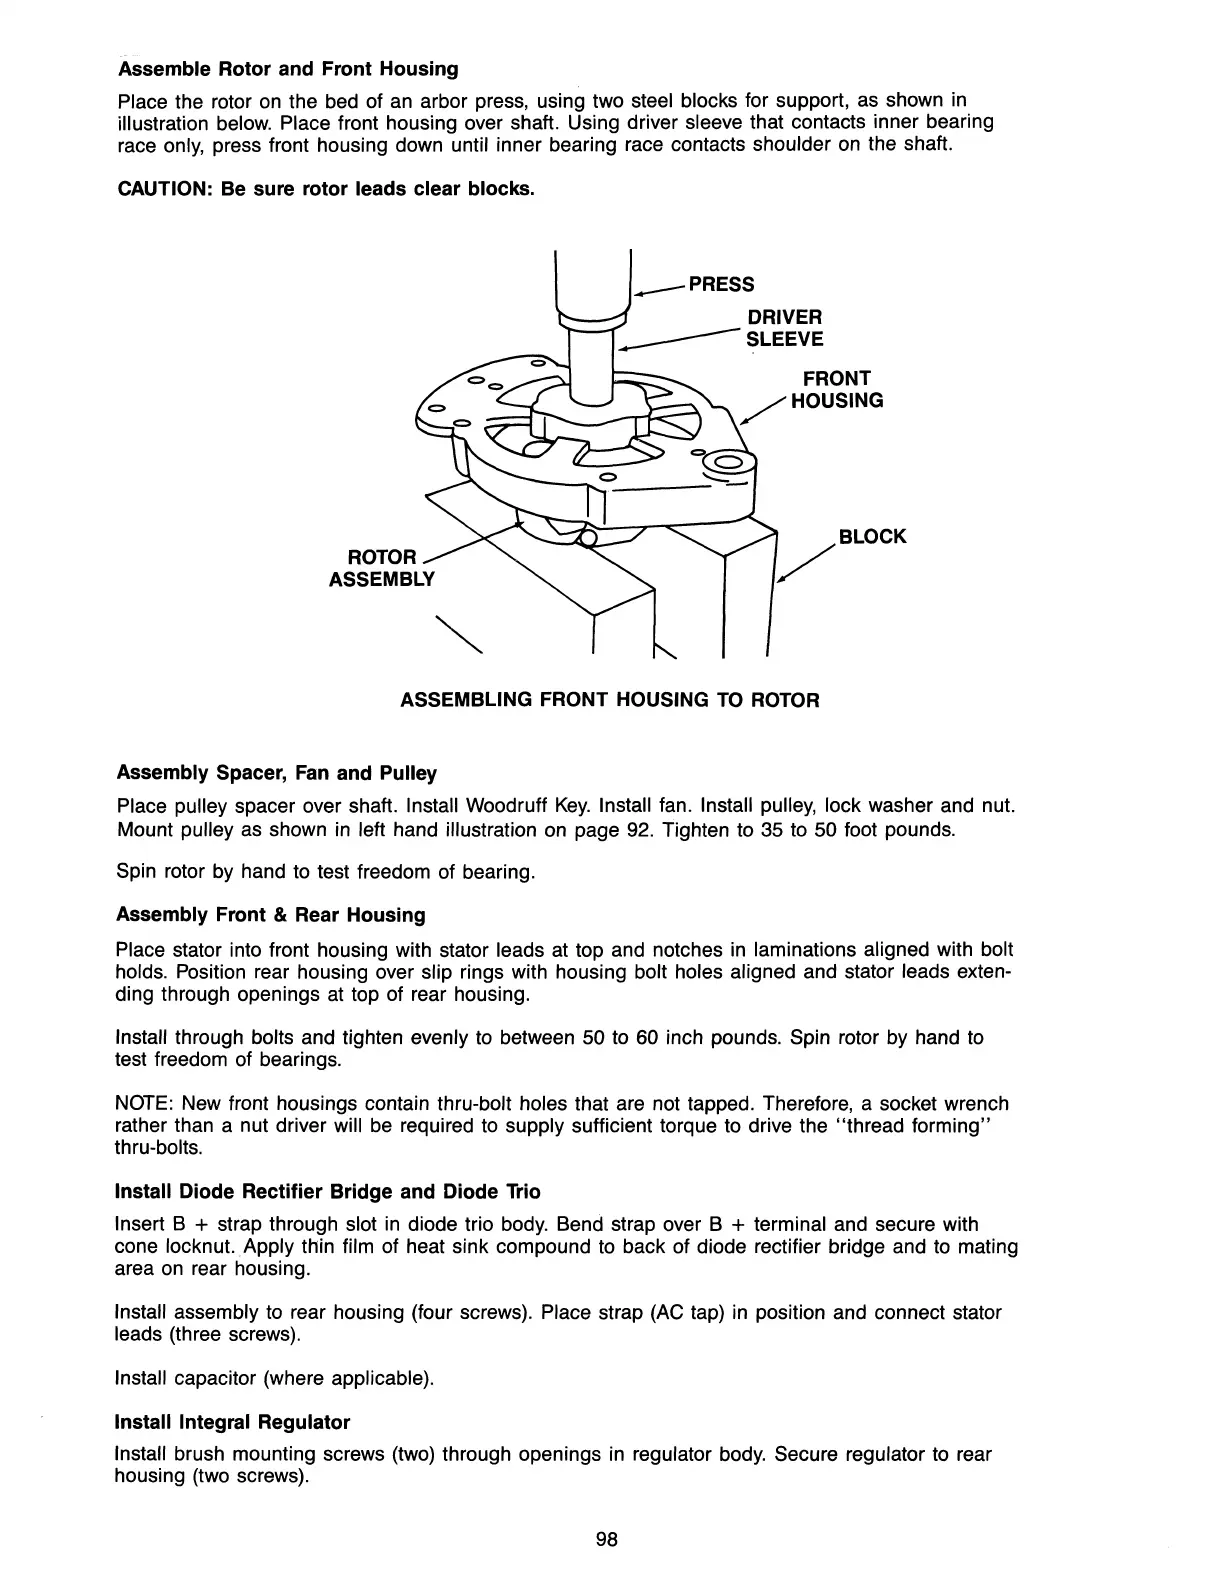
Assemble Rotor and Front Housing
Place the rotor
on
the bed of an arbor press, using two steel blocks for support,
as
shown in
illustration below. Place front housing over shaft. Using driver sleeve that contacts inner bearing
race only, press front housing down until inner bearing race contacts shoulder
on
the shaft.
CAUTION: Be sure rotor leads clear blocks.
____
PRESS
DRIVER
_______
SLEEVE
FRONT
/HOUSING
ASSEMBLING FRONT HOUSING
TO
ROTOR
Assembly Spacer,
Fan
and Pulley
Place pulley spacer over shaft. Install Woodruff
Key.
Install fan. Install pulley, lock washer and nut.
Mount
pulley
as
shown in left hand illustration on page
92.
Tighten to 35 to 50 foot pounds.
Spin rotor by hand to test freedom of bearing.
Assembly Front & Rear Housing
Place stator into front housing with stator leads at top and notches in laminations aligned with bolt
holds. Position rear housing over slip rings with housing bolt holes aligned and stator leads exten-
ding through openings at top of rear housing.
Install through bolts and tighten evenly
to
between 50 to 60 inch pounds. Spin rotor by hand to
test freedom of bearings.
NOTE:
New front housings contain thru-bolt holes that are not tapped. Therefore, a socket wrench
rather than a nut driver
will
be
required to supply sufficient torque to drive the "thread forming"
thru-bolts.
Install Diode Rectifier Bridge and Diode
Trio
Insert B + strap through slot
in
diode trio body. Bend strap over B + terminal and secure with
cone locknut.
Apply
thin film of heat sink compound to back of diode rectifier bridge and to mating
area
on
rear housing.
Install assembly to rear housing (four screws). Place strap (Ae tap) in position and connect stator
leads (three screws).
Install capacitor (where applicable).
Install Integral Regulator
Install brush mounting screws (two) through openings in regulator
body.
Secure regulator to rear
housing (two screws).
98