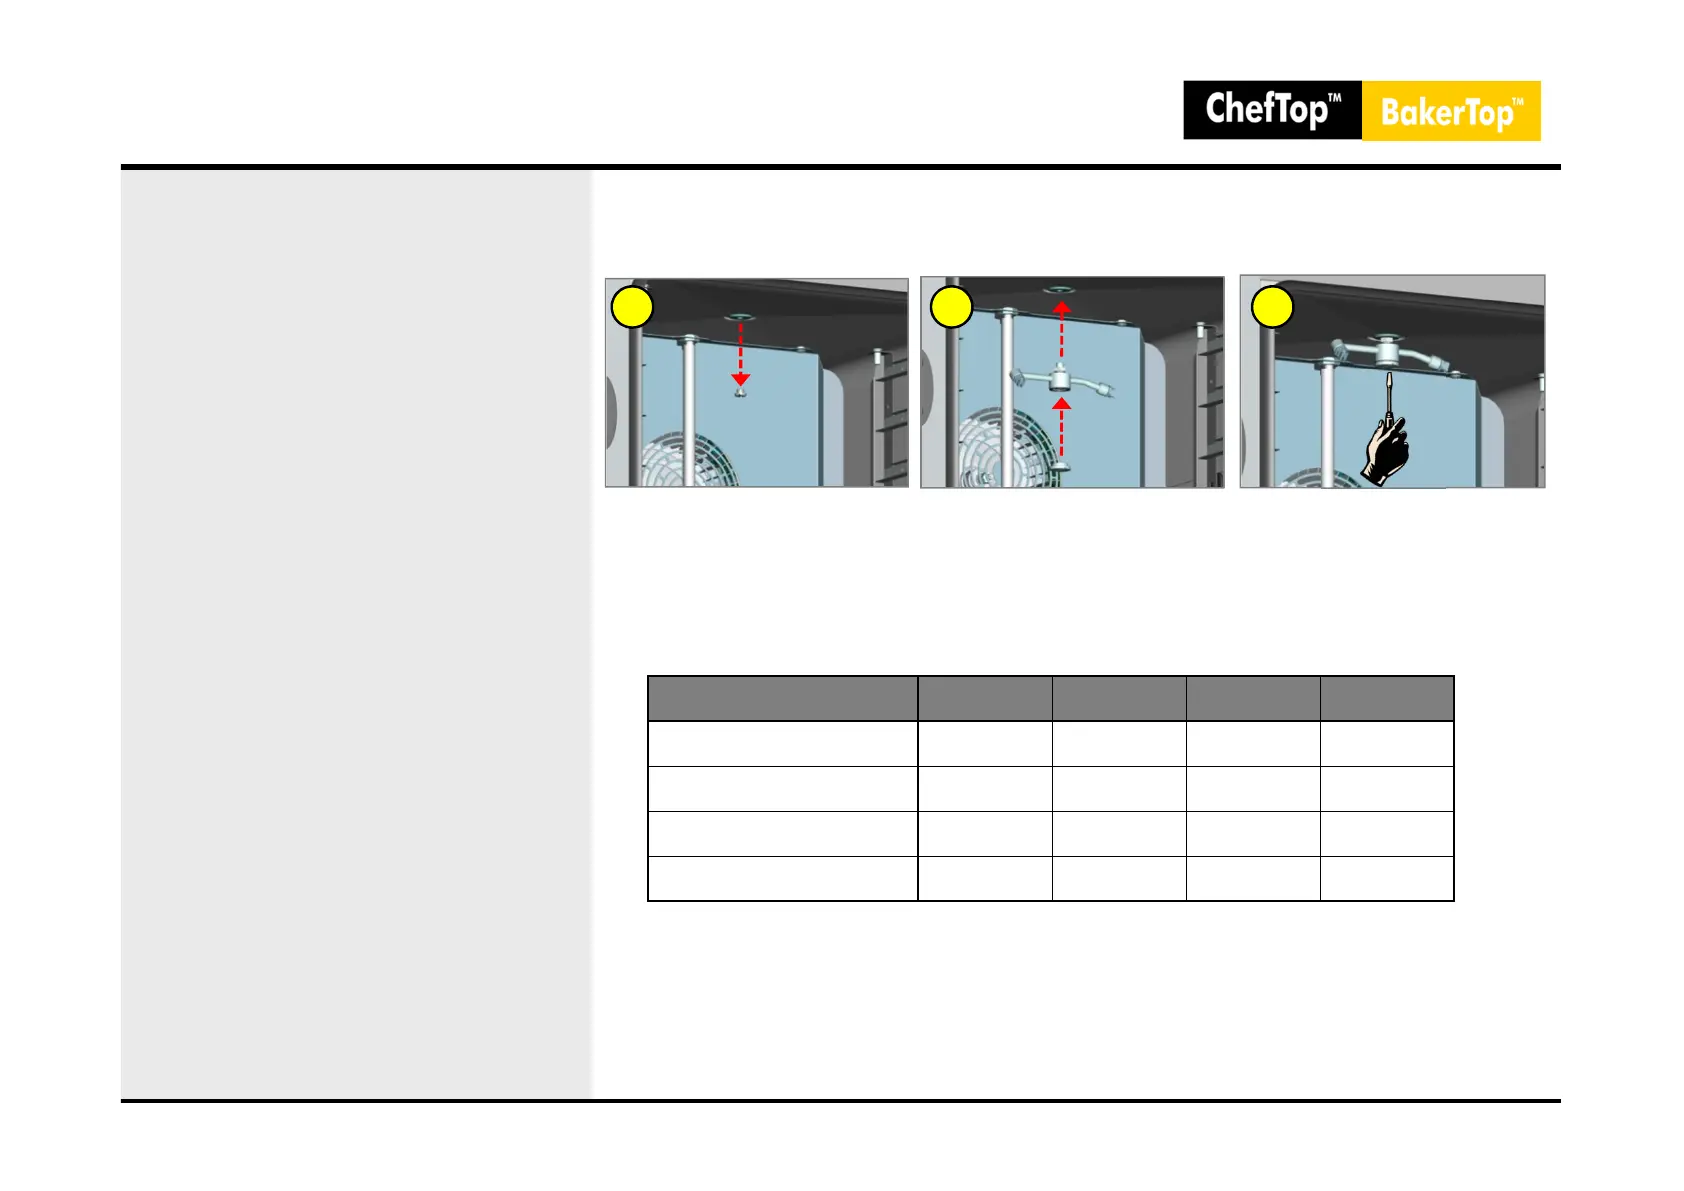
9. ROTOR.Klean – Automatic Washing System
Installation
- Rotor Assembly:
- Unscrew the closing cap that you find
on the ceiling of the cooking chamber.
- Fix the rotor in the proper hole with
the issued pin (by using a slot screw
driver) and place the issued washer
between them.
- Replace the closing cap by screwing it
with a slot screw driver.
-Detergent and Rise Aid:
- Insert the detergent and rinse aid
suction pipes, fitted with proper
sinking weights, into the respective
tanks (check the labels on the back of
the washing system box).
- Use recommended detergent and
rinse aid brands and models; the use
of different products does not grant
the correct washing of the oven
cooking chamber and invalidates the
warranty. Refer to the supply contacts
indicated at the end of the manual
instructions.
Rotor Assembly
Consumption data
33
FUNCTION LH20 SHORT (L1) MEDIUM (L2) LONG (L3)
Duration (minuts) 5 46 77 117
Water consuption (liters) - 35,6 62,4 89,2
Detergent consuption (liters) - 0,135 0,215 0,315
Rinse consuption (liters) - 0,03 0,03 0,03
A CB
 Loading...