Register thermostat and/or system device
to a controller
To register room thermostats and system devices (interface
etc.) to the controller:
Enter registration mode
12. Press and hold the OK button on the controller, for
about 3 seconds, until the LED for channel 1 (or the
first unregistered channel) flashes red.
Register a thermostat
13. Select a thermostat channel.
13.1 Use buttons < or > to move the pointer (LED
flashes red) to a preferred channel.
13.2 Press the OK button to select the channel for
registration. The LED for the selected channel
starts flashing green.
13.3 Repeat steps 13.1 and 13.2 until all channels to
be registered with the thermostat are selected
(LEDs flashing green).
Note! It is recommended to register all channels
to the thermostat at the same time.
14. Select a thermostat.
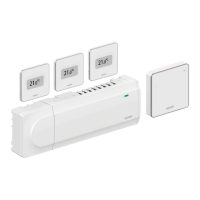
THERMOSTAT T-143 AS A THERMOSTAT, WITH
VARIOUS FUNCTIONS
14.1 Gently press and hold the registration button
on the thermostat, release when the LED starts
flashing green (located in the hole above the
registration button).
The selected channel LED in the controller turns
fixed green and the registration is complete.
THERMOSTAT T-144
14.1 Using a pointed instrument, gently press and hold
the registration button on the thermostat, release
when the LED above the dial starts flashing.
The selected channel LED in the controller turns
fixed green and the registration is complete.
THERMOSTAT T-141 AND T-145
14.1 Gently press and hold the registration button
on the thermostat, release when the LED on the
front of the thermostat starts flashing.
The selected channel LED in the controller turns
fixed green and the registration is complete.
THERMOSTATS T-146, T-148 AND T-149
14.1 Press and hold both - and + buttons (T-149
= and ) on the thermostat until the text
CnF (configure) and a communication icon is
displayed.
The selected channel LED in the controller turns
fixed green and the registration is complete.
15. Repeat steps 13 and 14 until all available thermostats
are registered.
Register a system device (I-147 etc)
NOTE!
At least one thermostat must be registered before
registering a system device.
16. Make sure to be in registration mode (step 12).
16.1 Use buttons < or > to move the pointer to the
power LED (LED flashes red).
16.2 Press the OK button to enter system channel
registration mode. The power LED flashes
according to the pattern long blink, short pause,
long blink and channel 1 LED flashes red.
16.3 Select a system channel, see list below.
1 = Touch screen interface
2 = Not used
3 = Public thermostat with outdoor sensor
4 = Public thermostat with heating/cooling
switch from sensor input.
5 = Public thermostat with Comfort/ECO switch
16.4 Press the OK button to select system device
channel. The channel LED starts flashing green
17. Select a system device matching the system channel.
INTERFACE I-147
17.1. Power up the interface and attach it to the
charger.
17.2. Follow the startup guide in the interface up until
registration.
17.3 Press Link Touch Screen to controller in the
Startup guide, or Link menu (Main menu >
Preferences), to initialize registration.
17.4 The interface gets registered to the controller.
The selected channel LED in the controller turns
fixed green and the registration is complete.
THERMOSTAT T-143 AS A SYSTEM DEVICE, WITH
VARIOUS FUNCTIONS
17.1 Gently press and hold the registration button
on the thermostat, release when the LED starts
flashing green (located in the hole above the
registration button).
The selected channel LED in the controller turns
fixed green and the registration is complete.
18. Repeat steps 16 and 17 until all available system devices
are registered.
Exit registration mode
19. Press and hold the OK button on the controller, for
about 3 seconds, until the green LEDs turn off to end
registration and return to run mode.