(Distance to
bottom of
wood beams.)
Front View
90°
B
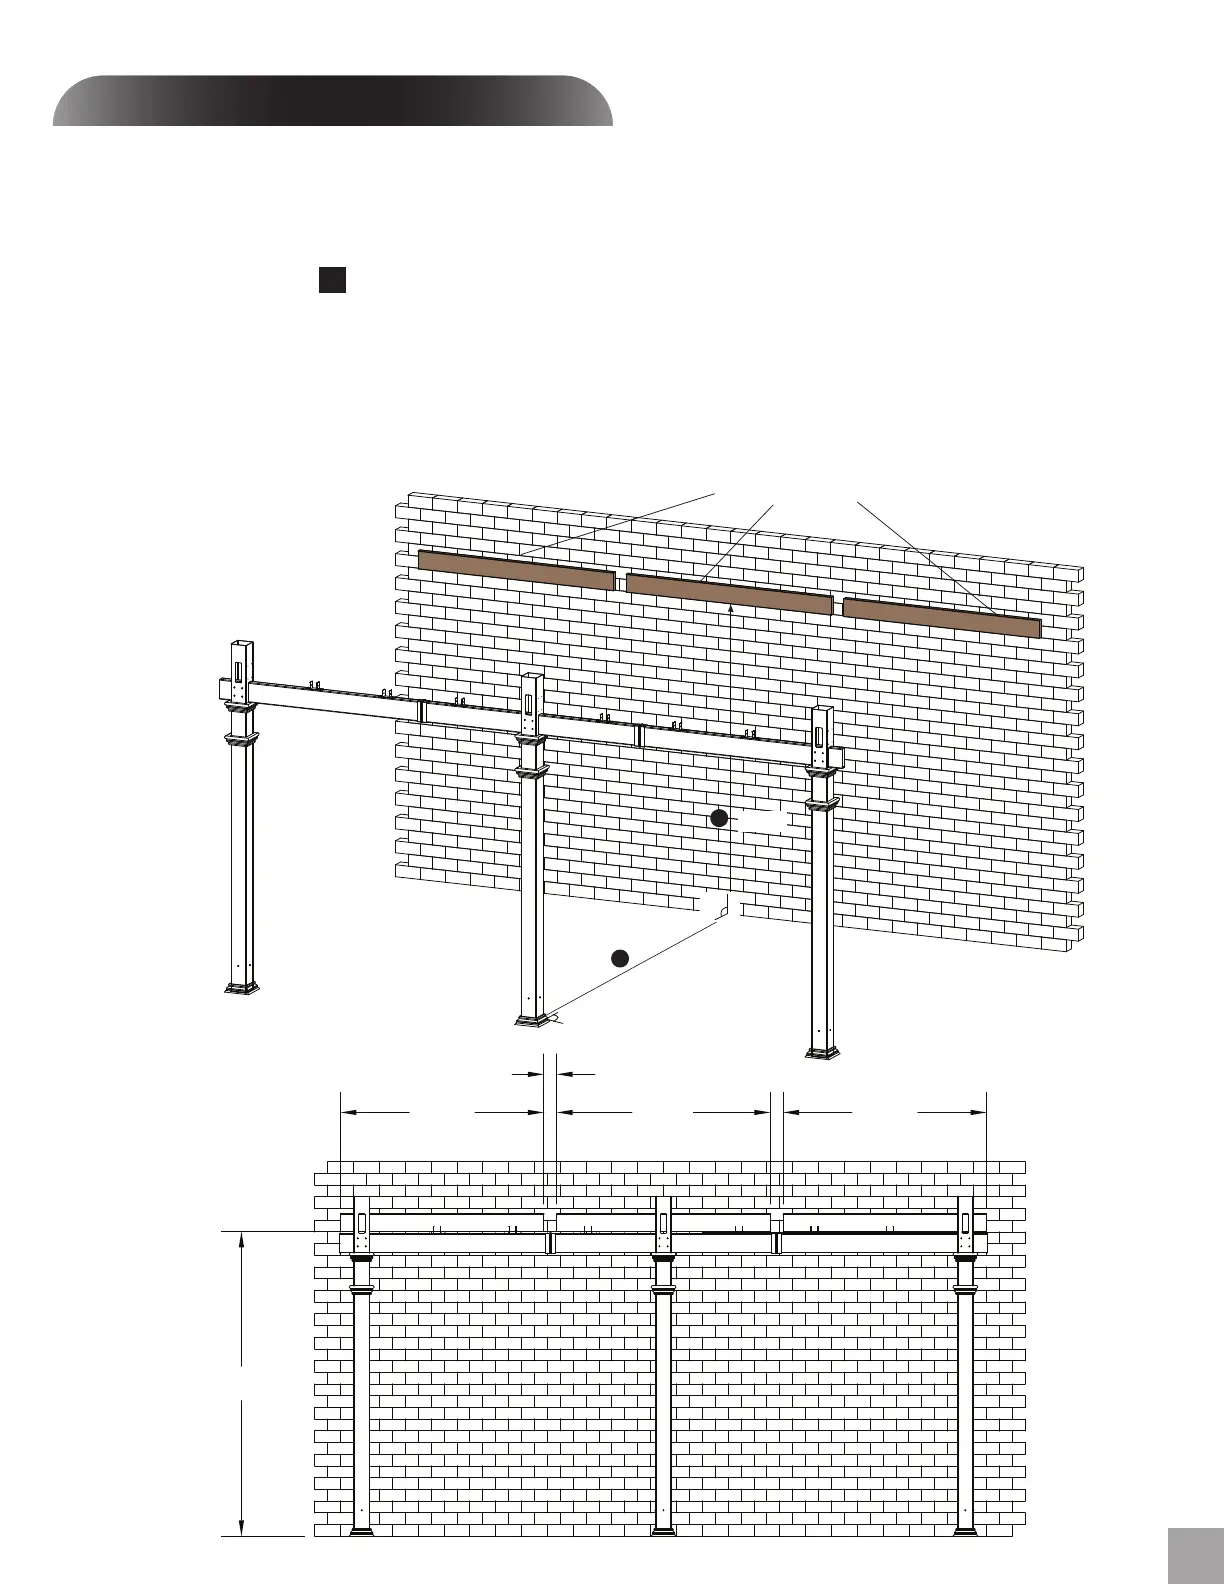
Ledger Boards installation
Using a helper and two ladders proceed to complete the
following steps:
Mount the three 2x6 (4x15cm) pressure treated wood boards
(sold se-parate) on your wall surface. Please consult your local
hardware store regarding methods of mounting. We
recommend 11 lag screws if mounting to a wood siding or
concrete/brick anchor if you are mounting to a brick wall.
Screws heads should be recessed flush with the wood beam.
1
STEP SEVEN
15
To locate the position of your wood beams;
A. Measure half way between the middle vinyl post
B. Mark and draw a string line square to the wall.
C. Measure up 94 3/8” (239.7cm) and mark with pencil. This would
be the bottom centre of the middle wood board as shown.
2x6 x 16’ (4x15x488cm) Pressure Treated Board cut in
three pieces 58”, 66“, and 58” (147.3, 167.4, 147.3cm)
94 3/8 in
(239.7 cm)
58 in (147.3cm)
(Wood Beam Length)
66 in (167.4cm)
(Wood Beam Length)
58 in (147.3cm)
(Wood Beam Length)
4 in (10.2 cm) (Distance Between Wood Beams)
C
94 3/8”
90°