A700 Step-by-step maintenance procedures.
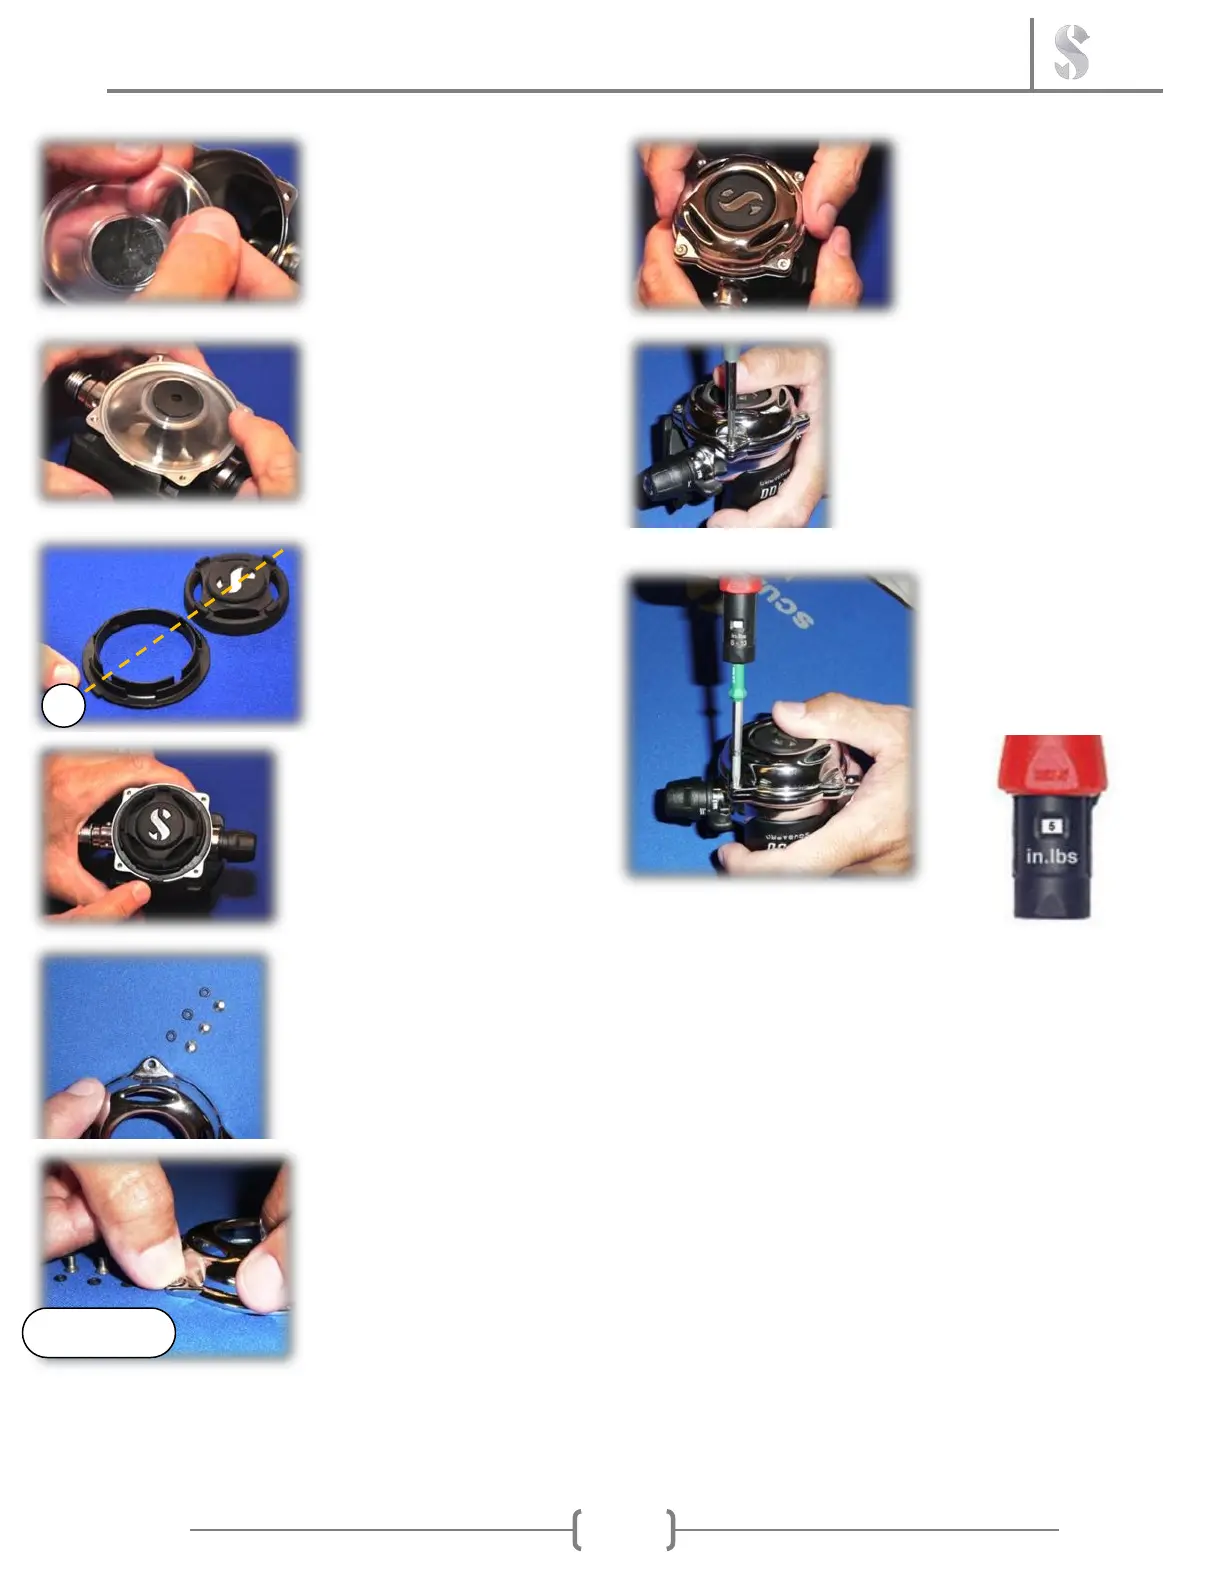
30. Check for previous
folds/creases on the
diaphragm “lip”.
Any imperfections found
merits replacement.
36. Align the cover (with
screws and o-rings
already installed).
31. Be certain the entire
circumference of the
diaphragm is laying flat
and into the case
diaphragm groove.
37. Begin to lightly snug
the 4 TORX® screws
down, using an X
tightening pattern.
32. With the outside ring
tab @ the 6 o‟clock
position, press the cover
into place, orienting the
bottom of the “S” logo
towards the tab.
38. Using Torque driver,
tighten the screw to the
recommended 6.2 inch
pounds / 0.7 Newton
meters. See tool list on
page 2 of this manual.
33. Place the two piece
assembly, orienting the
ring tab into case notch
located at the “6 o-clock
position”.
34. Align one cover hole
with an o-ring.
A neoprene surface is
best!
35. Press the screws, one
by one, through the front
cover hole and through
the new 363 o-rings.
The neoprene provides
just enough support and
give, to allow the screw
to pass through the o-ring
until installed.