Do you have a question about the Uwatec D420 and is the answer not in the manual?
Provides essential guidelines for regulator use with Enriched Gas (Nitrox) and clean environments.
Details the process and requirements for cleaning regulator components, referencing a specific document.
Specifies requirements for seals, o-rings, plastic, rubber, and metallic components during service.
Essential tools including screwdrivers, knives, punches, and hex keys for disassembly and assembly.
Includes specific spanners and multi-tools required for adjusting components like the flow vane.
Fine-tipped tools such as picks, pliers, forceps, and tweezers for delicate part manipulation.
Tools for specific tasks like retaining ring removal, torque application, and hex drive extensions.
Steps for removing the mouthpiece, cover pin, decal, purge button, and face plate.
Procedures for carefully lifting out the diaphragm, thrust washer, and flow vane plug.
Instructions for removing the lever, decorative cap, case plug, and hose inlet with o-rings.
Steps to disassemble the flow vane assembly, housing support, and exhaust tee components.
Final steps to access and inspect the exhaust valve for replacement or damage.
Guidance on fitting the exhaust valve, exhaust tee, and securing them with the pin.
Instructions for lubricating and fitting o-rings onto the housing support, hose inlet, and case plug.
Steps for inserting and securing the housing support and housing into the regulator case.
Details on installing the lever, flow vane, adjustment screw, and related components.
Instructions for positioning the poppet, spring, spring support, and flow vane sub-assembly.
Steps for fitting the flow vane washer, dive switch, o-ring, and flow vane plug.
Pressurizing the regulator and adjusting the screw for air leaks and cracking effort.
Ensuring diaphragm seating and adjusting the lever height for optimal performance.
Attaching the faceplate, thrust washer, and installing the purge button assembly.
Performing leak tests without air supply and checking for freeflow in the Pre-Dive position.
Applying decals, fitting safety pins, decorative caps, and completing reassembly.
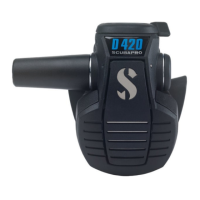
The provided document is a service manual for the Scubapro D420 second stage regulator, offering detailed instructions for its disassembly, reassembly, tuning, and final testing. It emphasizes the importance of proper maintenance for scuba life support equipment, noting that DIY service can be dangerous. The manual is an adaptation of a March 2020 Scubapro service procedure, with additional modifications and insights from the author's experience.
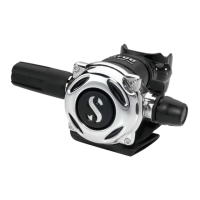
The Scubapro D420 is a second stage regulator designed for use with enriched gas (Nitrox) up to EAN40. Its primary function is to deliver breathing gas to the diver on demand, reducing the intermediate pressure from the first stage to ambient pressure. The regulator features a unique center-balanced design intended for efficient air delivery. Key components include a diaphragm, poppet (stem assembly), flow vane, and dive/pre-dive switch, all working in concert to control gas flow and inhalation effort. The dive switch allows the diver to adjust the venturi effect, optimizing performance for different diving conditions.
The D420 regulator is designed for ease of use and adaptability in various diving scenarios. The dive switch, located on the side of the regulator, allows the diver to toggle between "Dive" and "Pre-Dive" positions. In the "Pre-Dive" position, the venturi effect is reduced, helping to prevent freeflow, particularly when the regulator is out of the diver's mouth or in strong currents. This feature enhances safety and conserves gas. When in the "Dive" position, the venturi effect is maximized, providing effortless breathing at depth. The purge button, prominently located on the front, allows for easy clearing of water from the regulator. The mouthpiece is designed for comfort and secure fit, ensuring a good seal during use. The hose inlet can be mounted on either side of the regulator, offering flexibility in hose routing to suit individual diver preferences and equipment configurations. The regulator's design aims to provide consistent and comfortable breathing performance across a range of depths and conditions.
The service manual provides comprehensive instructions for maintaining the D420 regulator, focusing on cleanliness, proper lubrication, and precise assembly.
All components, especially seals, o-rings, and metallic parts, must be perfectly clean and free from dust, hydrocarbons, or other particulate matter. The manual emphasizes checking o-ring lands for imperfections or burrs and inspecting plastic/rubber components for deformation or damage. Metallic components should be free of separation, and chrome plating should be smooth and undamaged. The diaphragm must be examined for cuts, holes, or irregular edges, and its disc insert checked for security.
All o-rings, particularly those for dynamic use, require lubrication with approved lubricants like Christolube MCG-111 or Tribolube 71. The lubricant container and tools used for service must also be impeccably clean.
The manual details a step-by-step disassembly procedure, starting from removing the mouthpiece and cover pin, then progressing to the purge mechanism, faceplate, diaphragm, flow vane plug, dive switch, lever, and internal housing components. Specific tools, such as flat blade screwdrivers, pin punches, hex keys, face spanners, and o-ring picks, are identified for each step. During reassembly, critical steps include carefully fitting the exhaust valve and tee, lubricating and seating o-rings, inserting the housing support, and assembling the flow vane sub-assembly. The manual provides specific torque values for certain threaded components, such as the hose inlet, to ensure proper sealing and structural integrity.
After reassembly, the regulator must be connected to an LP hose and pressurized to 125-145 psi for tuning. The adjustment screw (27) is used to set the cracking effort, which is the force required to initiate inhalation. Clockwise rotation increases spring tension and cracking effort, while counterclockwise rotation decreases them. The manual highlights a critical step regarding the gap between the lever and the diaphragm disc, recommending a 0.25-0.5mm separation when pressurized to ensure stable tuning and prevent spring binding. It also advises adjusting the screw only when the purge lever is depressed to avoid damaging the knife edge. A leak test is performed by applying light suction to the mouthpiece to check for any leaks in the diaphragm, exhaust valve, or housing. Finally, the dive switch is tested in the "Pre-Dive" position to confirm that freeflow cannot be initiated with a brisk tap on the purge valve, ensuring proper assembly and function of the flow vane sub-assembly. The decorative cap and safety pin are then fitted to complete the reassembly.
The manual also includes warnings about the delicate nature of certain parts, such as the housing's circular knife edge, and advises obtaining replacements from a service kit if any imperfections are noted. It stresses that the exhaust valve is not typically removed during annual service unless damaged. The document underscores the importance of following all instructions carefully, as improper service can compromise the regulator's performance and potentially endanger the diver.
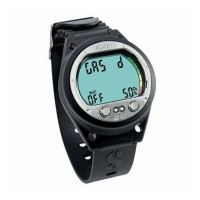
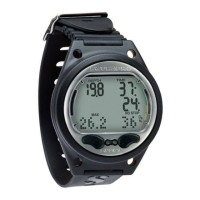
| Type | Dive Computer |
|---|---|
| Display | LCD |
| Nitrox Support | Yes |
| Modes | Air, Nitrox, Gauge |
| Wireless air integration | Yes |
| Digital compass | Yes |
| Battery Type | CR2450 |
| Water Resistance | 100m |