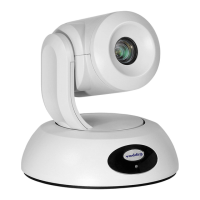
EasyManua.ls Logo

VADDIO RoboSHOT 12 Series User Manual

VADDIO RoboSHOT 12 Series
125 pages
To Next Page IconTo Next Page
Page #1 background imageLoading...
Page #1 background image
Complete Manual for
RoboSHOT 12 and RoboSHOT 30
Robotic PTZ Camera Systems
Including
RoboSHOT QCCU, RoboSHOT QUSB, RoboSHOT QMini,
RoboSHOT QDVI, RoboSHOT QSR, and RoboSHOT AVBMP
Document 411-0025-30 Rev. B
October 2018

Table of Contents

Questions and Answers:

VADDIO RoboSHOT 12 Series Specifications

General IconGeneral
Resolution1920 x 1080
Max Resolution1920 x 1080
Optical Zoom12x
Power Supply12V DC
Camera TypePTZ
Pan Range170 degrees
Tilt Range-30° to +90°
Video OutputsHDMI
ConnectivityEthernet
ControlRS-232, IP
AudioMic/Line Input
FocusAuto, Manual
White BalanceAuto, Manual
Power Consumption15W
Operating Temperature0°C to 40°C
Weight3.5 lbs (1.6 kg)

Summary

Overview of RoboSHOT PTZ Camera Systems

What's in this Guide

Summary of the manual's content and topics covered, including unpacking, features, installation, and control.

Camera Features and Capabilities

Details on the core capabilities, image sensor, zoom, motion, and connectivity of the camera systems.

Quick-Connect Device Features

Quick-Connect Universal CCU (QCCU)

Description of the QCCU device, ideal for lighting/color management and long cabling distances.

Quick-Connect USB (QUSB)

Description of the QUSB device, a versatile solution for soft conferencing applications.

Quick-Connect USB Mini (QMini)

Description of the QMini device, a cost-effective USB solution for single-camera needs.

Quick-Connect DVI/HDMI-SR (QDVI)

Description of the QDVI device, a connectivity solution for legacy equipment.

Quick-Connect SR (QSR)

Description of the QSR device, providing basic connectivity for older equipment.

Unpacking the Camera System

Caution: Handling the Camera

Important safety warning regarding proper handling of the camera to prevent damage.

A Quick Look at the Camera

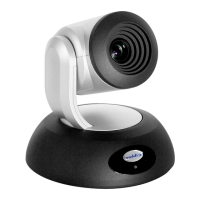
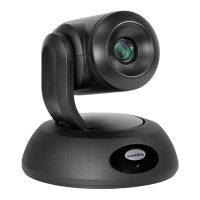
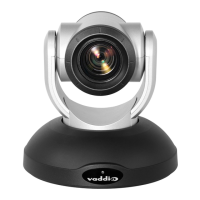
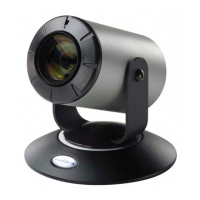
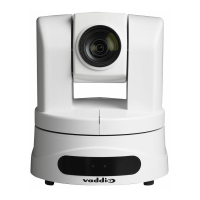
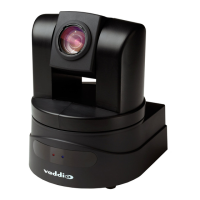
Front of the Camera Components

Explains the optical components, zoom capabilities, IR sensors, and status indicators on the camera front.

Status Indicator Light Meanings

Describes the meaning of the LED status indicator colors on the camera base.

Back of the Camera Connections

Rear Panel Port Descriptions

Details the various ports and connectors on the rear panel of the camera for network and power.

Camera Switch Settings

DIP Switches for Camera Behavior

Configuration of camera behavior using DIP switches for IR frequency, image flip, and baud rate.

Video Resolution Settings

Rotary Switch for Video Resolution

Instructions for setting the desired output resolution using the rotary switch on the camera.

Installing the Camera and Quick-Connect Device

Warranty Protection: Installation Cautions

Critical warnings and cautions to ensure proper installation and avoid voiding the warranty.

Before You Start Installation

Installing the Wall Mount

Step-by-step instructions for mounting the camera using the provided wall mount.

Basic Connections for RoboSHOT Systems

RoboSHOT QCCU System Connections

Diagram and explanation for connecting the RoboSHOT QCCU system.

RoboSHOT QUSB System Connections

Diagram and explanation for connecting the RoboSHOT QUSB system.

RoboSHOT QMini System Connections

Diagram and explanation for connecting the RoboSHOT QMini system.

RoboSHOT QDVI System Connections

Diagram and explanation for connecting the RoboSHOT QDVI system.

RoboSHOT QSR System Connections

Diagram and explanation for connecting the RoboSHOT QSR system.

RoboSHOT AVBMP Connections

Diagram and explanation for connecting the RoboSHOT AVBMP system.

RS-232 Serial Communication

RS-232 Connector Pin-Out

Details the pin configuration for the RS-232 serial connector.

Installing the Camera

Connecting Cables to the Camera

Step-by-step guide for connecting power and video cables to the camera.

Powering Up the Camera

Status Light Indicator Meanings

Explanation of camera status indicated by the front indicator light.

Using the IR Remote Control

IR Remote Control Details

Comprehensive explanation of the IR remote's functions and controls.

Web Interface Operations

Getting the Camera's IP Address

Procedure to find the camera's IP address for web interface access.

Accessing the Web Interface

How to connect to the camera's web interface using a browser.

Administrative Access to Web Interface

Accessing Admin Pages

How to log in as an administrator to access advanced settings.

Quick-Connect Device Web Interface

Quick-Connect USB Mini Modes

Explanation of the Video Mode vs. Control Mode for the Quick-Connect USB Mini.

Configuring Static IP Address for Camera

Networking Page IP Address Configuration

Steps to access the camera's networking page and configure static IP settings.

Managing Access and Passwords

Security Page Settings Overview

Options for managing user access, passwords, and Telnet server settings.

Camera Configuration Management

Saving and Restoring Camera Configurations

Instructions for backing up (exporting) and restoring camera configuration settings.

Installing Camera Firmware Updates

Firmware Update Power/Network Caution

Critical warning about not interrupting the firmware update process.

Adjusting Color and Lighting

Setting Default Lighting Adjustments

Using predefined lighting scenes as starting points for fine-tuning.

Adjusting Light Level and Detail

Adjusting iris, gain, and detail for optimal image quality.

Operating the Camera from the Web Interface

Moving the Camera Controls

Using arrow buttons to pan, tilt, and zoom the camera via the web interface.

Zooming In or Out

Using zoom controls to adjust the camera's magnification via the web interface.

Telnet Command Reference

camera pan Command Details

Details for controlling horizontal camera movement via Telnet.

camera tilt Command Details

Details for controlling vertical camera movement via Telnet.

camera zoom Command Details

Details for controlling camera zoom via Telnet.

Color and Light Management Commands

CAM_WB Command for White Balance

Commands for controlling white balance settings via RS-232.

Camera Specifications

RoboSHOT 12 and 30 Camera Technical Details

Detailed technical specifications for the RoboSHOT camera models, including image and lens.

Operation, Storage, and Care

Environmental Conditions and Handling

Guidelines for operating, storing, and caring for the device, including environmental limits.

Troubleshooting and Care Guide

Power/Responsiveness Issues Troubleshooting

Troubleshooting steps for issues related to power and camera responsiveness.

Video Signal Issues Troubleshooting

Troubleshooting steps for problems with video signal or display.

Camera Control Issues Troubleshooting

Troubleshooting steps for issues with remote or web interface control.

Restoring Factory Settings

Factory Reset via Web Interface

Procedure to restore original factory settings using the web interface.

Factory Reset via Hardware

Procedure to reset camera to factory defaults using hardware DIP switches.

Warranty and Return Policy

Vaddio Customer Service Information

Information on contacting customer service for testing, repair, or replacement.

Related product manuals