Supplied By www.heating spares.co Tel. 0161 620 6677
40 Instructions for installation and servicing ecoTEC
3
4
1
2
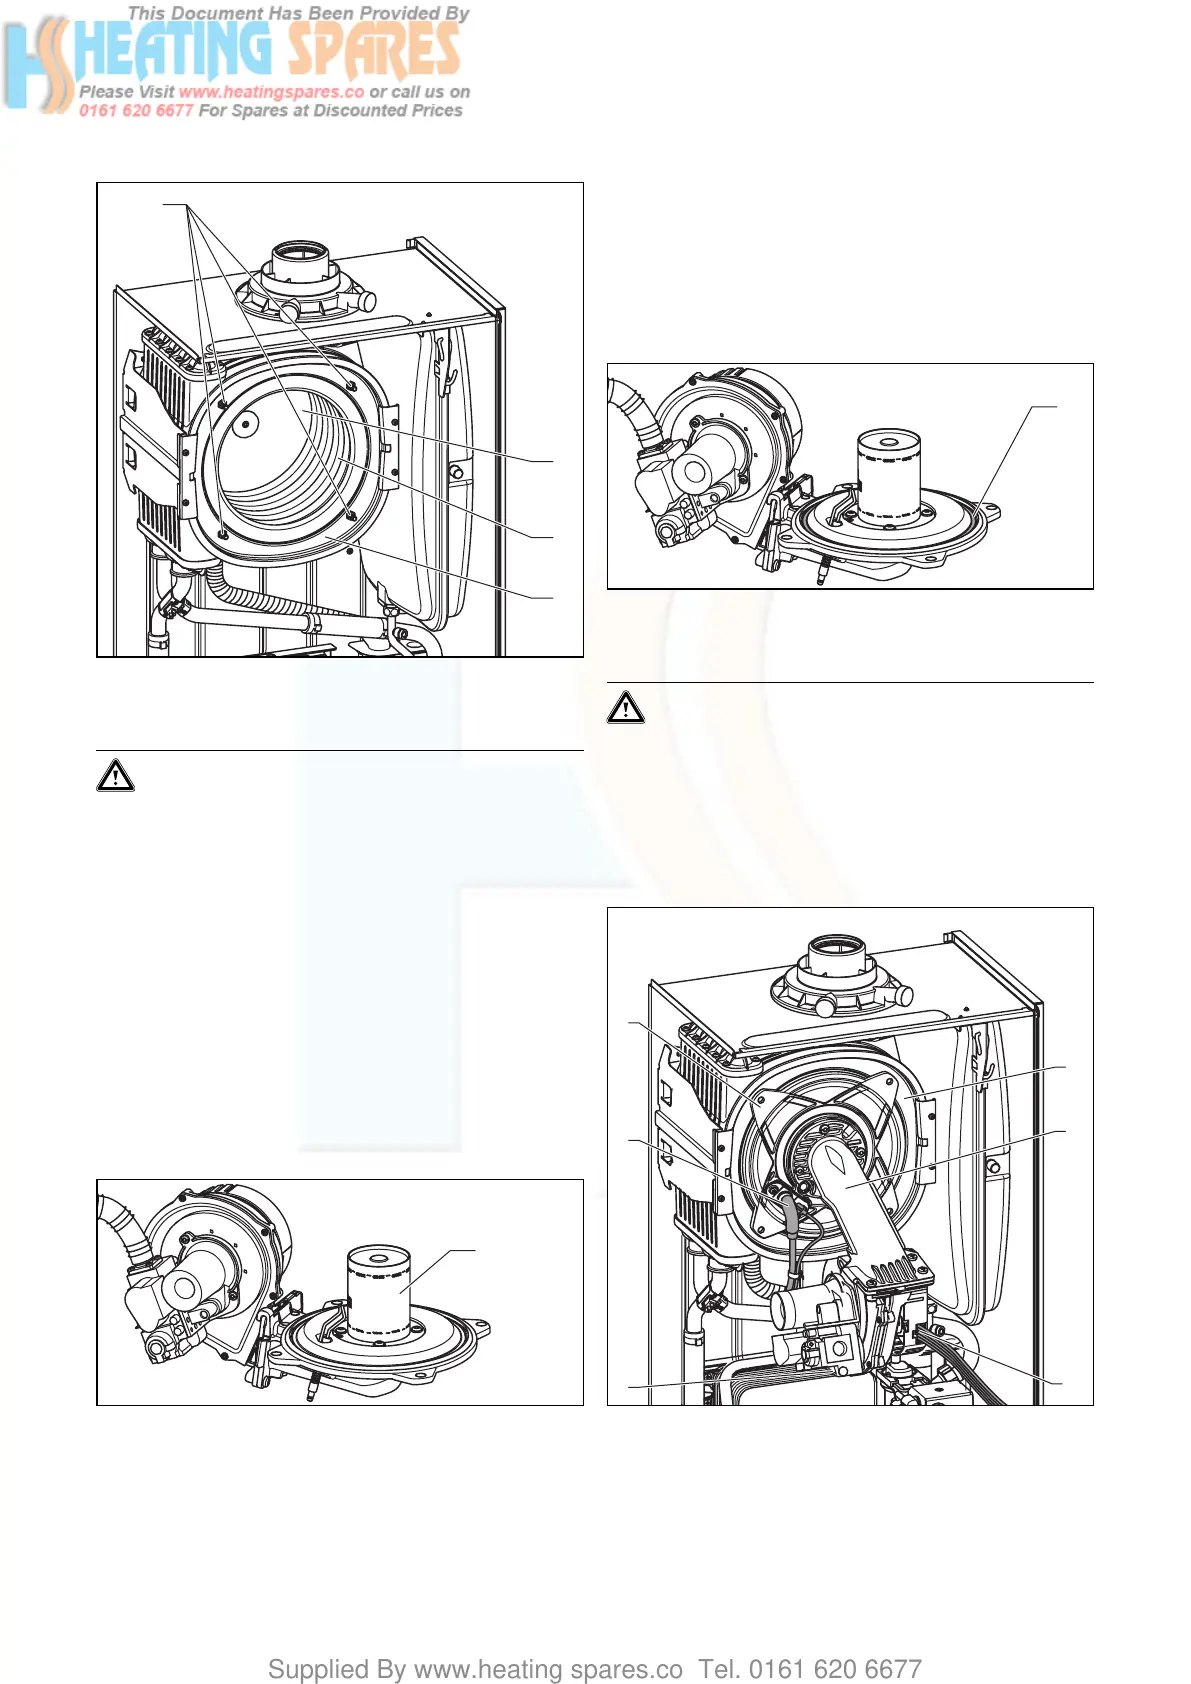
Fig. 7.3 Cleaning the integral condensation heat exchanger
• Dismantle the burner module as described under 7.2.1.
Caution!
Risk of damaging the primary heat exchanger!
Do not attempt to loosen nor retighten the four
screws (1).
With the burner and fan assembly removed it is now
possible to inspect the main heat exchanger (4).
• Remove any loose deposits from the heating spirals
(3) using a soft brush and jet of water (ensure that
water is kept away from all electrical components. Any
water used to clean the main heat exchanger will drain
through the condensate trap). Avoid pointing the
water jet directly at the insulating surface (2) on the
back of the heat exchanger.
If required the heat exchanger can be cleaned using reg-
ular vinegar.
7.2.3 Checking the burner
1
Fig. 7.4 Checking burner
The burner (1) is maintenance-free and needs no clean-
ing.
• Check the burner surface for damage, replace the
burner if necessary.
• After checking/replacing the burner, re-assemble the
burner module in the boiler as described in Section
7.2.4.
7.2.4 Refitting the burner module
1
Fig. 7.5 Replacing the burner door seal
• Insert a new seal (1) in the burner door.
Caution!
The burner door seal (1) and the self-locking
nuts on the burner module must be replaced
each time the module is removed (for example
during maintenance, see table 7.1). If the burner
flange insulation on the burner module shows
any signs of damage other small cracks it must
also be replaced.
10
9
8
4
5
6
7
Fig. 7.6 Refitting the burner module
• Insert the burner module (9) in the integral condensa-
tion heat exchanger (10).
7 Inspection and maintenance