Replacing components
66 Installation and maintenance instructions ecoTEC 0020173113_01
14
> Fill and purge the boiler and, if necessary, the system
after installing the new expansion vessel (¬ sec-
tion 10.5).
> On completion of the work, check for water leaks.
14.5 Replacing the heat exchanger
b
Caution.
Risk of damage to the heat exchanger.
> You can neither loosen nor tighten the
four screws (¬ fig. 14.7, pos. 1).
> Drain the boiler (¬ section 12.2.2).
> Remove the compact thermal module (¬ section 12.3.1).
> Detach the condensate discharge hose from the heat
exchanger.
1
2
3
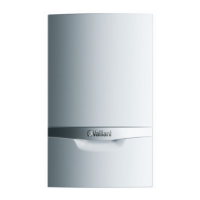
14.6 Replacing the heat exchanger
> Detach the clamps (2, ¬ fig. 14.6) and (3, ¬ fig. 14.6)
from the flow connection and the return connection.
> Detach the flow connection from the heat exchanger.
> Detach the return connection from the heat exchanger.
> Remove two screws (1, ¬ fig. 14.6) from each of the two
brackets of the heat exchanger.
1
1
2
3
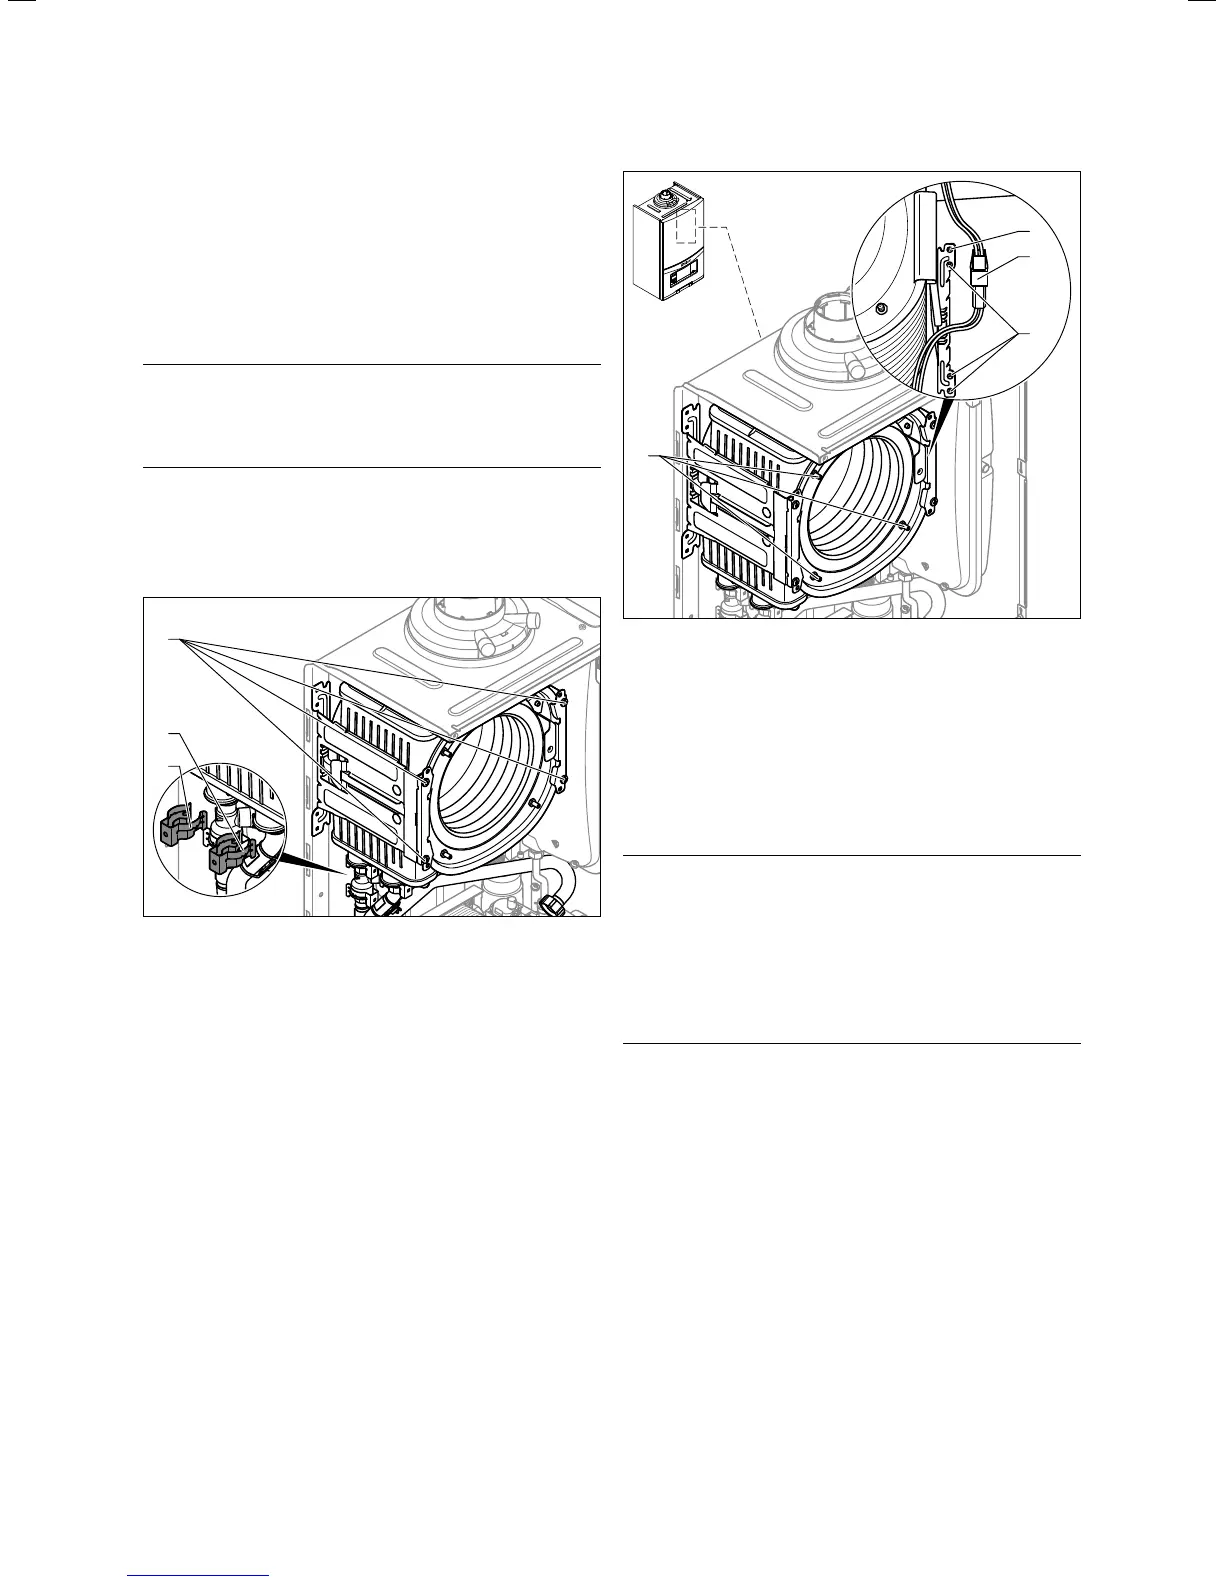
14.7 Heat exchanger brackets
> Disconnect the plug connection (2, ¬ fig. 14.7) of the
thermal fuse in the heat exchanger.
> Remove the bottom three screws (3, ¬ fig. 14.7) from
the rear part of the heat exchanger bracket.
> Swivel the bracket around the top screw (1, ¬ fig. 14.7)
to one side.
> Pull the heat exchanger downwards and to the right, and
remove it from the boiler.
b
Caution.
Risk of damage to the boiler.
Mineral oil-based lubricants may damage
the seals. The seals should therefore not be
lubricated.
> Only use water or commercially available
soft soap, if necessary, to assist with
installation.
> Install the new heat exchanger in the reverse order.
> Replace the seals.
> Insert the flow and return connections into the heat
exchanger as far as they will go.
i
Make sure that the brackets are seated correctly
on the flow and return connections.
> Reinstall the compact thermal module.
(¬ section 12.3.6).
> Fill and purge the boiler and, if necessary, the heating
installation (¬ section 10.5).