11
3.1.7. Once the hatch is in position, pull
down on the outer flanges to set the bu-
tyl seal and adhesive all four sides.
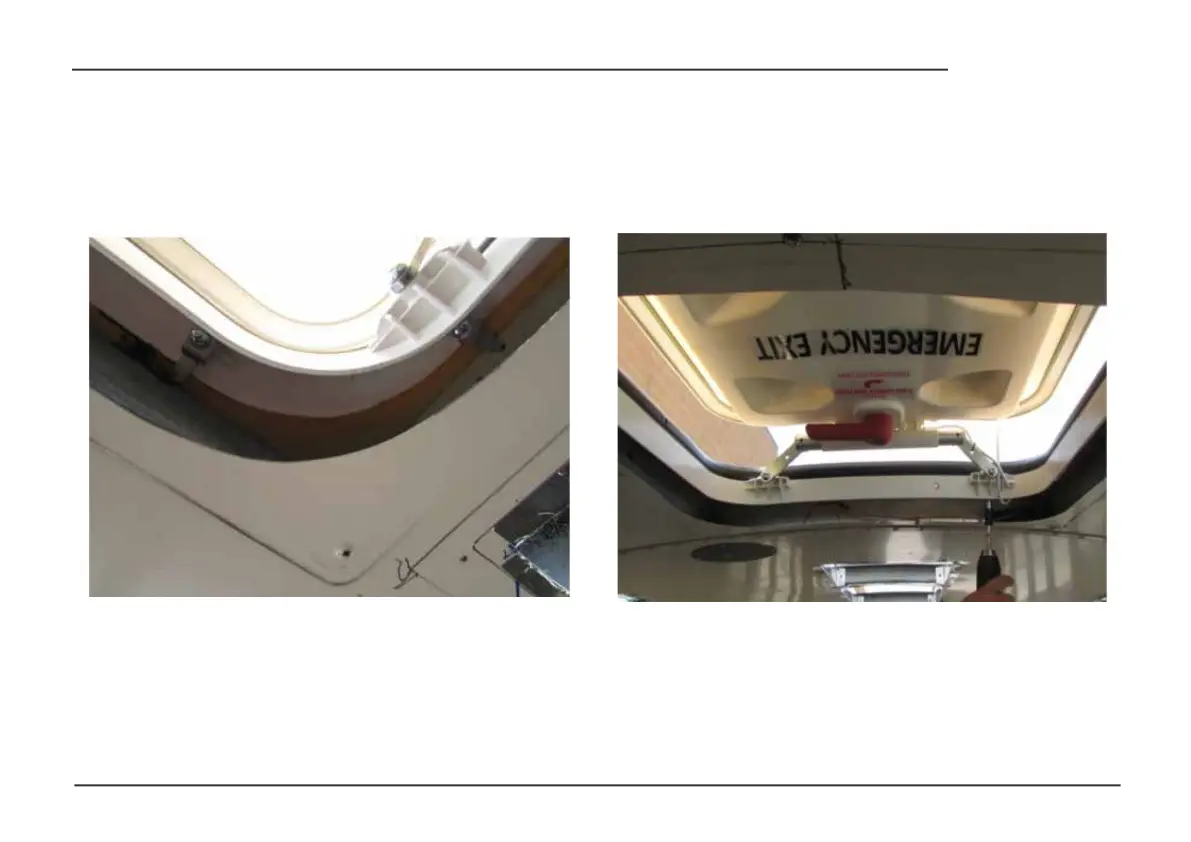
3.1.6. Using a screw driver loosen the
12 clamp screws, rotate the (12) clamps
off of their seat so that they point out-
wards from the hatch frame.
SMART HATCH
(Photo 7: SMART Hatch Assembly) (Photo 8: SMART Hatch Assembly)