Adjustments & Service Valmar
Fuse Replacement
Three fuses are located in the control unit.
Access them by removing the screws which
hold the housing together. The fuses are a 7.5
amp fast blow type (AGC 7 ½).
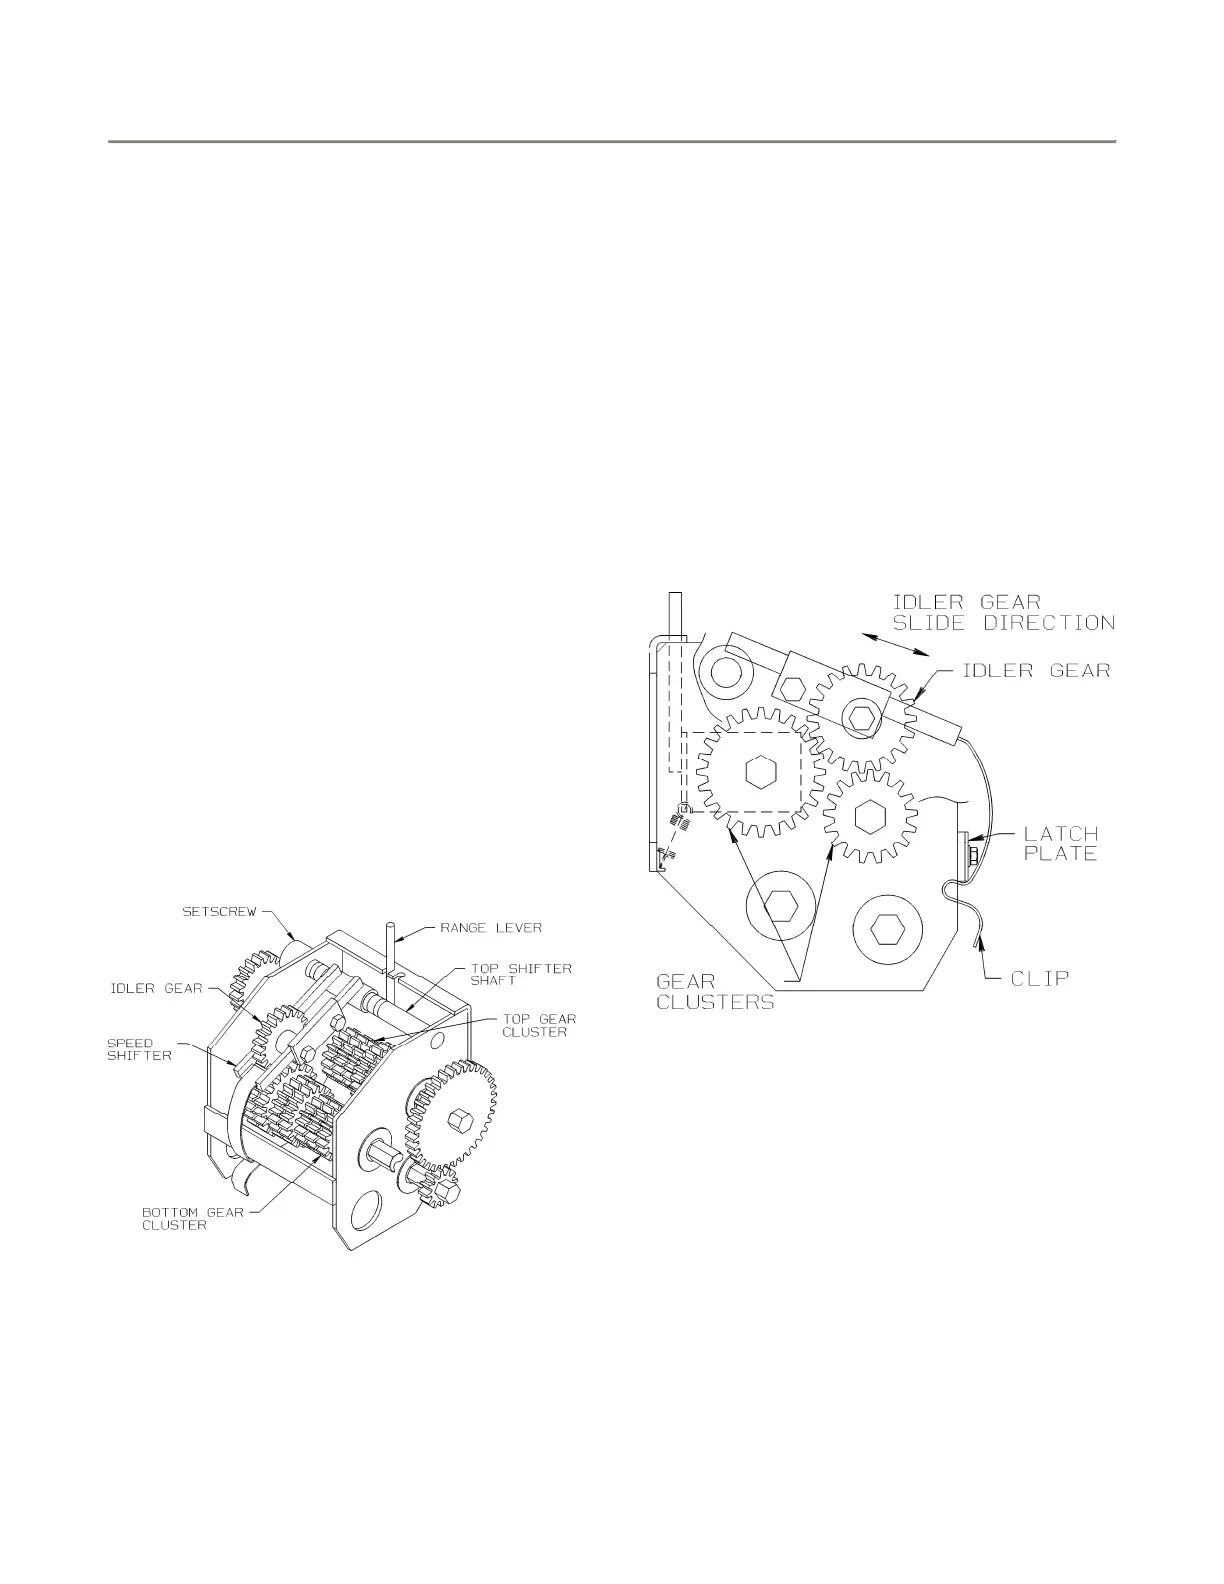
Gearbox (Figure 6-5)
Top and Bottom Gear Cluster Alignment
If the top and bottom clusters do not align
vertically, adjust by bending the range shift
lever left or right until gears align.
Gearbox Speed Shifter Alignment
If the idler gear in the gearbox speed shifter
does not line up (by detent) to the top and
bottom gear clusters, adjust it as follows:
1. Disengage gearbox speed shifter from gear
clusters.
2. Loosen setscrew on top shifter shaft.
3. Move to shifter shaft left or right, then
tighten the setscrew.
4. Check idler gear alignment to both gear
clusters. Repeat adjustment, if necessary.
Figure 6 - 5: Gearbox Adjustments
Idler Gear Tension (Fig. 6-6)
Check the idler gear tension as noted below
and adjust if necessary:
1. Set the gearbox at No. 1B and clip the idler
gear in place. Ensure that the gear teeth
engage the gear clusters.
2. The idler gear should not be free to slide
back and forth in the direction shown. If it is,
unclip the idler gear and loosen off the latch
plate. Move the latch plate down until proper
tension is achieved.
3. Repeat the above procedure for gearbox
setting No. 8B.
4. Set the gearbox to No. 2A. Ensure that the
idler gear can be engaged by hand without
excessive force. Adjust as required and
repeat steps 1 and 2.
5. Repeat step 3 for gearbox setting No. 8A.
Figure 6 - 6: Idler Gear Tension
Manifold Pressure Gauge (Fig. 6-7)
The two electrical alarm contacts on the
manifold pressure gauge can be adjusted by
inserting an allen wrench into the allen head
screws on the face of the gauge. The Low
Pressure Contact should be set at 10. The High
Pressure Contact should be set at 25.