Valmar Adjustments & Service
Page 31
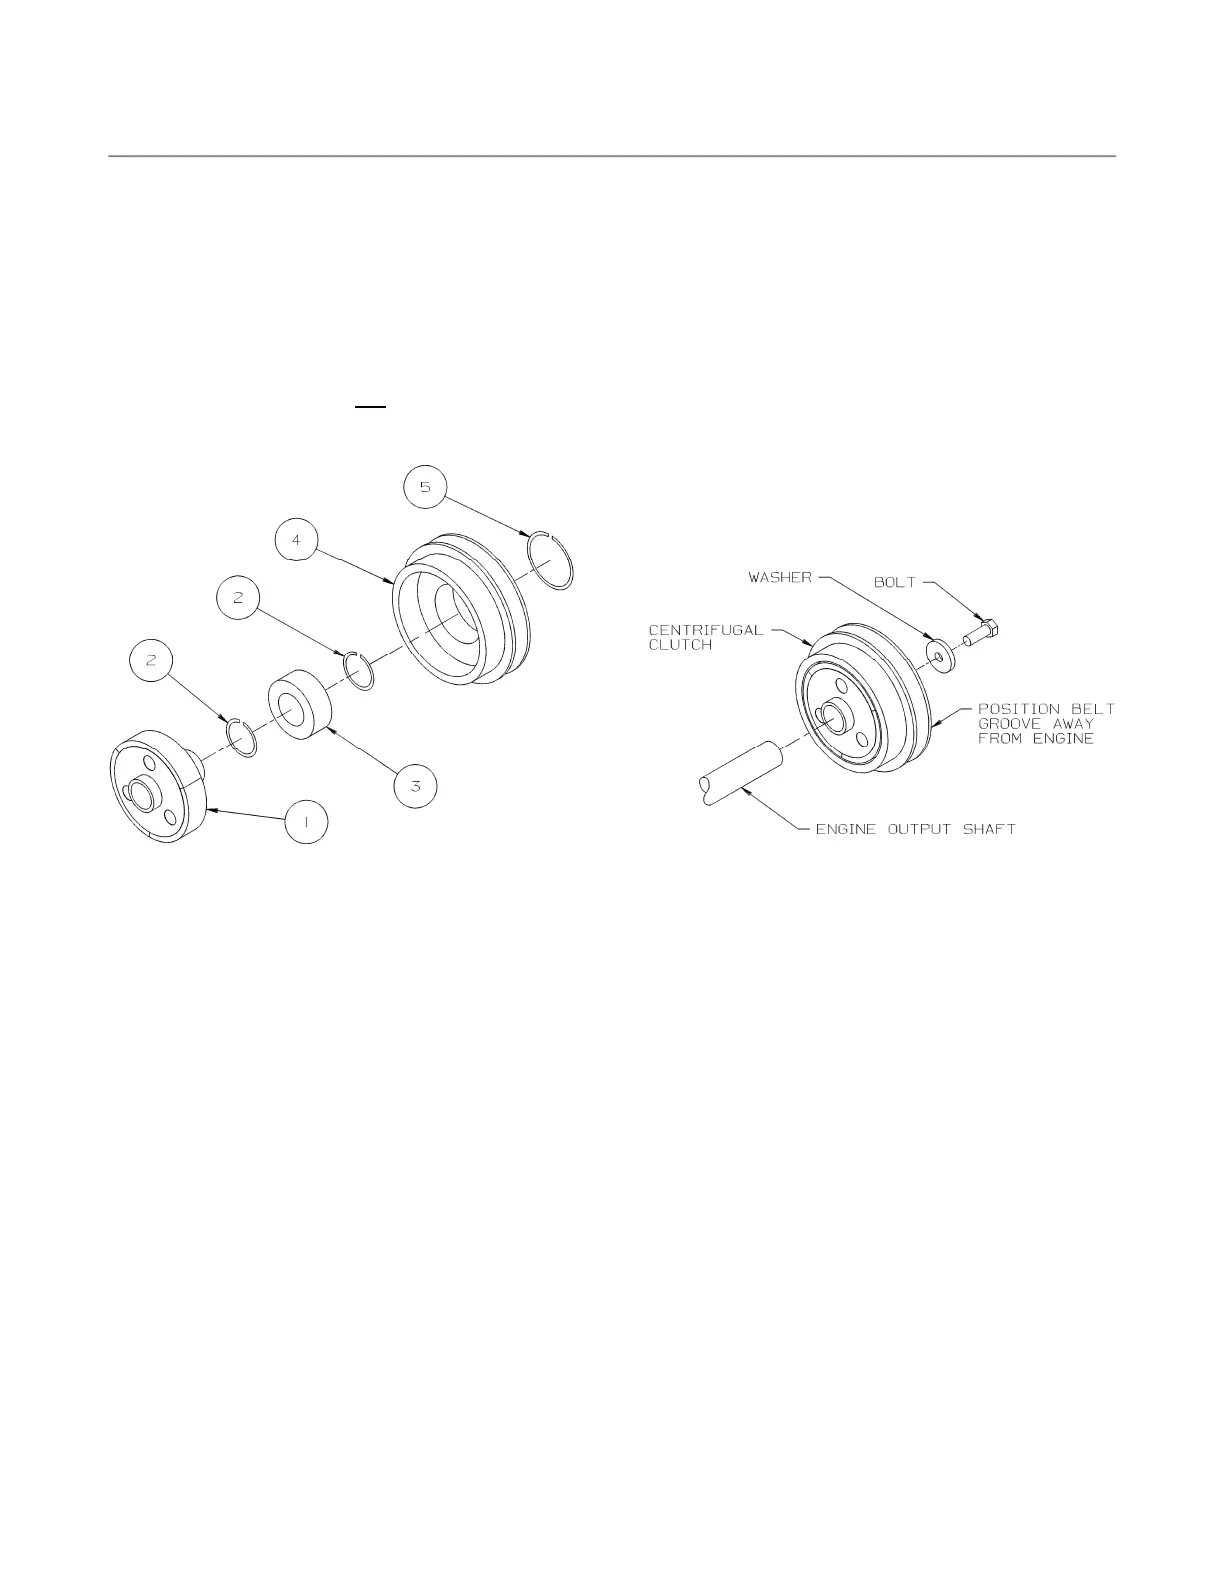
1. Remove the snap ring (5) and the pulley (4)
from the clutch rotor and hub (1).
2. Remove one snap ring (2) which holds the
bearing in place within the pulley and press
out the bearing.
3. Reinstall the components in reverse order of
removal. Install the new bearing by pressing
on the inner race, not the balls of the
bearing.
Figure 6 - 3: Bearing Replacement
Clutch Removal
If the clutch or pulley is damaged and needs to
be completely removed from the engine, do so
as follows:
1. Remove the retaining bolt and washer from
the end of the crankshaft.
2. Heat the Loctite securing the clutch to 350 to
400 degrees F. Direct the heat to the
connection point only. Do not overheat the
crankshaft as this may weaken it.
3. Using a puller, remove the clutch from the
engine while hot.
Clutch Reinstallation
1. Check the bearing seals for heat damage.
Replace if necessary.
2. Remove old Loctite from the clutch and
engine output shaft. Clean thoroughly using
a chlorinated solvent. Wipe dry.
3. Apply Loctite 609 evenly to both mounting
surfaces. Do not fill the keyway.
4. Install clutch to engine with the belt groove
away from the engine. Wipe off excess
Loctite.
5. Reinstall washer and retainer bolt. Do not
Loctite the washer.
6. Cure Loctite for 6 hours at a temperature of
68 to 70 degrees F before operating. If
temperature falls to 50 degrees F, allow 24
hours for curing.
Figure 6 - 4: Clutch Installation
Fan Drive
1. Start up the fan and run at the
recommended RPM until the manifold,
venturis and hoses are blown dry by the
airflow.
2. Check airflow at the house outlets with
the fan running at operating pressure. If
an outlet lacks sufficient air velocity,
check the manifold venturis and hose for
any blockage. Unplug as required.
3. Check that all bearings turn freely.
Replace any that are rough or seized.
4. Check all hardware. Tighten all loose
bolts and replace any that are missing.
Use Grade 5 or better when replacing
bolts.