52
ALLEGATO 1
JE MONOBLOCCO
Manutenzione del cuscinetto serie JP / JE MONOBLOCCO
• lapompavienefornitaconuncuscinettodeltipo2RS1,schermatoentrambiilati,aventelaquantitàdigrassosufficienteperladurata
d’impiego
Sostituzione del cuscinetto:
- svuotare il corpo pompa come indicato al paragrafo 7
Attenzione: residui di liquido possono rimanere all’interno del corpo pompa, nel portamotore, nella condotta di aspirazione; prendere
le dovute precauzioni se il liquido è pericoloso (infiammabile, corrosivo, velenoso, infetto ecc.).
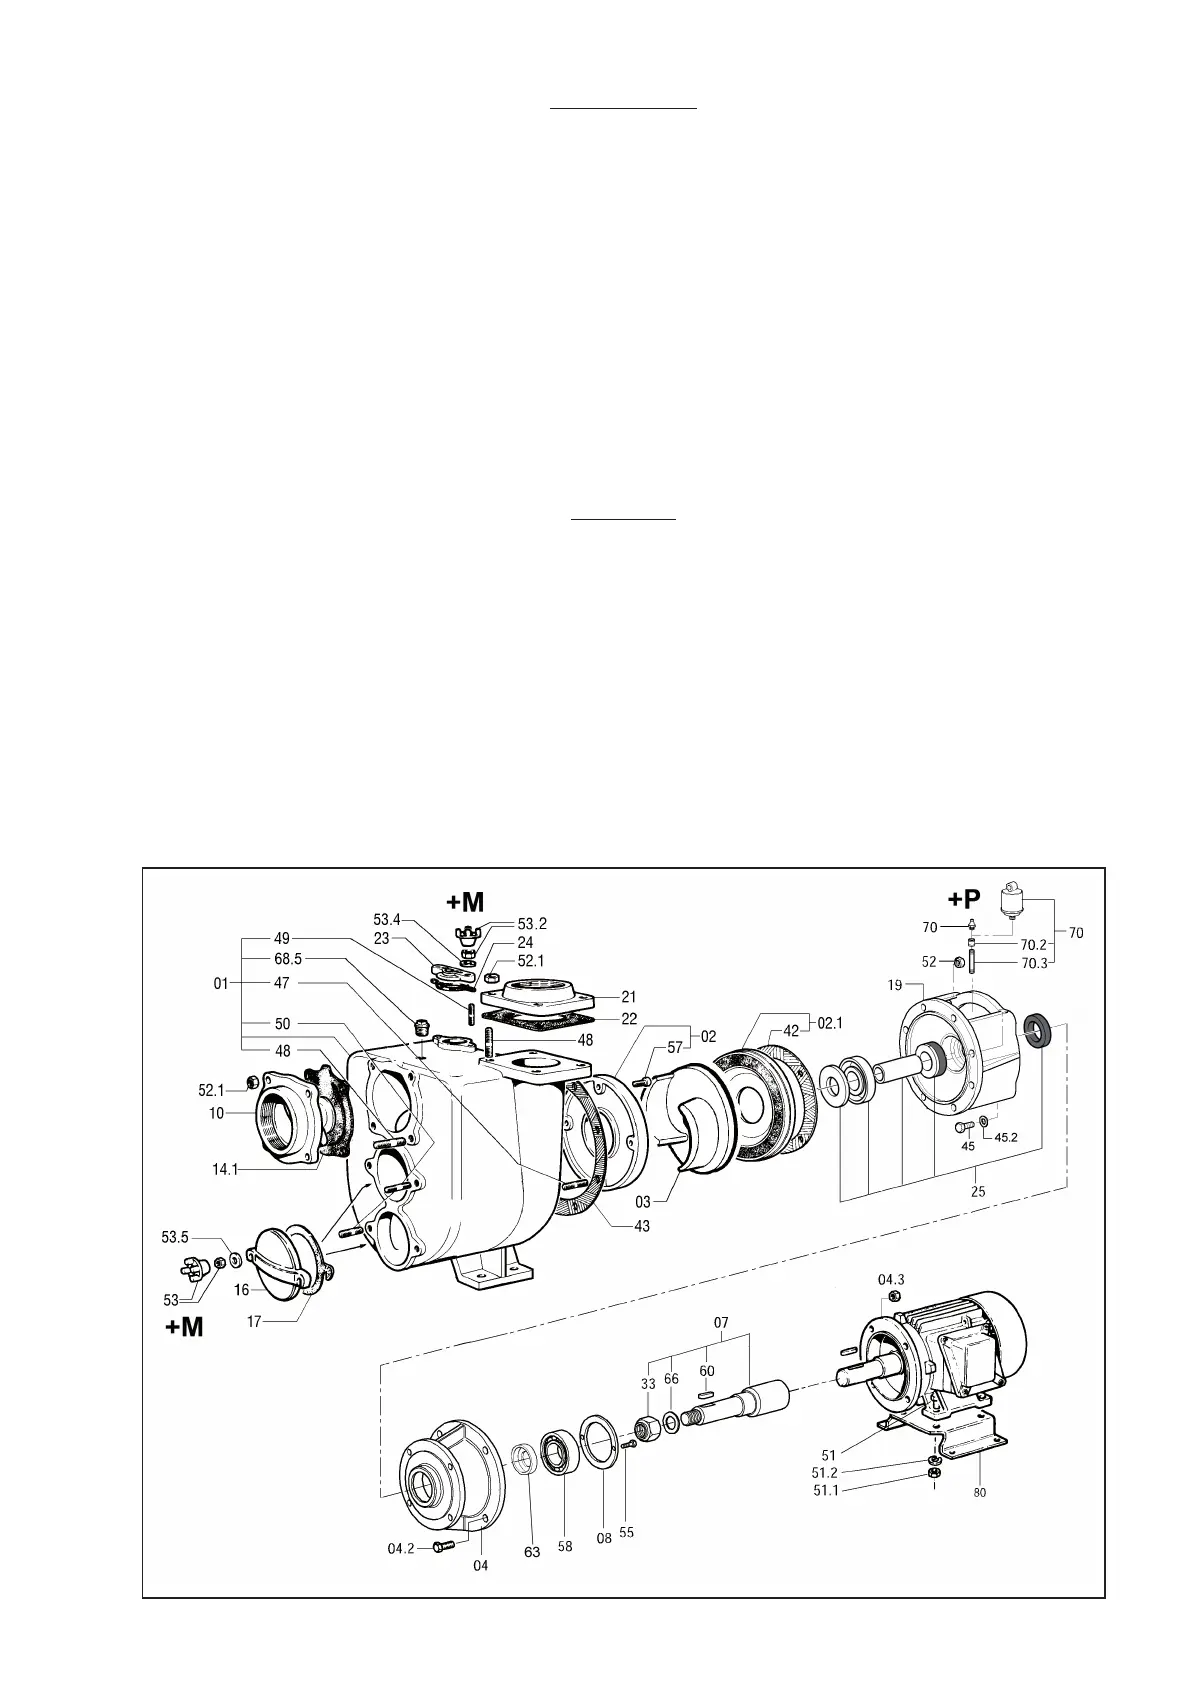
- smontare la parte pompante dal motore svitando le viti (04.2) della campana (04)
- smontare il corpo pompa (01), girante (03) e tenuta (25)
- togliere il copricuscinetto interno (08) svitando le viti (55)
- estrarre l’albero (07) completo di cuscinetto dalla parte della campana
- estrarre la ghiera (63) ed il cuscinetto (58) con un estrattore oppure con una pressa
- per il montaggio procedere al contrario
ANNEX 1
JE MONOBLOC
Servicing required by the JP / JE MONOBLOC series bearing
• thepumpissuppliedwitha2RS1bearingshieldedonbothsidesandwithasufficientamountofgreaseforaslongasitlasts
How to replace the bearing:
- drain the pump casing as shown in section 7
Attention: residual liquid may be found inside the pump casing, head and suction line; take all necessary precautions if the liquid is
hazardous (inflammable, corrosive, poisonous, infected, etc.)
- disassemble the pumping part from the motor by unscrewing the screws (04.2) of the bell mouth (04)
- disassemble the pump casing (01), impeller (03) and seal (25)
- remove the internal bearing cover (08) by unscrewing the screws (55)
- take out the shaft (07), complete with bearing, from the side with the bell mouth
- remove the ring nut (63) and bearing (58) with the aid of a puller or press.
- work through the instructions in reverse order to re-assemble the parts.