7 / 8
3.5. Set up your fixed colour
Push the ESC button first. Then use UP/DOWN buttons until you see “CoLo” in the display. Push
ENTER. Now you can see “Colx” or “AtF” in the display. If there is “Colx” the x stands for a number
between 1 and 9, which stands for 9 different colors to be choosen by using the up/down buttons. If
you want to mix your own color then please push up/down buttons until you see “AtF” in display, then
push ENTER
When you have confirmed AtF you can choose between the following colors to set up from 1 to 255:
Rxxx stands for red
Gxxx stands for green
Bxxx stands for Blue
After setting up your colors confirm your choice with ENTER.
3.6. Master Slave mode
Push the ESC button first. Then use UP/DOWN buttons until you see “SLav” in the display. Push
ENTER. Now the fixtures works in slave mode and copies exact the values from the master
fixture.
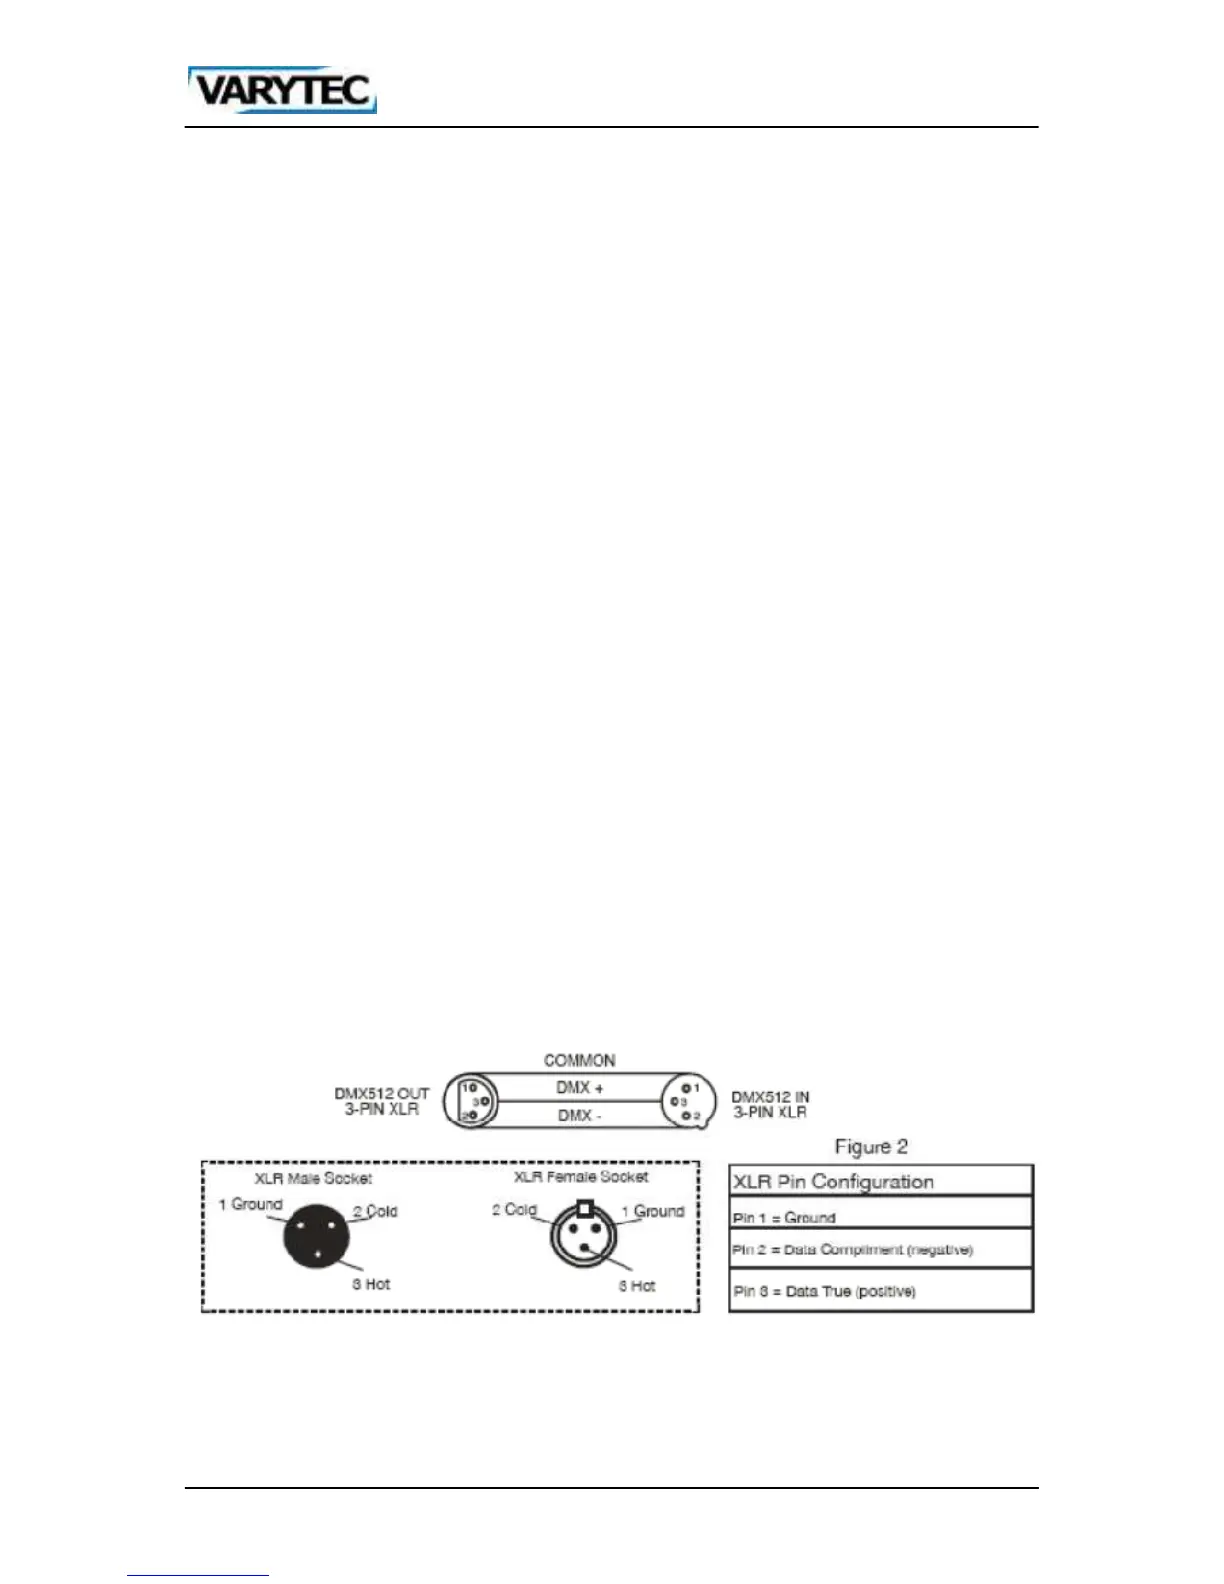
For the connection of master fixture and slave fixture, please use a standard dmx 3 pole XLR 110
Ohms cable. Connect the male connector to the master and the female connector to the slave
fixture. Go on like this until all the fixtures you want to be connected, are connected. Set up your
desired settings at the master and all the slaves will copy the functions of this fixture.
3.7. Version number
Push the ESC button first. Then use UP/DOWN buttons until you see “VER” in the display. Push
ENTER: Now you can see the actual software version. Leave the menu with ESC.
4. DMX Cable info