6
INSTALLATION GUIDELINES
A. INSPECTING AND PREPARING THE HEATER
❑ Remove the cardboard box, which comes packaged with the heater.
It should contain the following: Thermostat, temperature and pressure
relief valve, brass “tee” fitting, insulation, lid, and screws.
❑ Do not cover or damage the temperature and pressure relief valve
opening located in the brass “tee” fitting mounted to the Hot Outlet
fitting (See INSTALLATION DIAGRAM 1 on page 20 and
INSTALLATION DIAGRAM 2 on page 20).
B. LOCATION
❑ CAUTION: All tanks will eventually leak at some unpredictable
time.
❑ Do not place the heater where there is a risk of property damage in
the event of a leak.
❑ Place the heater on a solid foundation in a clean, dry location nearest
the boiler.
❑ The heater should be protected from freezing.
❑ Water lines should be insulated to reduce energy and water waste.
❑ Leave sufficient headroom to service the heat exchanger and
electrical controls.
❑ Do not install in an area where flammable liquids or combustible
vapors are present.
❑ CAUTION: The heater’s outer jacket is plastic and can melt.
❑ Do not install in close proximity to wood burning stove or other high
temperature apparatus.
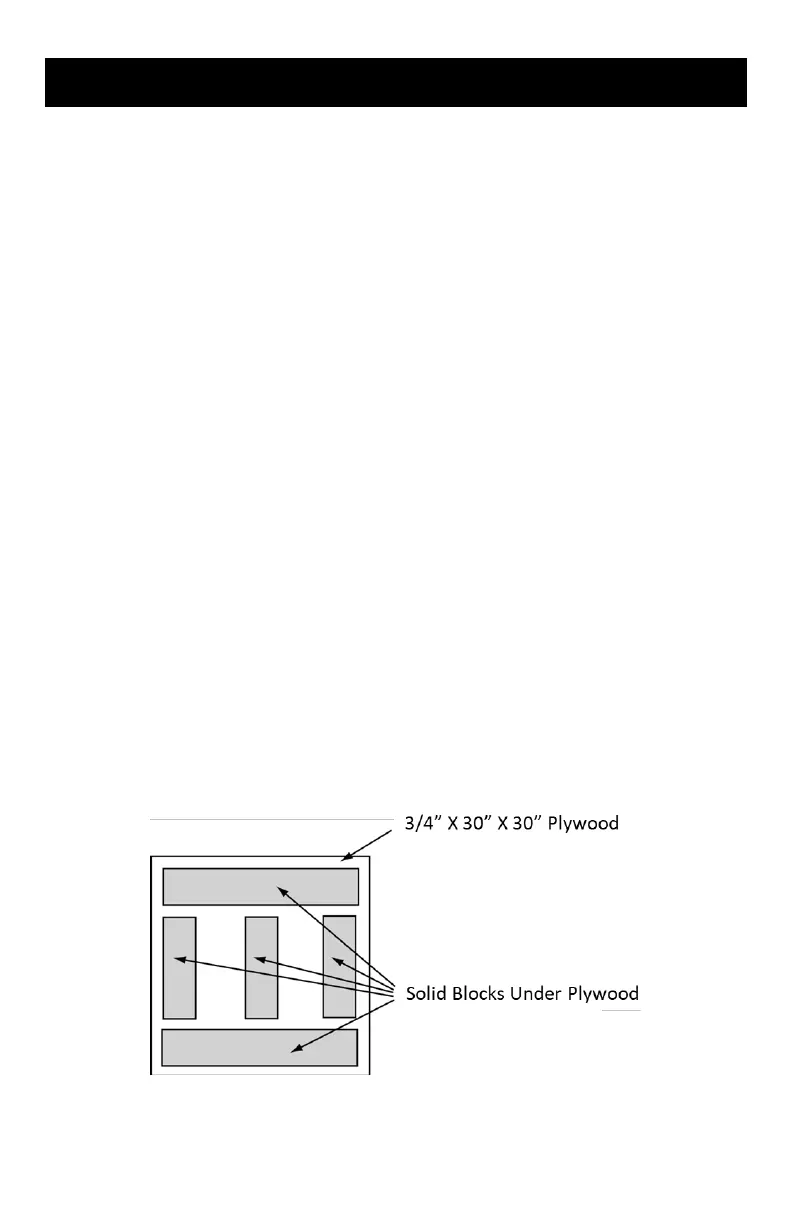
❑ NOTE: If heater is placed on blocks to raise it from the floor, be sure
to support the entire bottom with at least 3/4" plywood on the top of
the blocks.