Storage
NOTE: Before storing away, make sure to empty all contents of tank container.
NOTE: Make sure all parts, tank and lters are dry prior to storing machine.
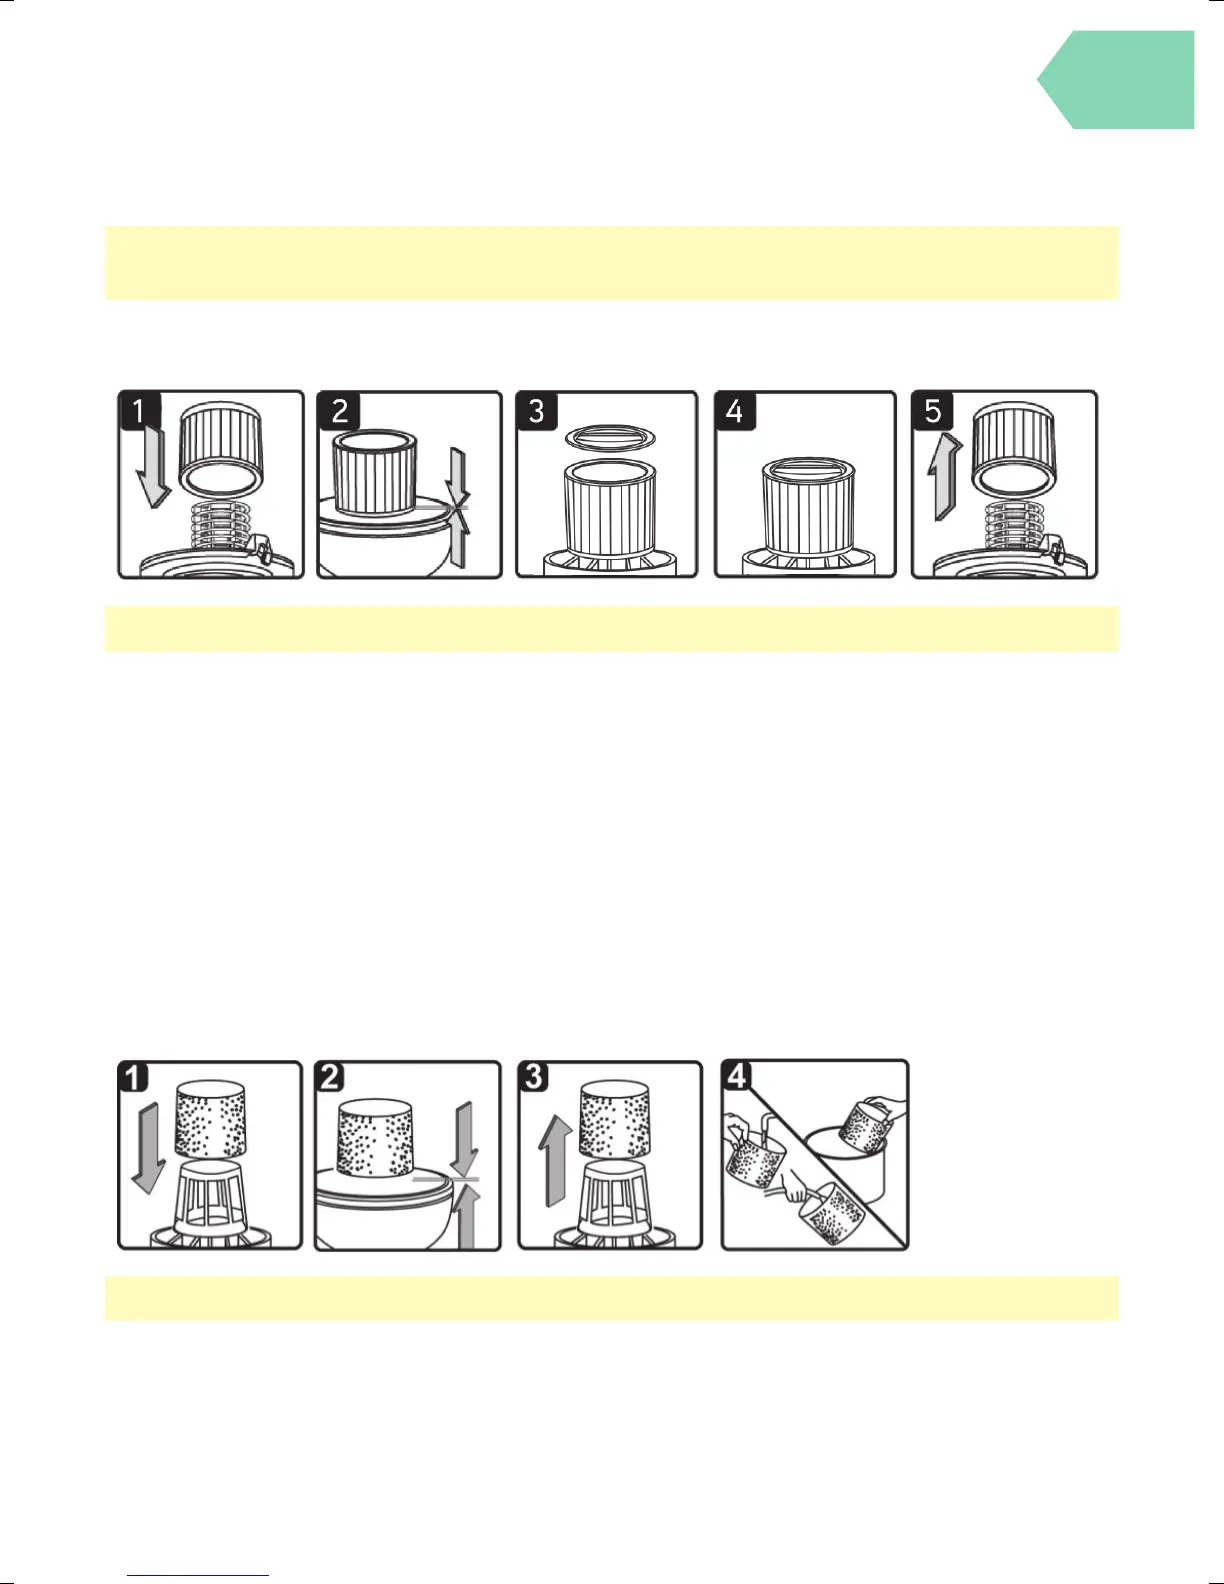
Installing and cleaning the DRY fi lter
Installing Dry Filter
1. Install the dry lter over the lter cage with the at end of the lter towards the vacuum power head. Carefully
push lter in until it stops against the power head. (g. 1 & 2)
2. Place lter retainer on top of cartridge lter over the raise lip and tighten down by turning retainer clockwise,
do not over tighten. ( g. 3 & 4)
Removing and Cleaning Dry Filter (THIS FILTER IS NOT WASHABLE)
1. Unlock and remove the lter retainer by turning retainer handle anticlockwise.
2. Carefully hold and pull the dry lter up for removal. (g. 5)
3. Clean the cartridge lter by gently tapping or brushing dirt o . For optimal performance it is recommended
to regularly change this lter depending on level of use (eg. 3-6 months).
4. Install cleaned or new lter into place as instructed above.
NOTE: Unplug machine from the power outlet before performing maintenance.
Taking care of your machine
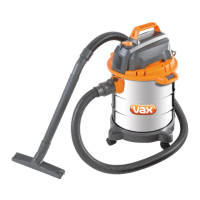
Installing and cleaning the FOAM fi lter
Installing Foam Filter
1. Follow instructions to remove dry dust lter rst before changing to foam lter.
2. Carefully slide foam lter down over the lter cage making sure the whole cage is covered. (g. 1 & 2)
Cleaning Foam Filter
3. Carefully remove foam lter. ( g. 3)
4. Use a mild soap and water solution to wash foam lter and rinse with clean water. ( g. 4)
5. Allow lter to air dry before installing and using again.
NOTE: Unplug machine from the power outlet before performing maintenance.