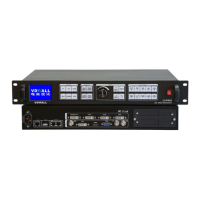
LVP603
LVP603
LVP603
LVP603 User
User
User
User
’
’
’
’
s
s
s
s Manual
Manual
Manual
Manual
---------------------------------------------------------------------------------------------------
---------------------------------------------------------------------------------------------------
---------------------------------------------------------------------------------------------------
---------------------------------------------------------------------------------------------------
LED
LED
LED
LED VIDEO
VIDEO
VIDEO
VIDEO PROCESSOR
PROCESSOR
PROCESSOR
PROCESSOR
14
brightness, and 64 represents the highest brightness.
Press “ ← ” or “ → ” to increase or decrease the values of brightness.
Press “ Enter
Enter
Enter
Enter ” to save the settings.
To
ensure full gray level of output image, normally the output
brightness is set as 64
64
64
64 !
Item
Item
Item
Item 8
8
8
8 : “
Color
Color
Color
Color ”
”
”
”
For V1, V2, DP and HDMI video input source, LVP603
LVP603
LVP603
LVP603 can set color
saturation for them ranging from 22 to 38. The lower this value is, the
weaker the color looks; the higher this value is, the stronger the color
looks. Press “
←
” or “
→
” to increase or decrease the values of color
saturation. Press “ Enter
Enter
Enter
Enter ” to save the settings.
Normally the value of color saturation is set as 30
30
30
30 !
Item 20: “
Definition
Definition
Definition
Definition ”
”
”
”
LVP603
LVP603
LVP603
LVP603 provides “ sharp ” or “ normal ” as options of definition. I n
sharp mode, the picture edge looks clearly, and image has higher
definition; while in “ normal ” mode, the picture looks milder . Normally
the value of
Definition
Definition
Definition
Definition
saturation is set as “ normal ” !
5.
5.
5.
5. PIP/POP
PIP/POP
PIP/POP
PIP/POP Output
Output
Output
Output Image
Image
Image
Image Setup
Setup
Setup
Setup
Items 9~12: “
PIP
PIP
PIP
PIP image
image
image
image output
output
output
output setup
setup
setup
setup
”
LVP603 PIP image window is located in LED screen. As in PIP
mode the PIP image is to be zoomed-in/out after being added to
background, it means that 4 values listed in items 9~12 in the table
below don ’ t represent their pixels in LED, but represent the width and
height value of output resolution “
Out_Format
Out_Format
Out_Format
Out_Format
” in the 6
th
option of
setting menu. For details see figure below (provided “
Out_Format
Out_Format
Out_Format
Out_Format
”
adopts 1920
×
1080 mode).
Note: the minimum values of
PIP_H_Width
PIP_H_Width
PIP_H_Width
PIP_H_Width
and
PIP_V_Heigh
PIP_V_Heigh
PIP_V_Heigh
PIP_V_Heigh
are
both 128.
9
PIP_
PIP_
PIP_
PIP_ H_Start
H_Start
H_Start
H_Start PIP
PIP
PIP
PIP horizontal
horizontal
horizontal
horizontal start
start
start
start
10
PIP_H_Width
PIP_H_Width
PIP_H_Width
PIP_H_Width PIP
PIP
PIP
PIP width
width
width
width
11
PIP_V_Start
PIP_V_Start
PIP_V_Start
PIP_V_Start PIP
PIP
PIP
PIP vertical
vertical
vertical
vertical start
start
start
start
12
PIP_V_Heigh
PIP_V_Heigh
PIP_V_Heigh
PIP_V_Heigh PIP
PIP
PIP
PIP height
height
height
height