S-19-01-1214-UV101 V1.3
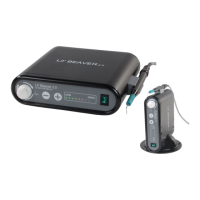
Section 9: Accessories
1. Ultrasonic insert (optional)
2. AC Power Cord Set
3. Foot control switch
4. Water tubing with quick connector
Section10: Techniques For Use
10.1 Patient Positioning
‧ For optimal access to both the upper and lower
arches, the backrest of the chair should be
adjusted to a 45∘ degree angle. This assures
patient comfort and Clinician visibility.
‧ Have the patient turn his/her head to the right or
left. Also position chin up or down depending
upon the quadrant and surface being treated.
Evacuate irrigate using either a saliva ejector or
High Volume Evacuator (HVE).
10.2 Performing Ultrasonic Scaling
Procedures
‧ Note: Refer to the Infection Control Information
Booklet supplied with your system for general
procedures to be followed at the beginning of
each day and between patients.
‧ The edges of ultrasonic inserts are intentionally
rounded so there is little danger of tissue
laceration with proper ultrasonic Scaling
technique. Whenever the insert tip is placed in the
patient’s Mouth, the lips, check and tongue should
be retracted to prevent Accidental prolonged
contact with the activated tip.
‧ Hold the empty Handpiece in an upright position.
Activate the Foot Control until fluid exits.
‧ Lubricate the rubber O-ring on the insert with
water before placing it into the handpiece. Fully
seat insert with a gentle push-twist motion. DO
NOT FORCE IT INTO PLACE.
‧ Activate the System. Hold the handpiece over a
sink or drain. Check spray temperature to verify
fluid is reaching the working end of the insert tip.
Adjust the water cooler irrigate. Control knob to
ensure adequate flow for the selected Power
setting. Greater flow settings provide cooler
irrigation.
‧ It may be necessary to adjust water flow larger
under "Turbo" mode (Foot Control fully depressed)
so adequate fluid will be available to cool tip and
tooth interface.
‧ In general, it is suggested a "feather-light-touch"
be used both supra and subgingivally. The motion
of the activated tip and acoustic effects of the
irrigating fluid, in most cases, is adequate to
remove even the most tenacious calculus.
‧ Periodically check the ultrasonic insert for wear
with the Insert Efficiency Indicator.
‧ The use of a saliva ejector or High Volume
Evacuator (HVE) is recommended during all
procedures.
‧ Set the System's Power Adjustment knob to the
lowest power setting for the application and the
selected insert.
‧ If water leakage found in handpiece, replace
sleeve or o-ring on handpiece cable assembly to
eliminate.
10.3 Patient Comfort Considerations
Reasons for sensitivity
‧ Incorrect tip placement. Point should be directed
away from root surfaces.
‧ Not keeping tip in motion on tooth. Do not allow
the insert to remain in a static position on any one
area of the tooth. Change the insert's path of
motion.
‧ Applying pressure. Use extremely light grasp and
pressure, especially on exposed cementum.
‧ If sensitivity persists, decrease power setting
and/or move from the sensitive tooth to another
and then return.