S-19-01-1214-UV101 V1.3
Section7: Installation Instructions
7.1 General Information
If installation of your Little Beaver 2.0 ultrasonic
scaler is performed by someone other than
trained Vector R & D Inc. distributor personnel,
care should be taken to observe the following
requirements and recommendations.
7.2 Water Line Requirements
‧ The System's water supply line is factory installed.
Do not disconnect from the ultrasonic scaler.
‧ Incoming water supply line pressure to the
ultrasonic scaler must be 25 psi (172 kPa
minimum) to 40 psi (276 kPa) maximum. If your
dental water system's supply line pressure is
above 60 psi, install a water pressure regulator on
the water supply line to your ultrasonic scaler.
‧ A manual shut-off valve on the dental water
system supply line should be used so that the
water can be completely shut-off when the office
is unoccupied.
‧ A filter in the dental water system supply line is
recommended so that any particles in the water
supply will be trapped before reaching the
ultrasonic scaler.
‧ After the above installations are completed on the
dental water supply system, the dental office
water line should be thoroughly flushed prior to
connection to the System.
‧ After flushing system verify there are no leaks.
7.3 Electrical Requirements
Refer to Section 3: Specifications.
7.4 Unpacking the System
Carefully unpack your Little Beaver 2.0 ultrasonic
scaler and verify that all components and
accessories are included:
1. Little Beaver 2.0 Ultrasonic scaler main unit
with factory installed water supply line and
handpiece assembly with tubing.
2. Detachable AC Power Cord.
3. Foot Control Switch.
4. User Direction Manual.
5. Ultrasonic Inserts (Optional).
7.5 System Installation
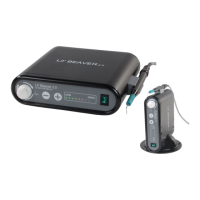
‧ The Little Beaver 2.0 Ultrasonic Scaler is designed
for both horizontal and vertical placement on a
level surface. Refer to section 7.6 for more
information of vertical installation.
‧ Be sure unit is stable and resting on four feet.
‧ Placing unit in direct sunlight may discolor plastic
housing.
7.6 Vertical Installation
7.7 Rear Panel Controls / Power Connection
‧ The ON/OFF Control Switch and power indicator is
located on the Front Panel of the Little Beaver 2.0
Ultrasonic Scaler. (See Section 8.1)
‧ Verify the ON/OFF Control Switch located on the
front panel of the Little Beaver 2.0 ultrasonic
scaler is in the OFF position before proceeding.
‧ Plug the detachable AC Cord into the back of the
ultrasonic scaler and into an approved outlet.
7.8 Water Supply Line Connection
Connect the free end of the ultrasonic scaler’s water
supply line to the dental water supply line. Inspect
all connections to make certain there are no leaks.