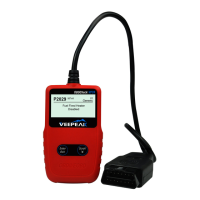
3.2 Product Specications
• Display–Backlit, 128 x 64 pixel display
• Operating Temperature--0 to 60°C (32 to 140 F°)
• Storage Temperature-- -20 to 70°C (-4 to 158 F°)
• Power–8 to 18 Volts provided via vehicle battery
• Dimensions: Length /110.3mm (4.34"), Width /69.5mm (2.74"), Height/20.2mm (0.8")
• Weight: 180g (6.35oz)
3.3 Accessories Included
• User’s Manual
• Fixed OBD2 Cable
3.4 Navigation Characters
Characters used to help navigate the code reader are:
• “►” -- Indicates current selection.
• “Pd” -- Identies a pending DTC when viewing DTCs.
• “$” -- Identies the control module number from which the datais retrieved.
3.5 Vehicle Power
The power of the code reader is provided via the vehicle Data Link Connector (DLC).
Follow the steps below to turn on the code reader:
1) Connect the OBD II cable to the code reader.
2) Find DLC on vehicle.
• A plastic DLC cover may be found for some vehicles and you need to remove it before
plugging the OBD2 cable.
3) Plug OBD II cable to the vehicle’s DLC.
3.6 Product Setup
The code reader allows you to make the following adjustments and settings:
1)Language: Selects desired language.
2)Unit of measure: Sets the unit of measure to English or Metric.
3)Contrast adjustment: Adjusts the contrast of the LCD display.
• The Settings of the unit will remain until change to the existing settings is made.
To Enter the Setup Menu
From the second startup screen, press SCROLL button to enter System Setup menu.
- 6 -