WWW.VELODYNE.COM
12 - EQ-Max Series User’s Manual
INTERCONNECT CABLES
When installing your new Velodyne subwoofer using the line level connections, you should always use shielded
phono cables. There are many high quality cables available today. It is recommended that you keep the length
of cable as short as possible to avoid any potential noise problems.
When using speaker level connections, use a high quality speaker cable that mates well with the connectors.
Be very careful to avoid any loose strands or frayed wires that may result in a short, which may damage
your equipment. Cables of extremely large size are not required due to the low current draw of this type of
connection. Extremely large gauge wire may not properly t in the terminals, resulting in a poor connection and
possible short circuits.
USAGE
This section addresses usage of your EQ-MAX subwoofer.
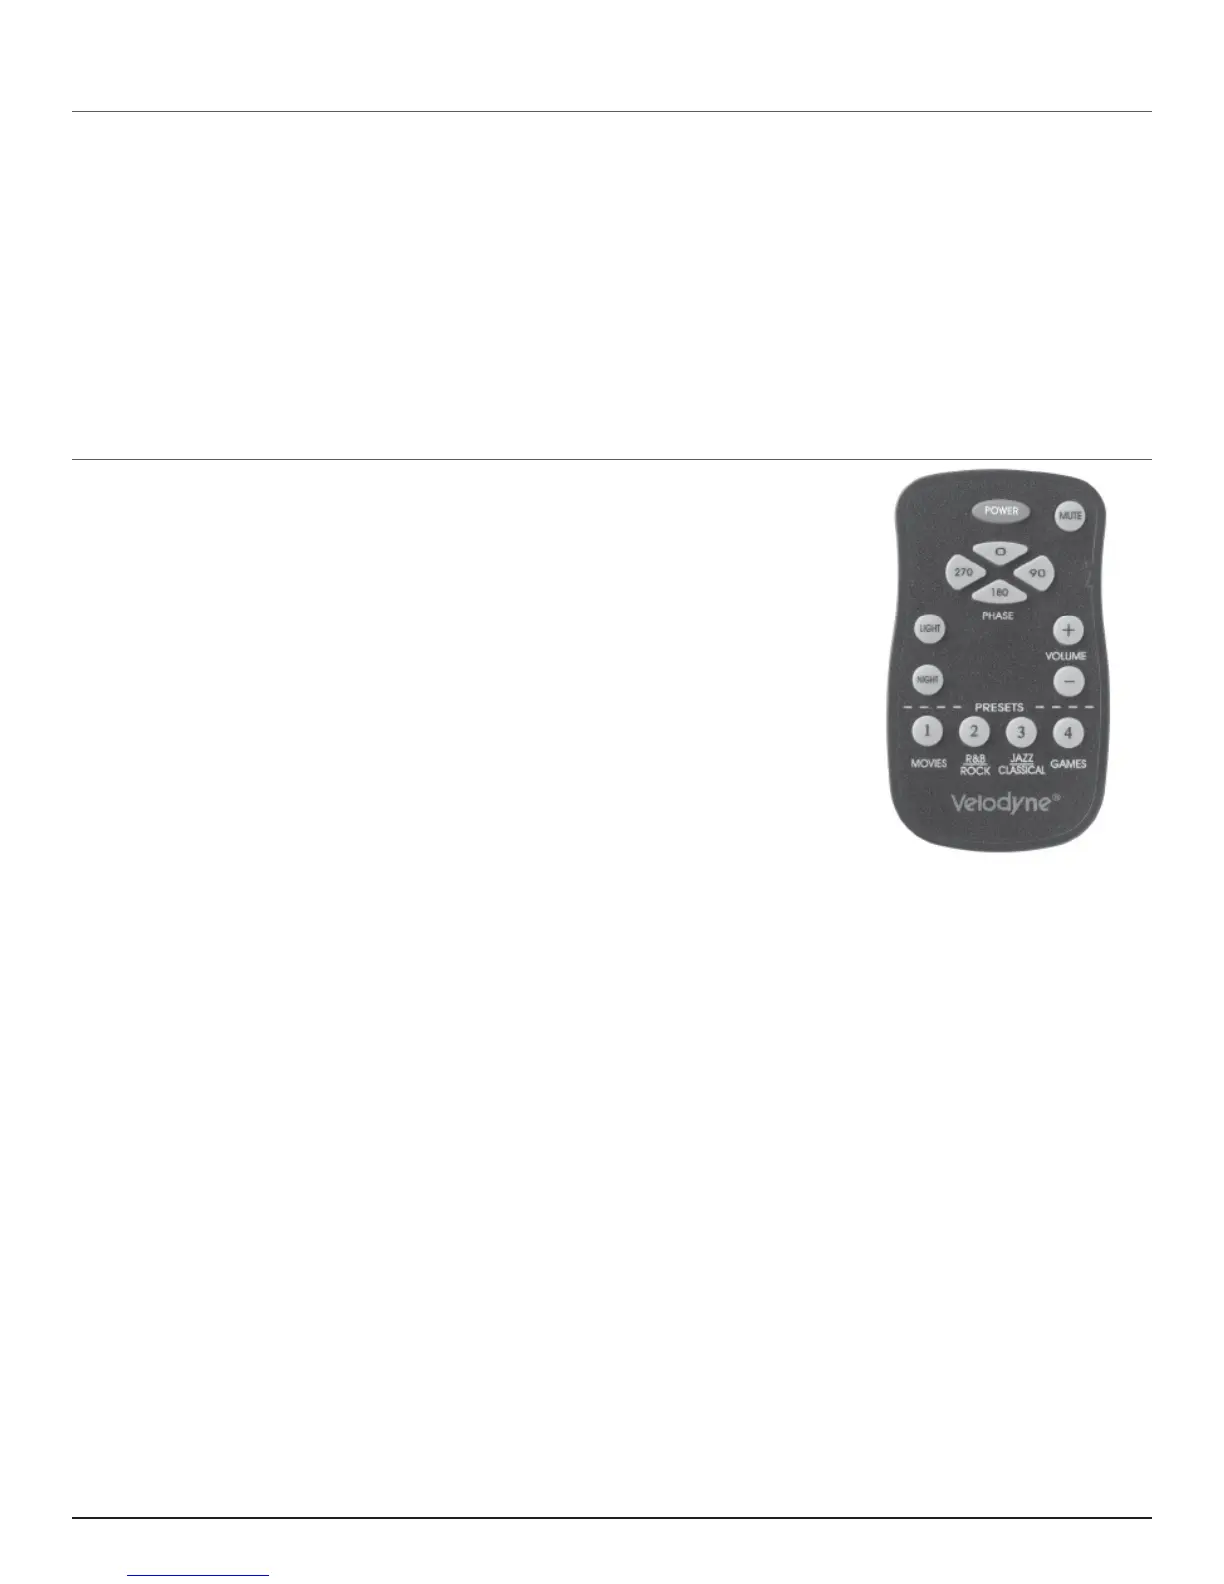
Remote Control
The features of the EQ-MAX remote control are listed below.
NOTE: The EQ-MAX remote can be attached magnetically to the back of the
subwoofer in the upper left hand corner.
• POWER — This button forces your EQ-MAX subwoofer unit into standby
mode. The woofer will not play and the LED will turn o. The unit will
remain in this mode until the POWER button is pressed again. To fully
deactivate (i.e. power down) the unit, turn o the power switch on the
back panel.
• MUTE — This button mutes the subwoofer’s output. The LED on the sub will show 00 if the unit is
muted. To unmute the subwoofer, press the MUTE button again and the original volume setting shows
on the LED.
• EQ — This button automatically equalizes the subwoofer’s output so that it sounds best for its position
in the room. To use this feature, remove the grille and plug the supplied microphone into the Mic-In jack
on the front bae of the sub and place the mic in your preferred listening position. Then press EQ on the
remote for about 2-3 seconds. The subwoofer emits 12 “sweep tones” that span the frequencies between
20 and 150 Hz. The LED displays “AU” during the Auto-EQ process. After the sweeps are complete, the
unit saves its EQ settings and returns to normal operation. To prevent accidental invocation of the EQ
feature, you must hold down the EQ button for 2-3 seconds before the EQ sweeps begin. If the mic is
not plugged in, the subwoofer sweeps twice then reverts back to normal functioning without changing
any EQ settings.
• PHASE — These buttons allow you to optimize the subwoofer’s bass performance relative to the
speakers and your listening position. Play some bass heavy music. While listening, push one of the four
phase buttons, listen for a few moments, and then press the next phase button. In most installations,
one of the four button positions will oer an audibly better blend of subwoofer and speakers. The LED
will show the phase selected by showing “PH” followed by the phase number: 0, 90, 180 or 270.
Figure 6: EQ-MAX Remote.
 Loading...