EasyManuals Logo

Velux INTEGRA KLI 310 Directions For Use

Velux INTEGRA KLI 310
19 pages
To Next Page IconTo Next Page
To Previous Page IconTo Previous Page
Page #15 background imageLoading...
Page #15 background image
3
1 sec 1 sec
1 2
B
B
B
A
A
A
VELUX
®
15
ENGLISH
VAS 454360-2019-02
A
Existing wall switch
B
New wall switch
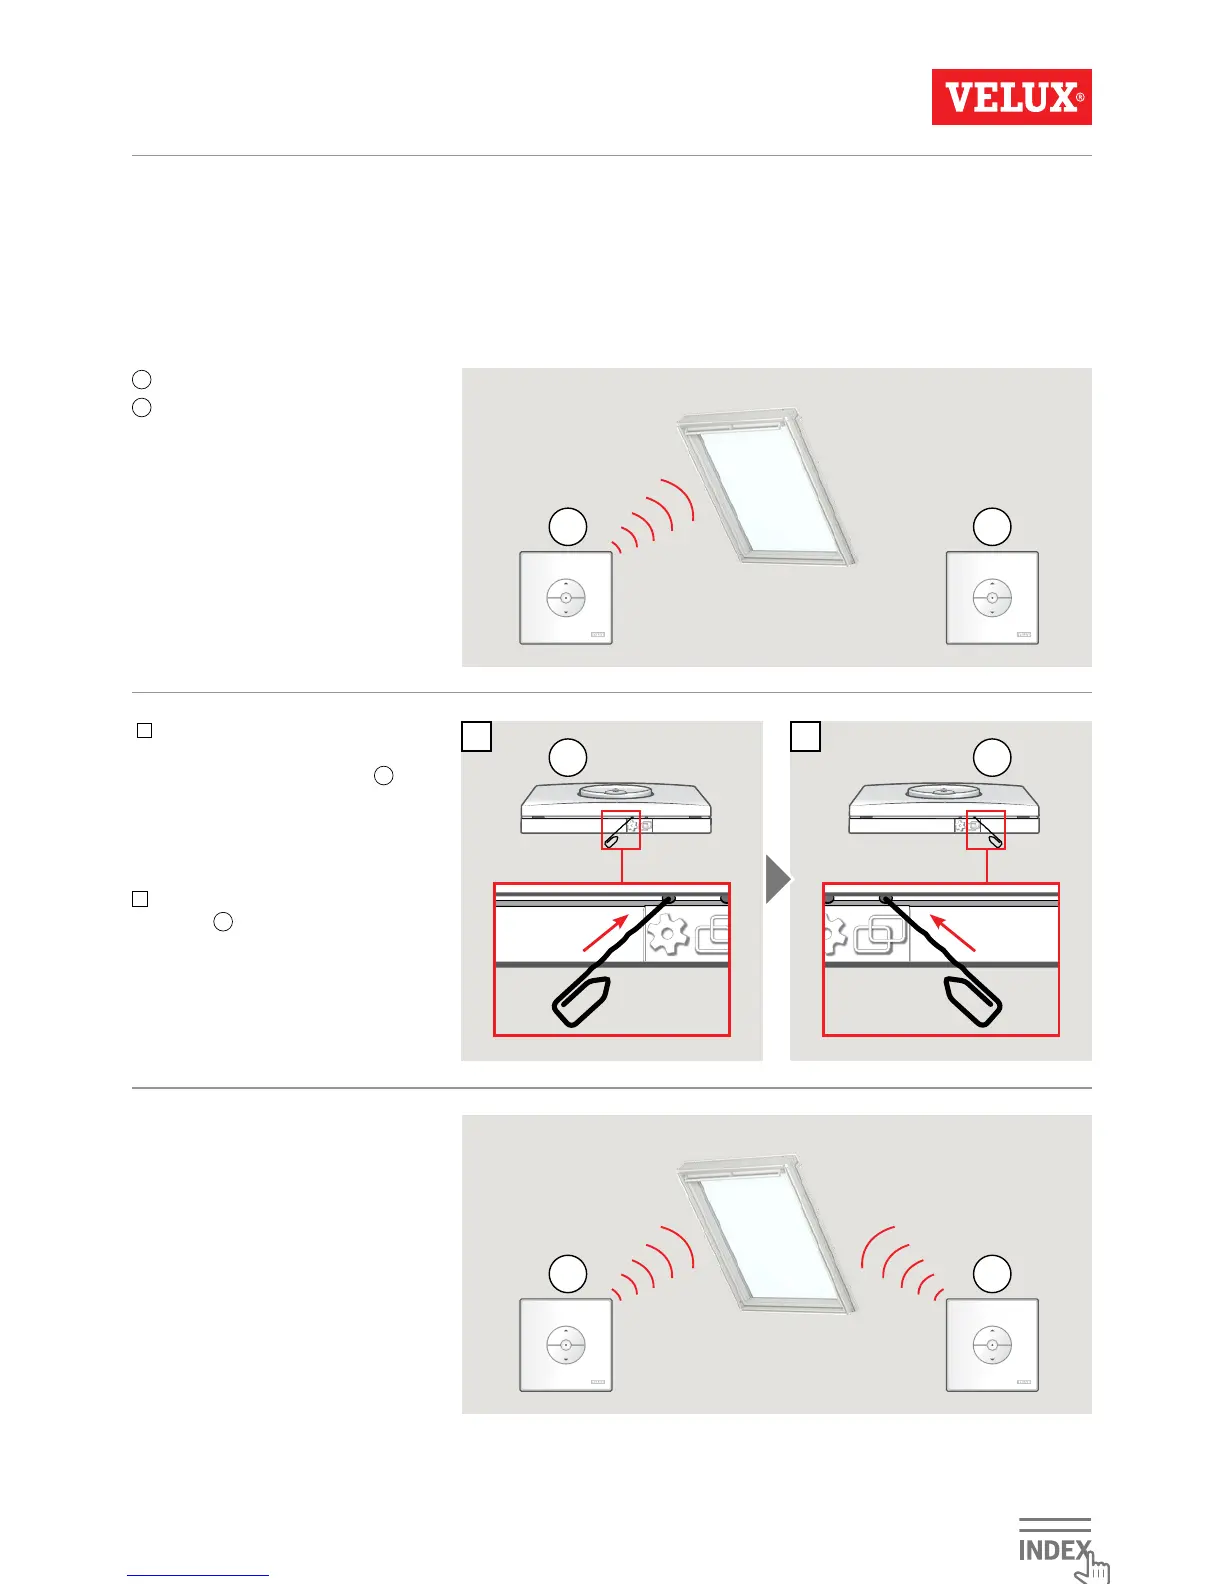
Setup of a new wall switch KLI 311/312/313 in addition to
an existing wall switch KLI 311/312/313
Important: The new wall switch must be of the same type as the existing wall switch.
1
Prepare the product for registra-
tion by pressing the GEAR button
on the existing wall switch
A
for
1 second.
The product will start running
briefly back and forth.
2
Press PAIR button on the new wall
switch
B
for 1 second.
The product can now be operated with
both wall switches.

Other manuals for Velux INTEGRA KLI 310

Questions and Answers:

Question and Answer IconNeed help?

Do you have a question about the Velux INTEGRA KLI 310 and is the answer not in the manual?

Velux INTEGRA KLI 310 Specifications

General IconGeneral
Radio frequency868 MHz
ModelKLI 310
CompatibilityVelux INTEGRA roof windows
Power sourceBattery
FunctionControl of roof windows

Related product manuals