1
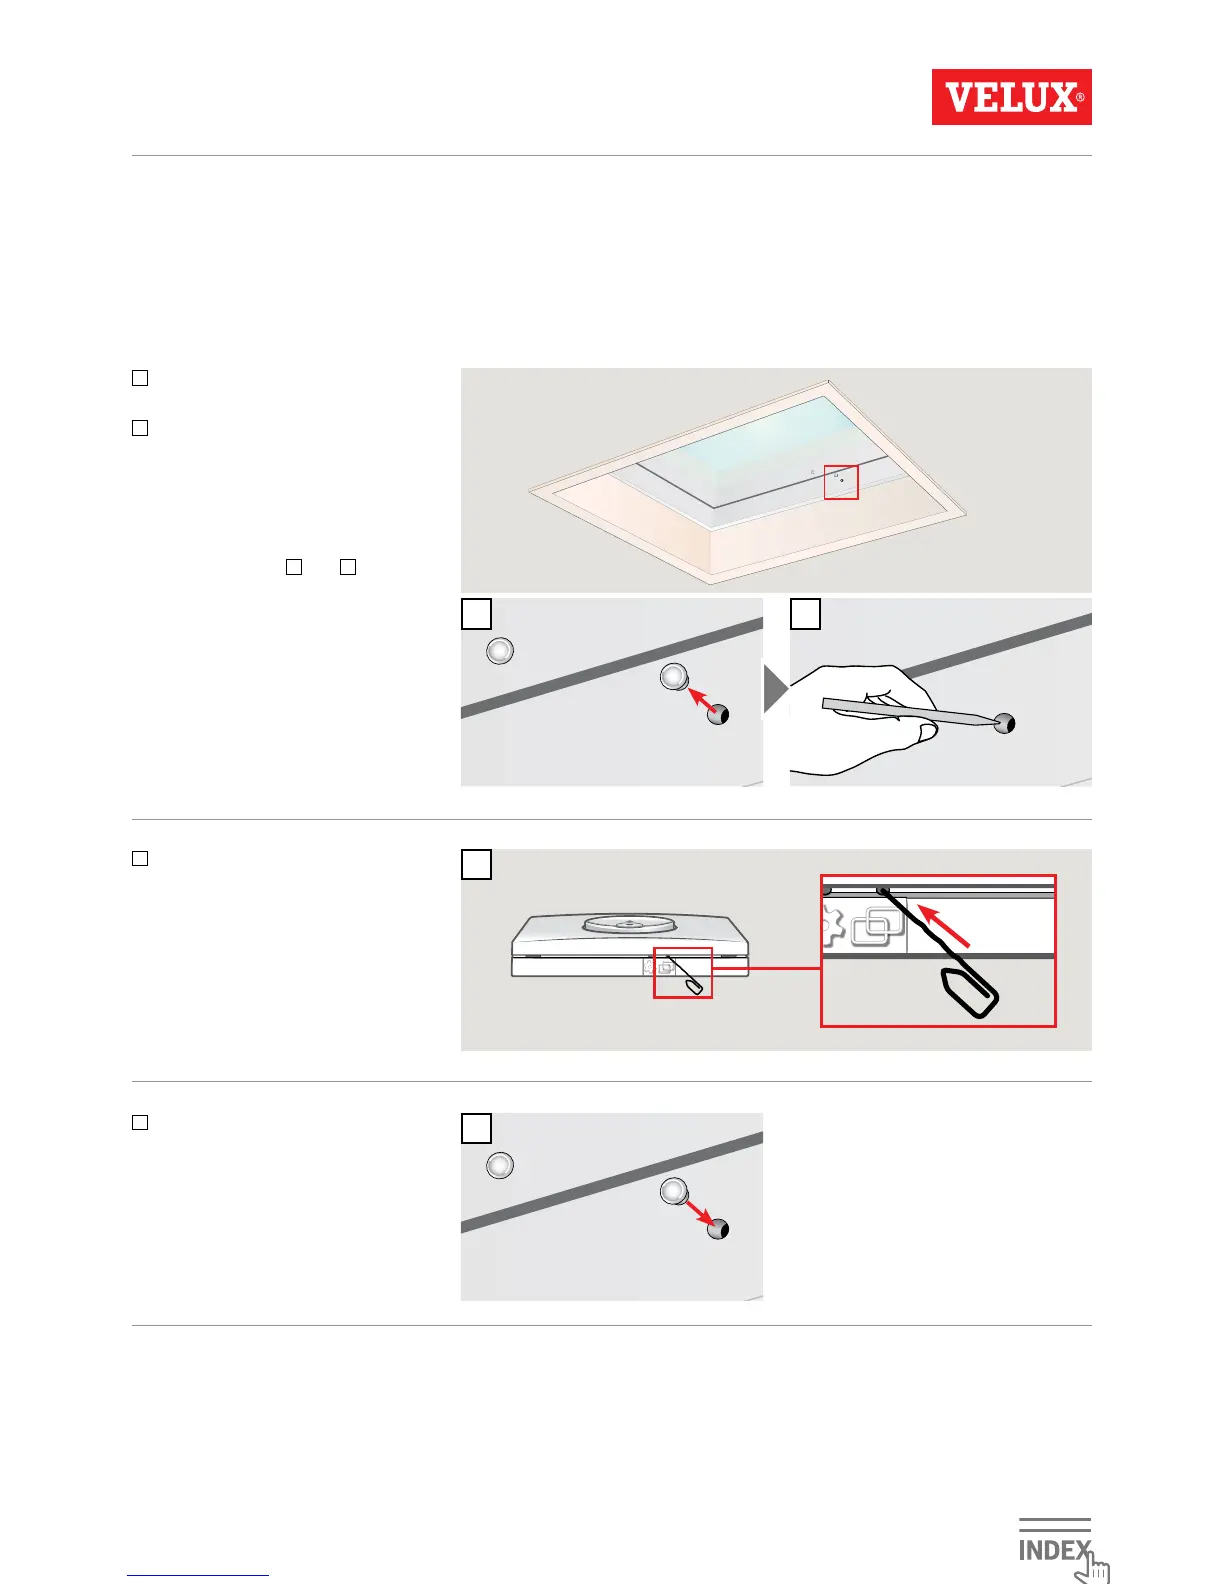
Carefully remove the cover cap on
the kerb.
2
Press the test button on the win-
dow operator behind the cover cap
for at least 10 seconds.
The window operator will run
briefly back and forth.
Note: Registration (
3
and
4
) must
now be completed within the next
10 minutes.
Setup of wall switch KLI 311 to operate
VELUX INTEGRA
®
flat roof window CVP
If a non-functional wall switch must be replaced or if the wall switch cannot find certain products, the products can be
prepared for registration by resetting them manually.
Note: Reset products cannot be operated until they have been registered in the wall switch again.
Important: This only applies to KLI 311.
3
Press PAIR button on the wall
switch for 1 second.
4
Refit cover cap.
The window can now be operated with the wall switch.