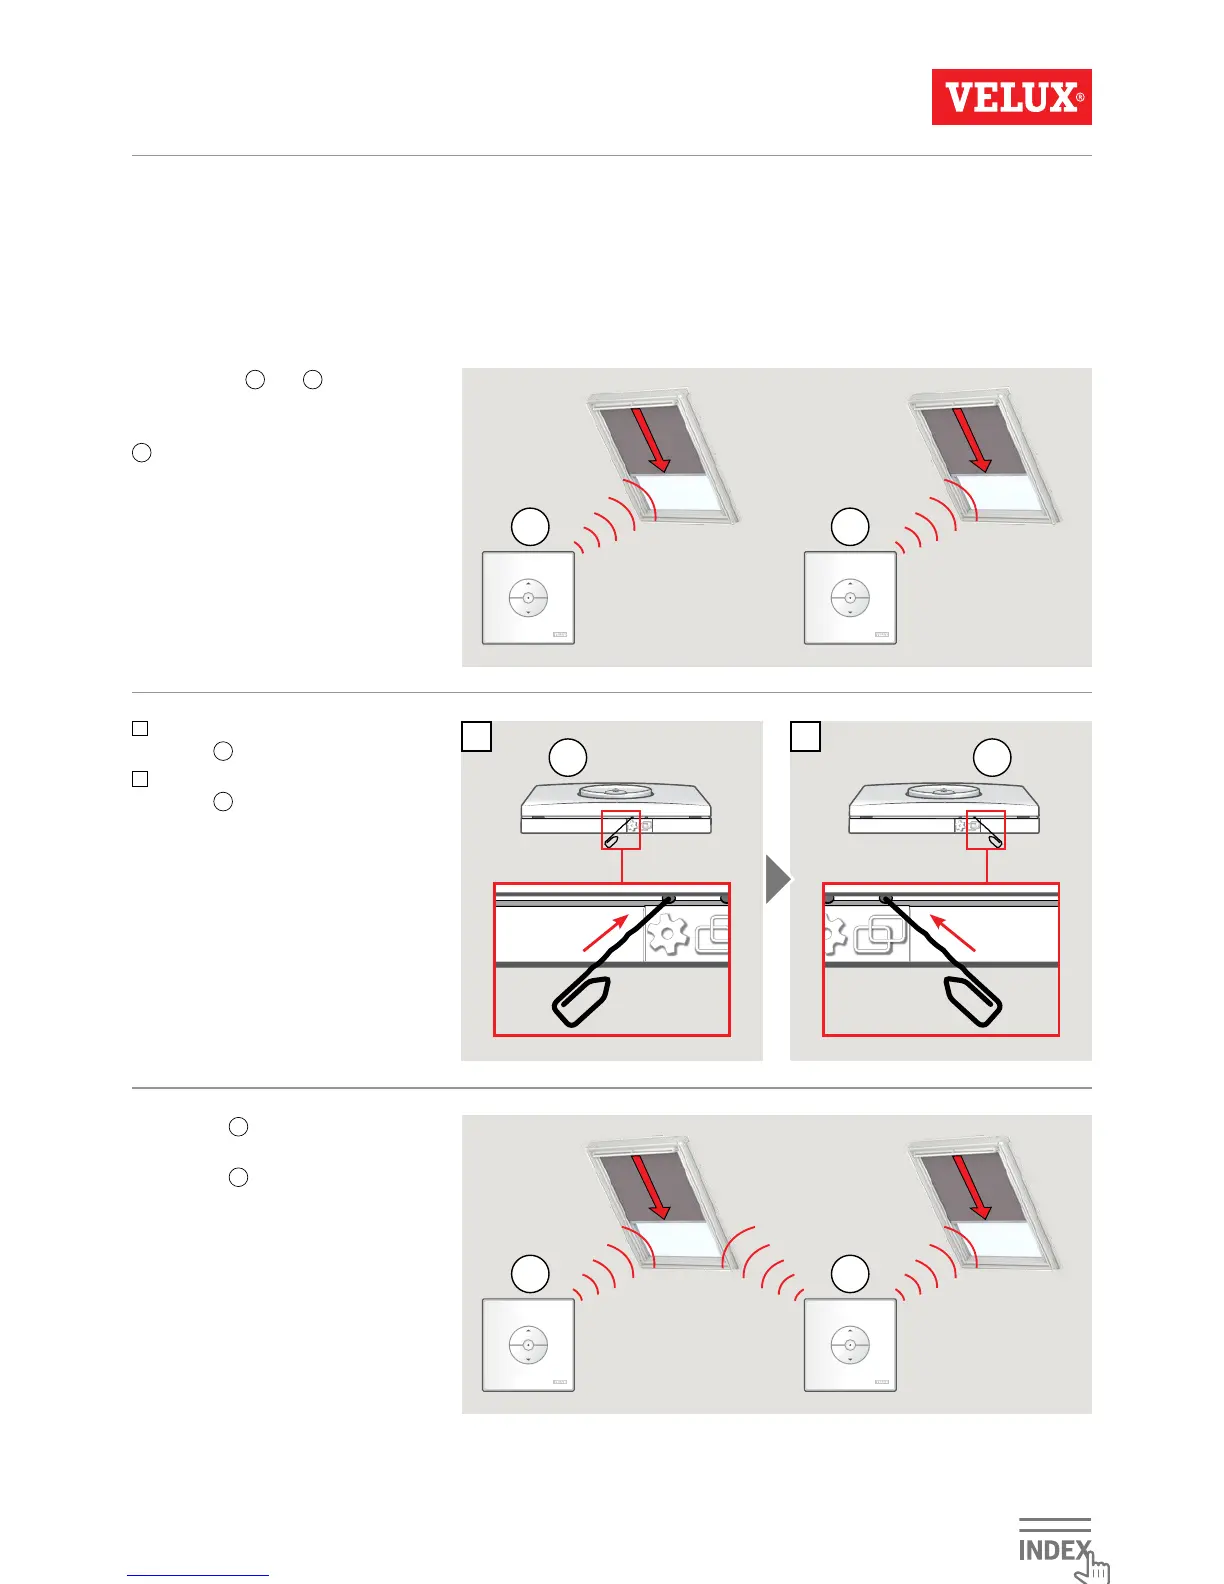
Home
Velux
Switch
INTEGRA KLI 310
Velux INTEGRA KLI 310 Directions For Use
5
of 1
of 1 rating
19 pages
Give review
Manual
Specs
To Next Page
To Next Page
To Previous Page
To Previous Page
Loading...
3
1
2
B
B
B
A
A
A
1 sec
1 sec
VELUX
®
16
ENGLISH
VAS 4543
6
0-2
019-
02
Setup o
f wall s
witch for gr
oup control of pr
oducts
Important:
All wall s
witches must be of the same type.
W
all switches
A
and
B
oper
ate sepa-
r
ate products.
T
he example sho
ws how wall s
witch
B
is set up to oper
ate both pr
oducts.
1
Pr
ess the GEAR button on w
all
switch
A
for 1 second.
2
Pr
ess the P
AIR button on w
all
switch
B
for 1 second.
W
all switch
B
can now oper
ate both
products.
W
all switch
A
can still oper
ate its
own pr
oduct.
15
17
Table of Contents
Table of Contents
2
Wall Switch Types
3
Wall Switch Functionality
4
Rain Sensor
5
Setup of Wall Switch KLI 311 to Operate VELUX INTEGRA ® Flat Roof Window CVP
7
Setup of Wall Switch KLI 312 to Operate VELUX INTEGRA ® Solar Blinds DSL/RSL/FSL/FSC
8
Setup of Wall Switch KLI 313 to Operate VELUX INTEGRA ® Solar Awning Blind MSL
9
Setup of Wall Switch KLI 313 to Operate VELUX INTEGRA ® Solar Roller Shutter SSL or SST
10
Setup of Wall Switch KLI 313 to Operate VELUX INTEGRA ® Solar Awning Blind MSG
11
Setup of a New Wall Switch KLI 311/312/313 in Addition to an Existing Wall Switch KLI 311/312/313
15
Setup of Wall Switch for Group Control of Products
16
Other manuals for Velux INTEGRA KLI 310
Instructions
15 pages
Quick Start Guide
9 pages
5
Based on 1 rating
Ask a question
Give review
Questions and Answers:
Need help?
Do you have a question about the Velux INTEGRA KLI 310 and is the answer not in the manual?
Ask a question
Velux INTEGRA KLI 310 Specifications
General
Radio frequency
868 MHz
Model
KLI 310
Compatibility
Velux INTEGRA roof windows
Power source
Battery
Function
Control of roof windows
Related product manuals
Velux INTEGRA KLI 311
2 pages
Velux INTEGRA KLI 312
15 pages
Velux Integra KLI 313
9 pages
Velux INTEGRA KLI311
55 pages
Velux KLI 311
2 pages