Function as interface
Registration with VELUX INTEGRA
®
control pad KLR 200
The illustrations below show how you choose products from the control
pad and how you assign them to inputs on the interface.
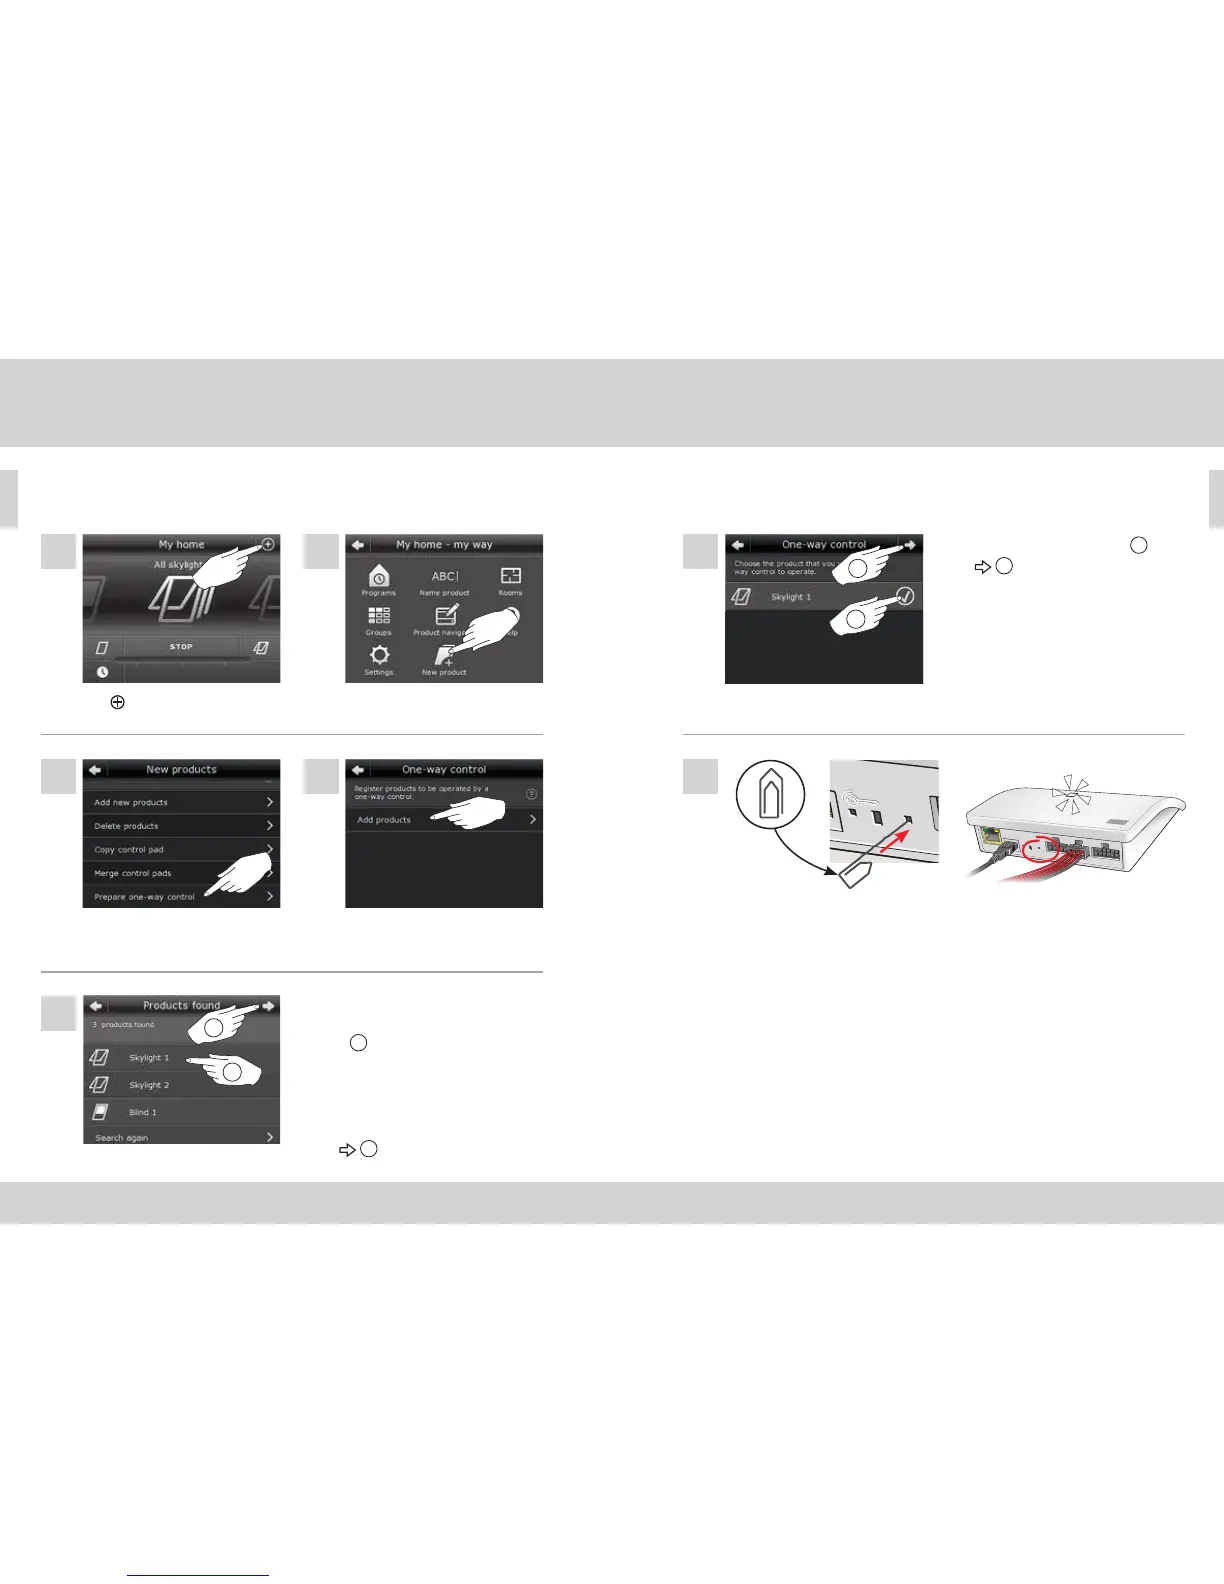
Tap "Prepare one-way
control".
Tap "New product".
Tap "Add products".
Tap
on KLR 200.
Scroll down the display and choose
the product(s) to be assigned to an
input
1
. The products must be of
the same type.
Note: By tapping the icon, you can
see whether you have chosen the
intended products.
Tap
2
.
Function as interface
Registration with VELUX INTEGRA
®
control pad KLR 200
Connect the supplied wire bundle to the input terminal. Press the
RESET button on the back of the interface briefly (1 second) with a
pointed object. The light-emitting diode flashes white rapidly.
Step 15 must now be carried out within 2 minutes.
Note: Take care that the red and black wire ends do not touch each
other at this point, as they may short-circuit. A short-circuit will
result in an unintended registration of products.
Tick the chosen product(s)
1
.
Tap
2
.
8 9
12
10 11
2
1
13
14
2
1

 Loading...